The saga continues…
My split top roubo bench needed a center insert…I was getting annoyed with things falling in between the two top pieces and not feeling like I could lay things across the gap, and it was sort of in the plans all along.

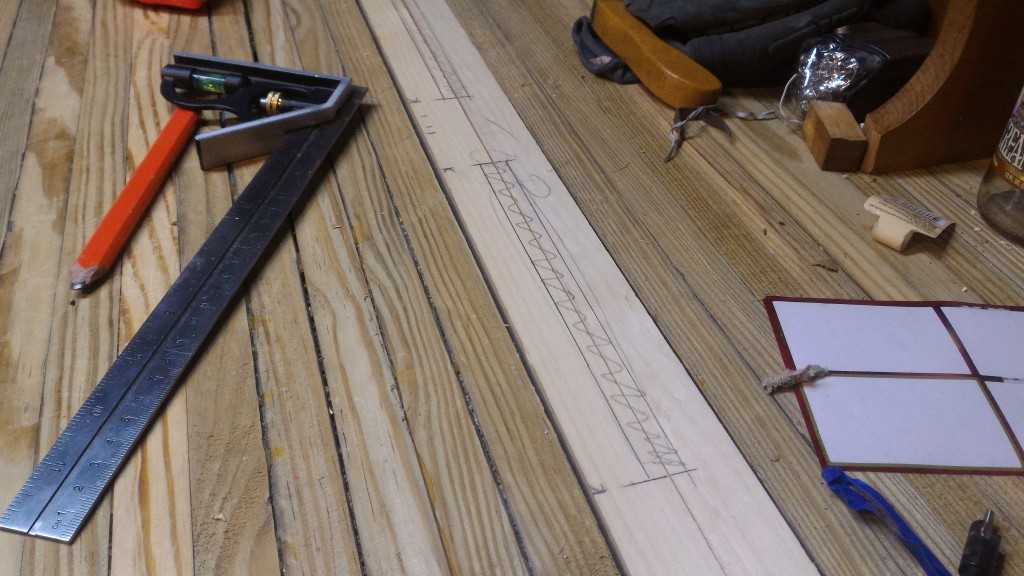
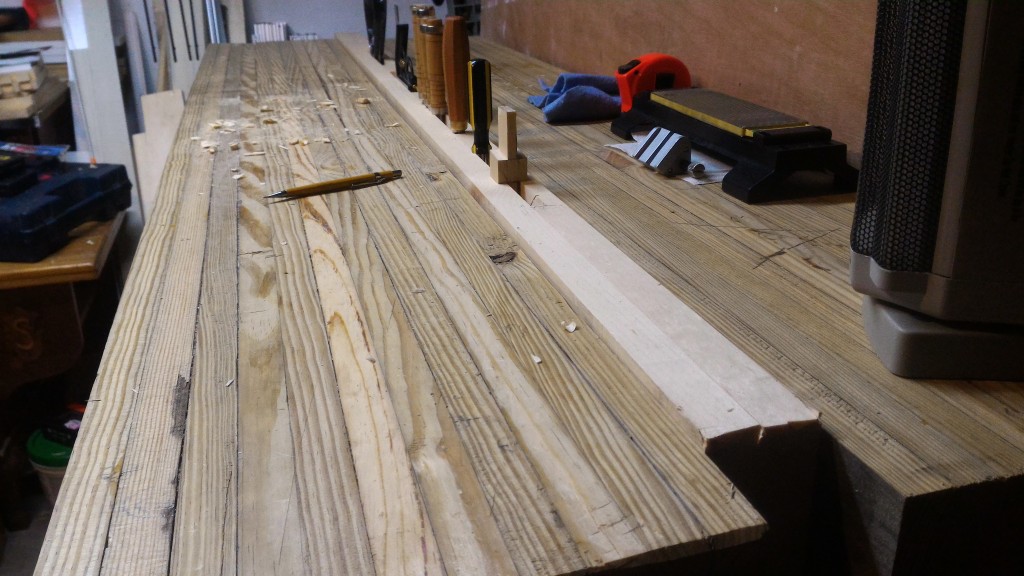
(By the way…see that piece of wood in the tool slot closest to us, next to the screwdriver? That’s a Paul Sellers dovetail template that I made in about 15 minutes and will show you how next week…stay tuned!)
Making the center insert for my bench turned out to be pretty straightforward though. It ended up that the 2” total width of two 4/4 boards stacked together (4 quarters of an inch thick each, so about 1” actual…not like a nominal 1×6, which is actually ¾” thick) was just right to slip into the center slot in the workbench top.
For the design, I wanted several tool slots to hold a few of my most used tools during projects, like chisels, saws, squares, etc. I wasn’t too keen on the idea of cutting slots out of the middle of one wide board though, so I decided to use two boards and cut wide, matching dados out of both inside faces and then glue them together to make the tool slots.
The wood I used was just basic pine appearance board from home depot, but 4/4 stock instead of 1-by material because I knew I needed the full inch thickness for both boards to fit well in that slot. These were just down the aisle from the common pine.
Cutting Things Down to Size
First step of the process was to cut down the two 8’ pieces to the length of my workbench (a little less than 72”). The benchcrafted insert looks like it is several inches shorter than the workbench top, and I didn’t really like the look of that so I went with full length.
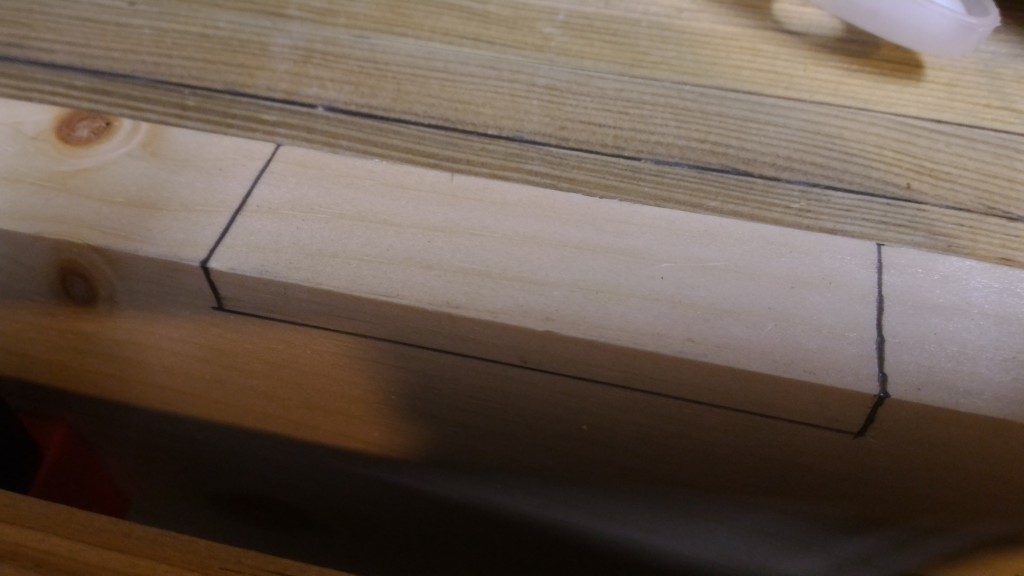
Once the pieces were cut to length, I was able to line them up, resting in the slot side by side, and mark the bottom dados that were needed to rest down over the leg stretchers.
My bench is about 5” to 5-¼” thick (it still needs to be flattened, mind you) and the width of these boards is 5 ½” so when resting on the leg stretchers in the slot, it sticks up above my bench surface about ¼”…perfect for a planing stop.
I measured how much board was sticking out of the bench at the tallest point and it was about ⅜” or so, so that’s how deep I marked the dados.
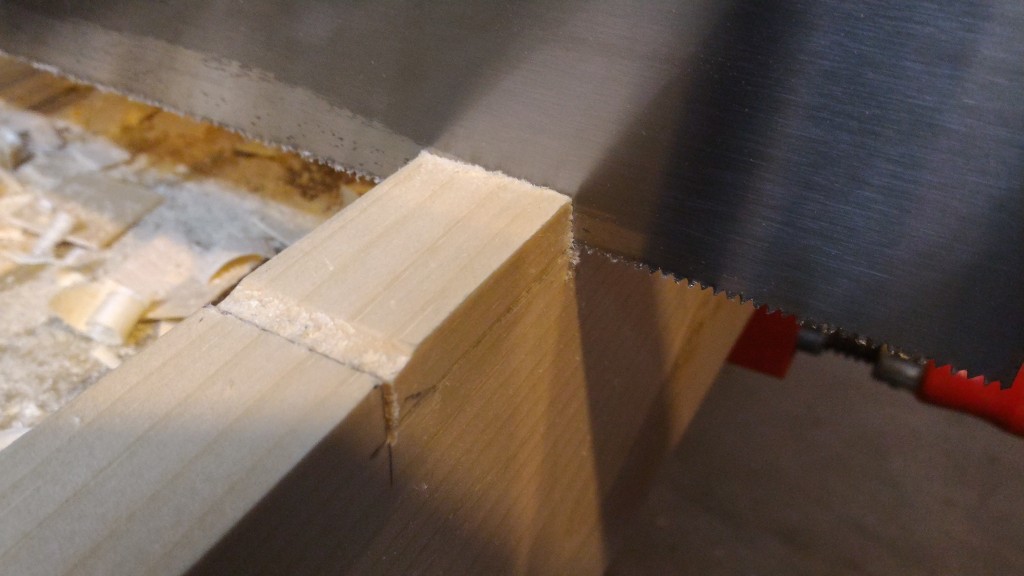
To get a nice clean saw line, I used a trick that I learned from Paul Sellers (though it’s pretty common hand tool practice from all the other woodworking teachers I see out there): Instead of pencil to mark your cuts, use a marking knife, which scores the wood fibers and prevents tear out, then chamfer a little bit from the waste side (the material you will be removing), right up to your knife line.
This gives the saw a nice little slot to sit in while you get your cut started, and a flat knife line to snug the saw against to ensure an accurate cut, most every time.
I don’t yet have a marking knife, and my utility knife doesn’t cut it most of the time (I know, I know, I am a cheesy punner…but I am a dad, so I get to use that excuse), so I just line a chisel up with the waste side of the pencil line, bevel towards the waste and hammer it one or two taps straight down into the wood. The flat side of the chisel goes straight down into the wood nice and square.
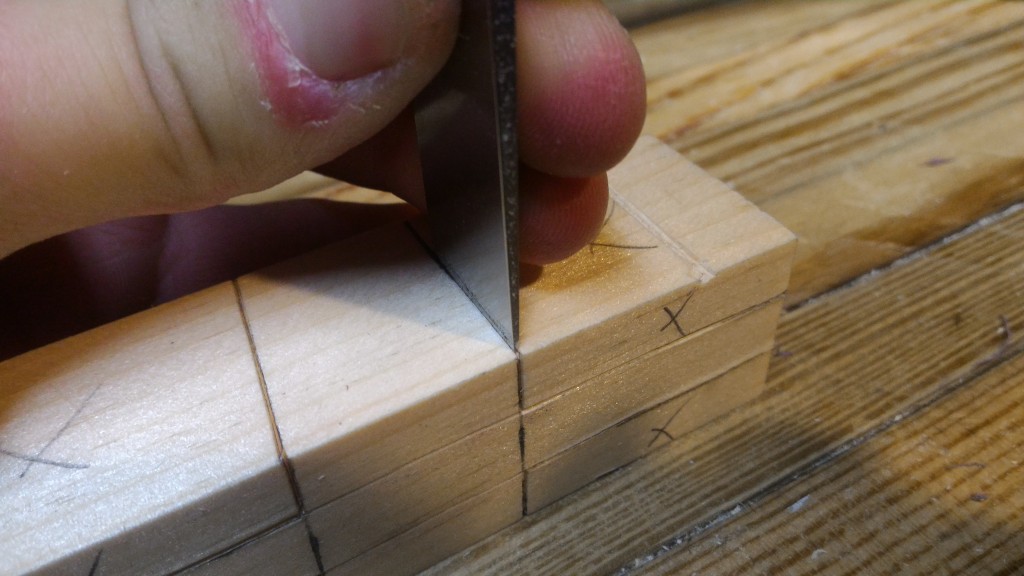
This cuts a nice ⅛” deep cut into the wood fibers, leaving a clean, square “knife line” to chamfer up to with my chisel.
I am going to be recording/filming a more detailed version of this method in the next couple weeks…keep an eye out for that too.
This short video is just to show the basic concept as I was making the cut for the tool slot dados…more on these later.
Oops…too much chiseling
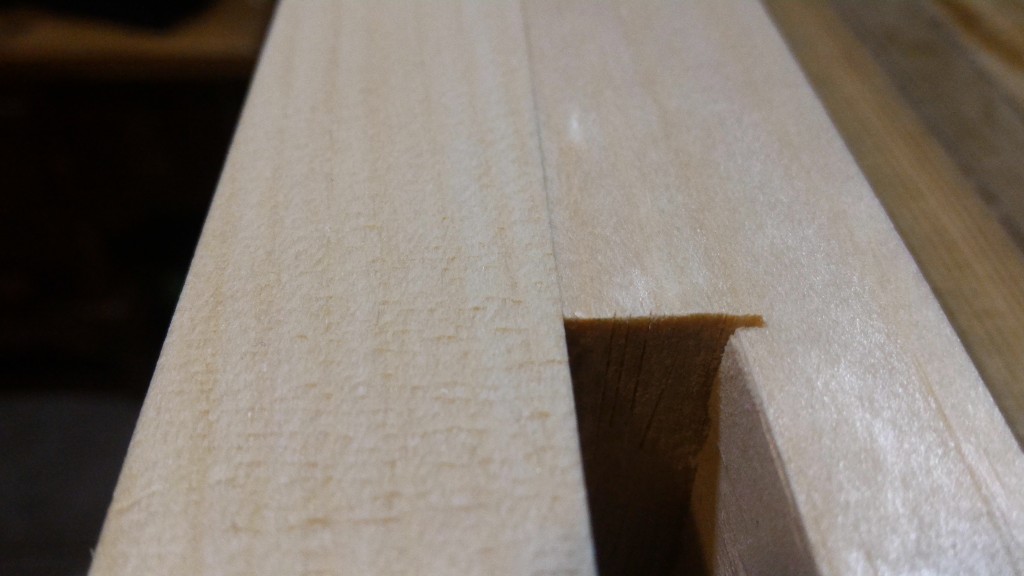
While chiseling away a chamfer from the waste side up to the knife line along the face, I ended up taking a bit too much waste out with the chisel (I was experimenting with paring with the grain, parallel to the knife line) as you can see in this photo.
No big deal, and I wouldn’t even have a saw cut starting there anyway, I was just playing with how the wood behaved.
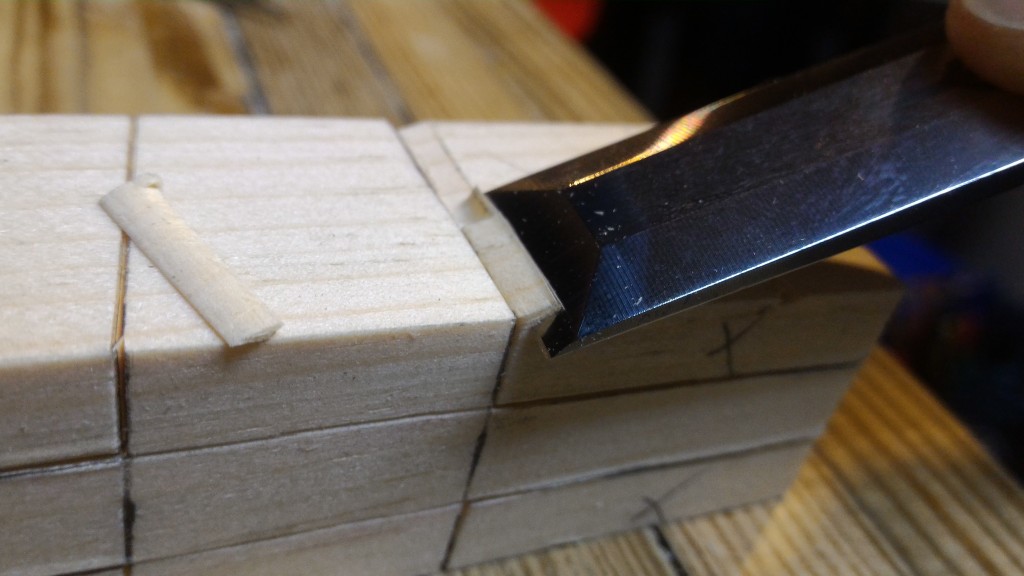
Next up, cut the cheeks of the dado down to my knife line on the face and add a few saw cuts to make the paring easier.
Now all that’s left is to pare, pare away…
take care now… don’t pare too deep!
ah, now flatten and smooth it to the final depth.
Repeat 3 more times for the other dados on the bottom of the insert boards.
Cutting the Tool Slot Dados
Once the leg stretcher dados were cut, I laid out where I wanted the ½” wide tool slots. Half inch was the result of measuring the base of my chisels, saw(s), squares, etc and determining that most things wouldn’t fall through at that width.)
At first, I had them evenly split between both pieces to create a tool slot in the center, but after thinking on it more, I moved the tool slot back so that the entire half inch slot would only be cutout from the back piece…essentially cutting the amount of work in half since I now only had to chisel out half as many dados in the center pieces.
Here I am marking the new half inch set back…notice the existing quarter inch line after previously laying this out.
After marking the lines on the top, I wrapped them around the sides I would be cutting (down the inside face and in a half inch on the bottom as well.
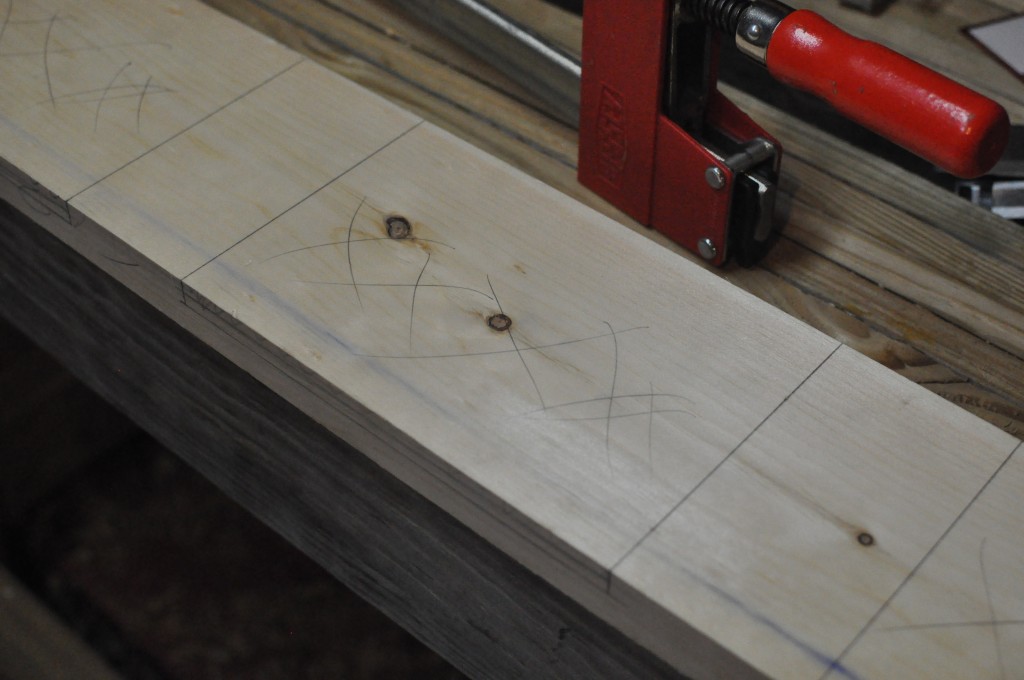
Now, to get the waste out of where I have marked, I tried a couple methods. The general idea is that you cut saw kerfs (the slot a saw leaves as it cuts) as deep as you need to remove (½” in this case) and then chisel out what’s left in between. I was experimenting with different ways to cut saw kerfs before chiseling.
The first attempt I just cut a big X across the waste.
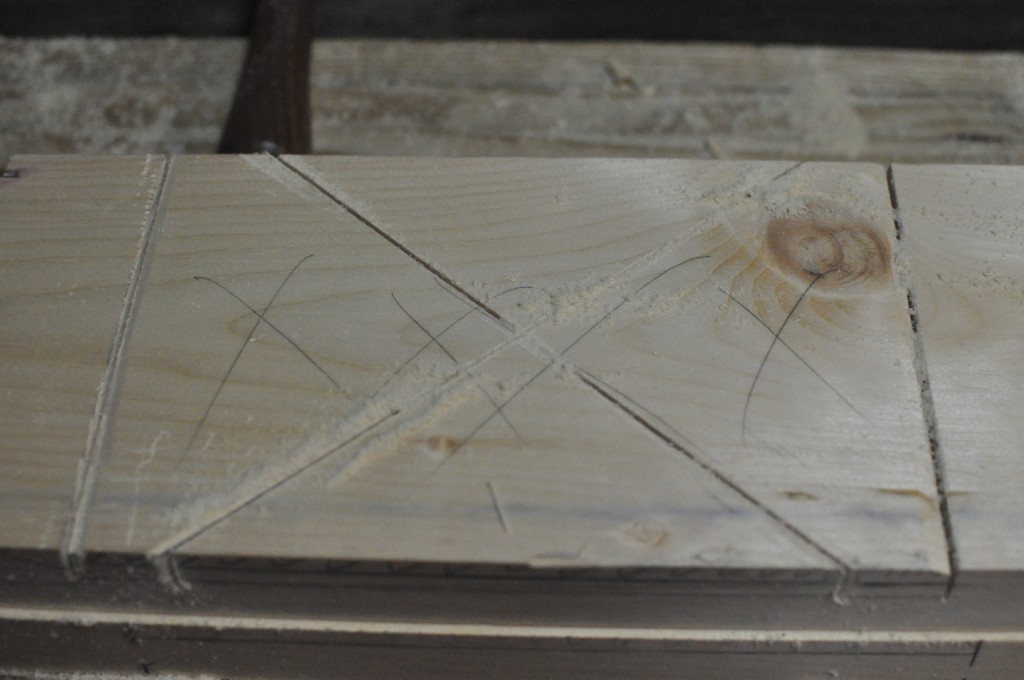
This worked, but was a lot of work. Getting all the waste out with the chisel took a long time and made my palms sore from the pressure on the chisel. Perhaps that’s a sign my chisel needs sharpening…or there is a better way.
Naturally, I moved on to try another technique…cutting straight kerfs about every inch or two before chiseling out the remaining waste.
This resulted in about the same amount of work with the chisel. Next!
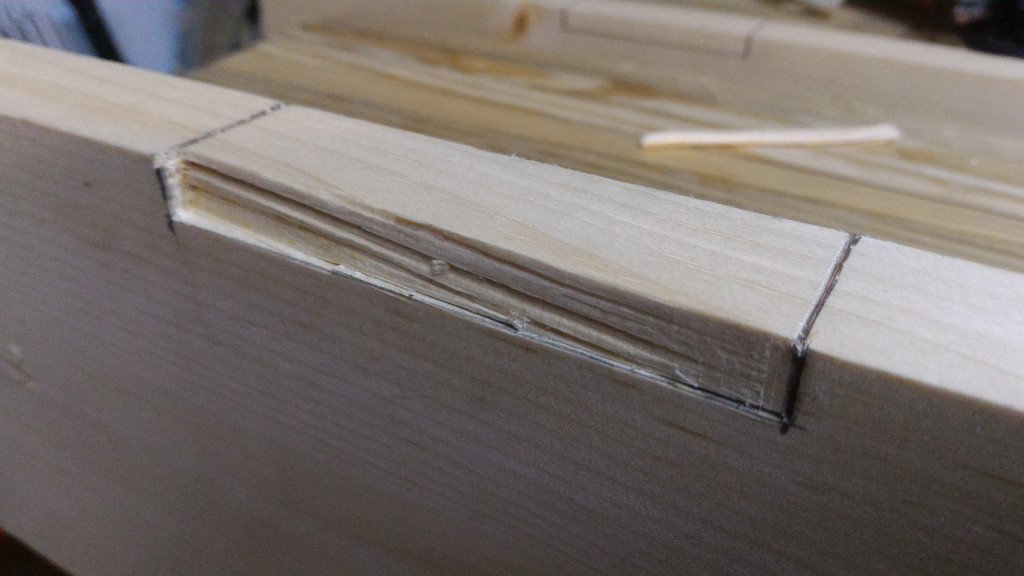
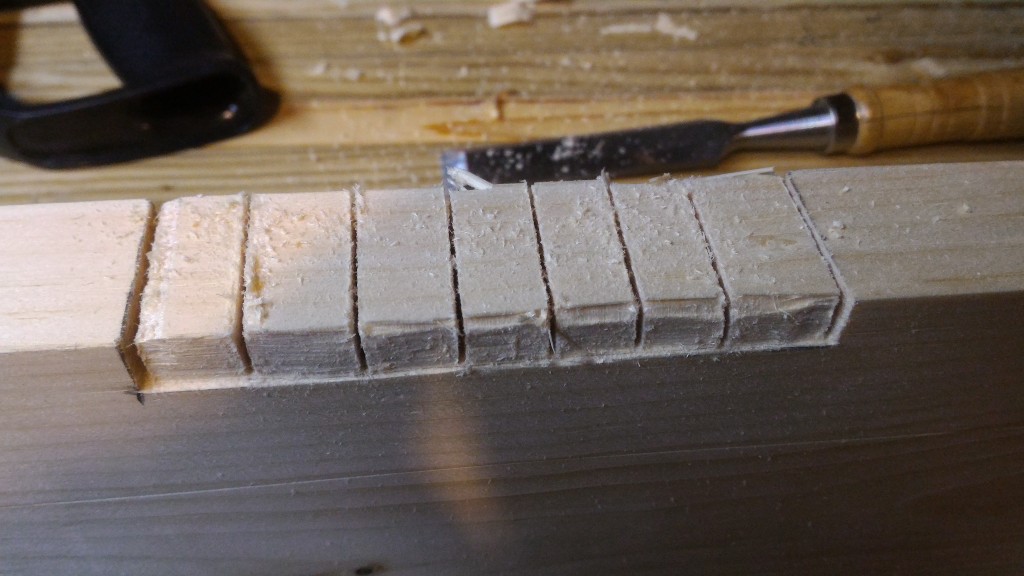
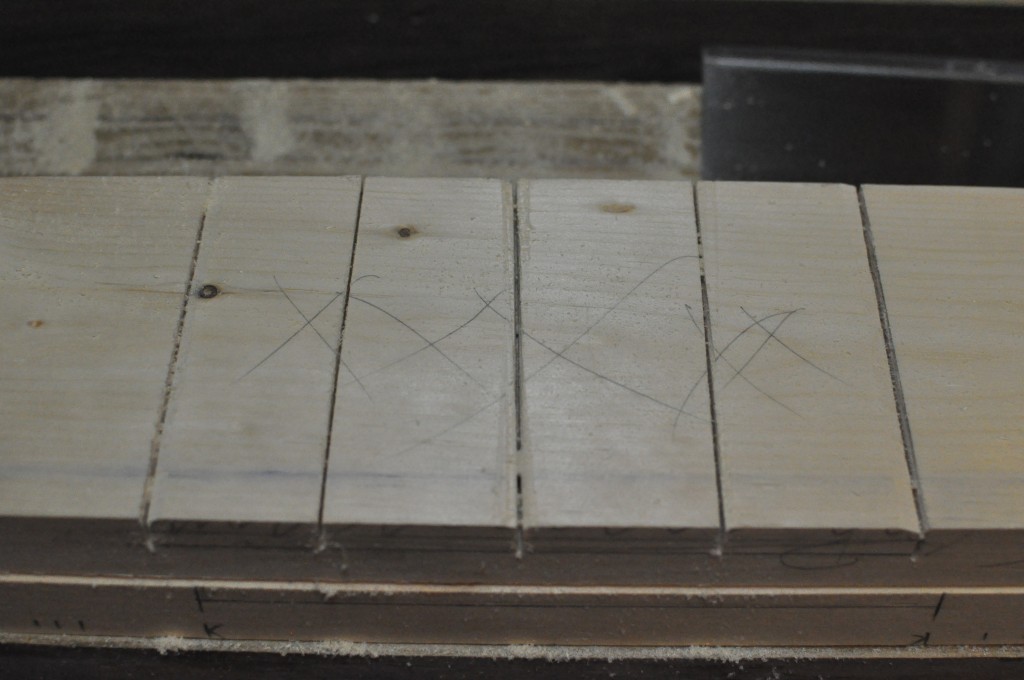
The final technique (final for good reason) is the more commonly taught method, and the method recommended in my Joints book. Cut a LOT more kerfs, about every ¼” apart before chiseling away the waste.
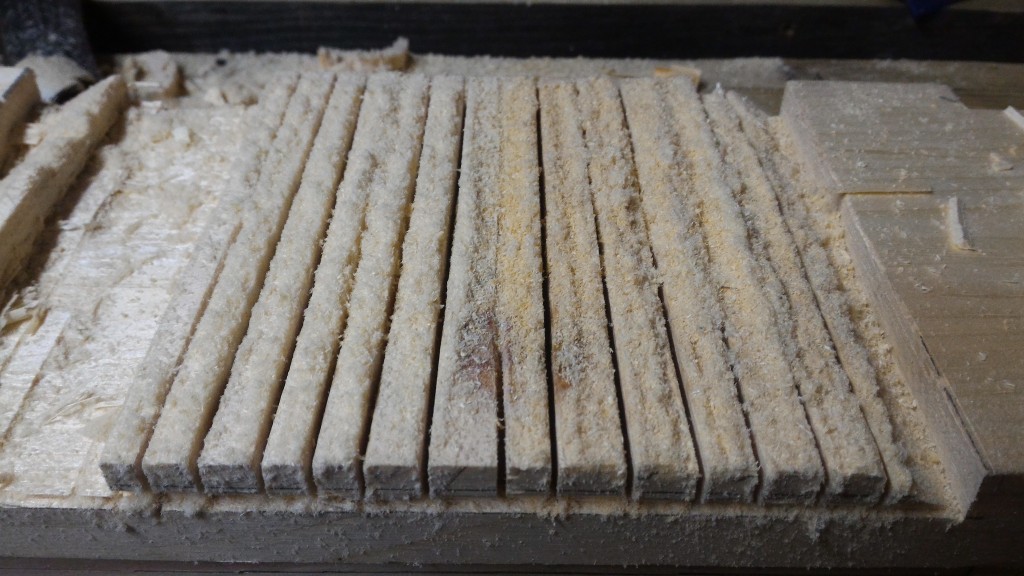
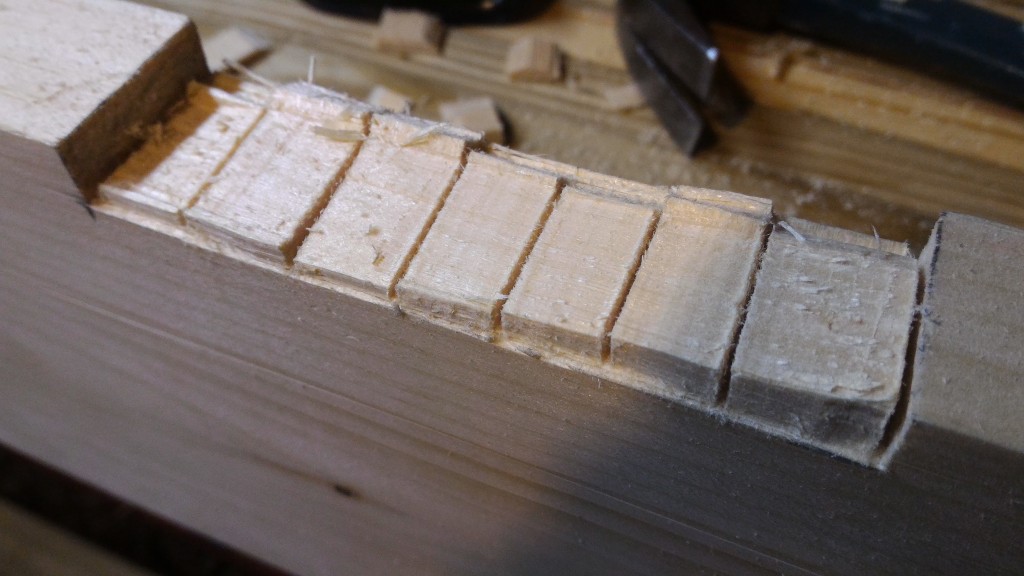
The advantage here is that you can chisel perpendicular to the grain and the wood just chips right off. With the other methods, too much wood would have needed to be split apart in one stroke for this to work with the larger patches of waste wood.
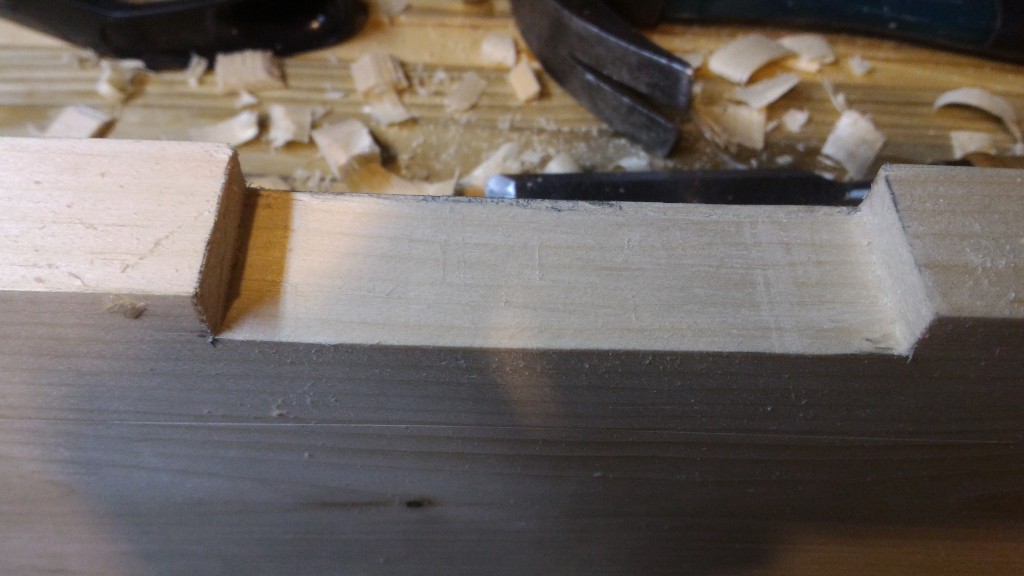
Once you chisel out most of the waste, you clean the bottom of the dado up with the chisel and possibly a rabbet plane (a hand plane that can plane right up flush to the edge). I just have a regular plane, so could only do so much with it before working on it with the chisel.
One lesson I learned was that for dados this wide, I really needed to be using a much larger chisel to clean up the bottom. My nicest (and sharpest) chisel is only ¾” and that’s the one I use to clean things up. I could have perhaps spent some more time sharpening my 1-¼” chisel to be suitable for working with pine, but didn’t really notice the issue until after I had completed the work.
Something I am coming to realize and learning is that the larger your chisel, the less prone it is to taking things out of square.
Imagine you are trying to flatten a 1” wide dado. If you are trying to do this with a ¼” chisel…you would have to take several passes and some may be deeper than others. It’s not likely it would be very flat. Now, if you had a ¾” or even a 1” chisel, it would take one or two passes to make it flat, and much less prone to errors.
For the nerds out there this is pretty much a real life application of the Heisenberg Uncertainty Principle from quantum mechanics. I honestly never thought that little nugget of information would ever have some correlation to real life. Thanks engineering degree.
The Glue Up
Now that the dados have been cut, I was ready to glue both boards together to mostly complete this insert.
Since I was pretty selective with the boards I picked out at the home store, these were pretty straight and true and didn’t need any preparation before the glue up. If they are bowed or cupped or anything, I would have needed to joint and plane them to get them square and parallel on all four sides.
I (again) forgot to snap a photo at this stage, but used a convenient glue roller I got from Rockler to evenly spread the glue on the inside face of the board with the dados. This helped me make sure that I didn’t have glue junk inside my tool slots and only on the mating surfaces of the wood.
I clamped it in between every dado to ensure a nice even fit and left it overnight.
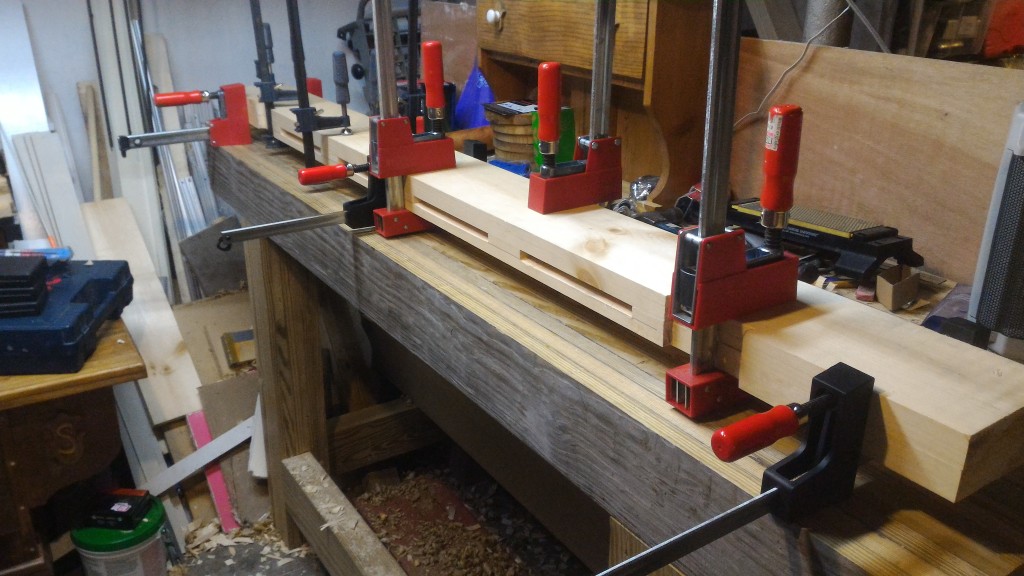
The glue roller did a nice job of helping me avoid the massive piles of extra glue that you probably saw oozing out of my workbench top when I glued that up. There was very, very little glue that seeped out of the sides of this glue up. I was able to wipe off the little that did come out with a paper towel.
This meant glue cleanup was much easier than with the workbench top.
Cleanup and Final Touches
Pulling the insert out of the clamps the next day, I then clamped it to the front of the workbench and planed both sides flat to ensure that both boards were even with each other on top and bottom. I was not very concerned with how square it is given its application, but wanted it close anyway.
As I was planing the bottom, I decided I wanted the dados for the leg stretchers to be eased in a bit to make it easier to slide the insert on and off the leg stretchers when I wanted to raise it up for a planing stop. I chamfered the edges of the bottom of the insert about ¼” all the way around, and then did the same to the bottoms of the tool slots. I didn’t want any tools getting hung up on the bottom as I tried to pull them out of the slot.
Fitting the entire insert back into the workbench, I noticed that it was a bit proud of the rest of the workbench when it was resting down on the leg stretchers. I pulled it back out and shaved some more depth out of the two dados for the leg stretchers.
Plopped it back in the workbench and now it sits just below the rest of the workbench top. Perfect.
I can pull it up, slide it a few inches to the side to prevent it from sitting down in the notches, and voila, a ¼”-½” high planing stop. I can even leave my tools in there the whole time.
Lessons Learned
Pay attention to grain direction!
I noticed this particularly on this project, probably because it is such smooth pine and pine is notorious for having bad tear out if your plane blades aren’t extremely sharp: I didn’t plan far enough ahead to think about my planing direction when finishing the insert.
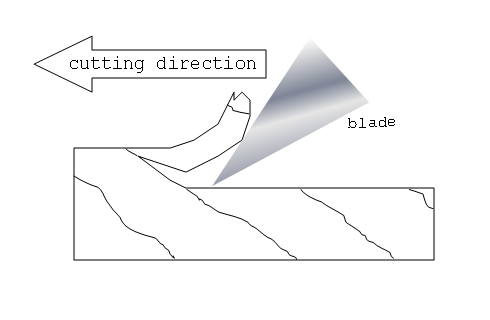
When you are planing wood (with either a machine or a hand plane) you always want to plane such that the blade never has the opportunity to ‘dig down’ under wood grain and pry it up. Planing with the grain lets the blade shave off the tops of all the bits of wood grain smoothly.

Planing against the grain…bad 🙁
This is akin to rubbing a shark the wrong way. If you rub the wrong direction, your hands catch on the scales, if you rub the right direction…smooth sailing. No guarantees about being eaten though.
Yes…woodworking and sharks go together.
If you plan ahead, you can orient your boards such that all are meant to be planed in the same direction, or at least better plan your planing directions.
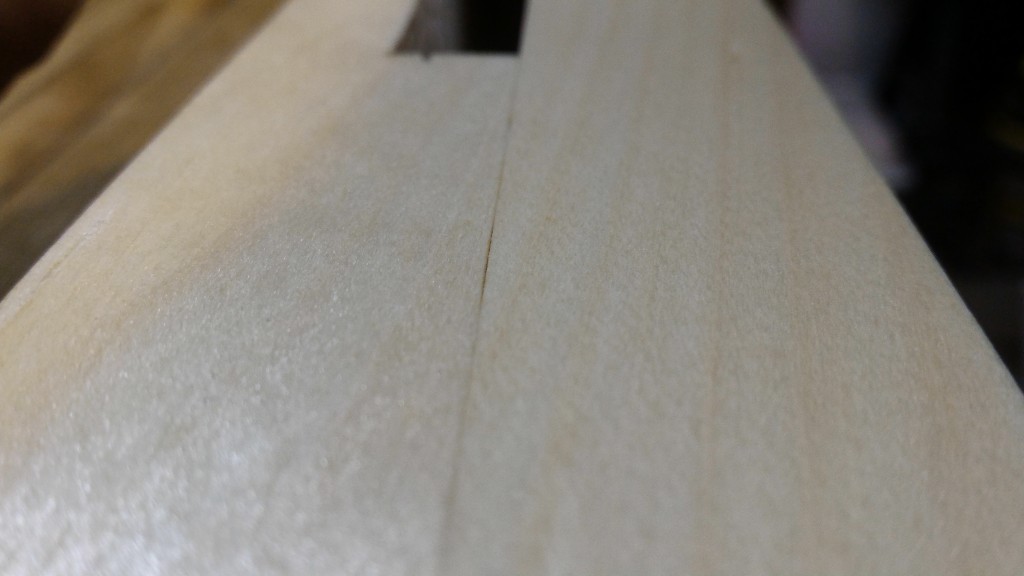
I didn’t do that, and you can see the results in this photo. Notice how the board on the right is very smooth and the board on the left looks more rough. This is just after a couple quick passes with the hand plane.
However, some parts of these boards did have the grain running in the same direction, and you can see in this photo was that results in. Much cleaner on both sides.
Another lesson I learned was the advantage of using a depth stop on your saw.
Remember those saw kerfs that I cut with the saw to help me waste out all that wood in the dados? Not all of them were the right depth.
Some were too shallow and meant I had to chisel more than necessary. Ugh. I hate wasted effort.
Others went too deep.
In the very same picture above with the tear out, you can see the the saw kerf pointing off to the right went too far and now I have to look at this ugly extra notch in my tool slot…not the worst, but certainly not suitable if I am to ever make anything of presentable quality to either give away or use in my own home.
Had I used a saw with a depth stop or even two boards clamped to the side of my saw at the right height, I would have had instant feedback that my cut was to the right depth and stopped. Much more consistent cuts. I will keep this in mind next time I need to cut several cuts to the same depth.
Lesson learned.
One more add-on to my bench checked off the list. Next up, a leg vise of some kind. Ooooor, possibly bench dogs. I don’t know…maybe I’ll just keep using clamps for now and start practicing my joinery skills.
Thanks for reading. See you next week. 🙂
Congrats my friend!! Great job.
Thanks AK!
I am enjoying reading this blog, Brad. Thanks for letting me know about it. Looking forward to future posts.
Wow…very impressive! I am still working on my basement. Come and help me 😉
I know I’m a little late to the game and hope you see this. Thank you for posting this. These are terrific detailed, methods and instructions for building a Roubo center insert. In fact, it’s about the only instructions I’ve been able to find on the vast internet. Hard to believe. Maybe my search terms are incorrect. Anyway, nice job!