Every woodworker needs a bench, whether its a 8 ft long french workbench with full through dovetailed joinery and a deep brown colored wenge end vice, an old dinner table, or even a stack of pallets, a bench is what lets you to do what you do…nothing more to it. I have read many articles detailing what type of bench feature you need to do X, Y and Z, and in the end, it comes down to just needing a sturdy flat work surface and the rest will follow suit.
For me, the stack of pallets wasn’t quite cutting it anymore (for some unknown reason). Especially since it tended to wobble around when I would do just. about. anything. I needed something better, and after learning that it is somewhat of a right of passage for woodworkers to make their own bench, I thought that would make a good first ‘official’ woodworking project.
As I am just getting started in woodworking, a bench seemed to make the most sense for me to start with, allowing me to focus on future projects, rather than being frustrated with my lack of work surfaces.
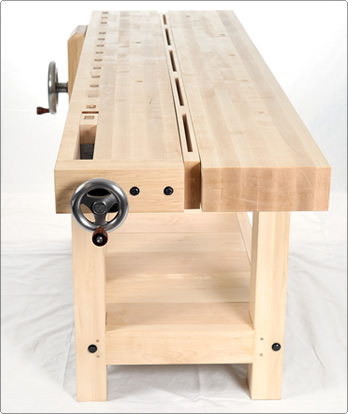
My immediate bench inspiration came after discovering the writings of Christopher Schwartz, the current editor of Popular woodworking magazine and author of several books, most importantly in my case, The Art of Workbenches. In his book he describes a couple different types of benches, one of which is a French designed workbench known as the Roubo (after its original french woodworker who popularized this style of bench).
It’s a stout workbench with a thick top and it is designed to enable more hand tool work over power tool work (though its perfectly well suited to that as well). This was something that attracted me to it. It has that old world charm and makes you feel like you are honoring history in some way.
The second place of inspiration came from one of my father’s workbenches we had in a few of the rentals we lived in growing up. It had thick legs, a thick top, and was bolted together to allow him to tear it down and move it with us wherever we went. It had big mortise and tenon joints to lock everything together and they way they locked together was always so satisfying to me. I always said to myself ‘I want a workbench like that when I grow up.’ Now’s my chance to make it how I want it!
I like my house a lot, but it is not where I expect to be in ten years, especially if my little family gets any bigger, so I wanted a workbench that I could easily move away when the time is right. I fully expect this workbench to still be quite functional in ten years. I knew I needed it to have what is called ‘knockdown joinery’ which is a fancy way of saying IKEA-ized, such that it can come apart into manageable pieces for when you move.
I saw a few examples of Roubos with knockdown joinery online and that combined with the focus on hand tools and just plain weight of the thing, I decided that was what I wanted to go with.
For those of you that know me personally, I tend to obsess over things for about a two week ‘phase’ (my wife coined the term, btw), learning everything I can but then dropping it a couple weeks in. Luckily, I couldn’t really do anything with my woodworking ‘phase’ until I built a bench, and that wasn’t going to take two weeks.
All in all (I’m still not quite finished, nor will I ever be I expect) it took me about a year and a half to get it where it is today. I think the prolonged build let me take things at a bit slower pace and not burn myself out with the hobby as I do with others. I also hold down a full time job and have a two year old…my time commitment to woodworking is meager, at best.
In my newfound fascination with Roubo benches (mostly for their weight and sturdiness) I found several examples of split top Roubos, which have a 2” gap down the center with an insert that can be used to store tools or flipped over and act as a planing stop for planing across the face of workpieces.
My modern day inspiration an design ideas mostly came from a combination of Schwartz’s book and Benchcrafted (http://benchcrafted.com/str.html – Split Top Roubo Plans and Hardware)
My mind was made up, I was making a Roubo.
Now, where the heck would I find 200 board feet of nice wood?
Enter Craigslist.
Now I know what you’re thinking, you can’t find good wood on craigslist, it’s mostly pallets and scrap wood. Turns out I got lucky and found someone with a pile of wood from a deck they had just torn out.
All of the wood was 1×6 pressure treated pine…covered with screws and nails (seriously…covered, whoever built this deck went crazy). I managed to fit most of the < 8ft pieces into the back of my little Ford Escape, and a snagged a few longer pieces that I threw up on the roof rack and away I went. I think I even came back the next day to grab more of it.
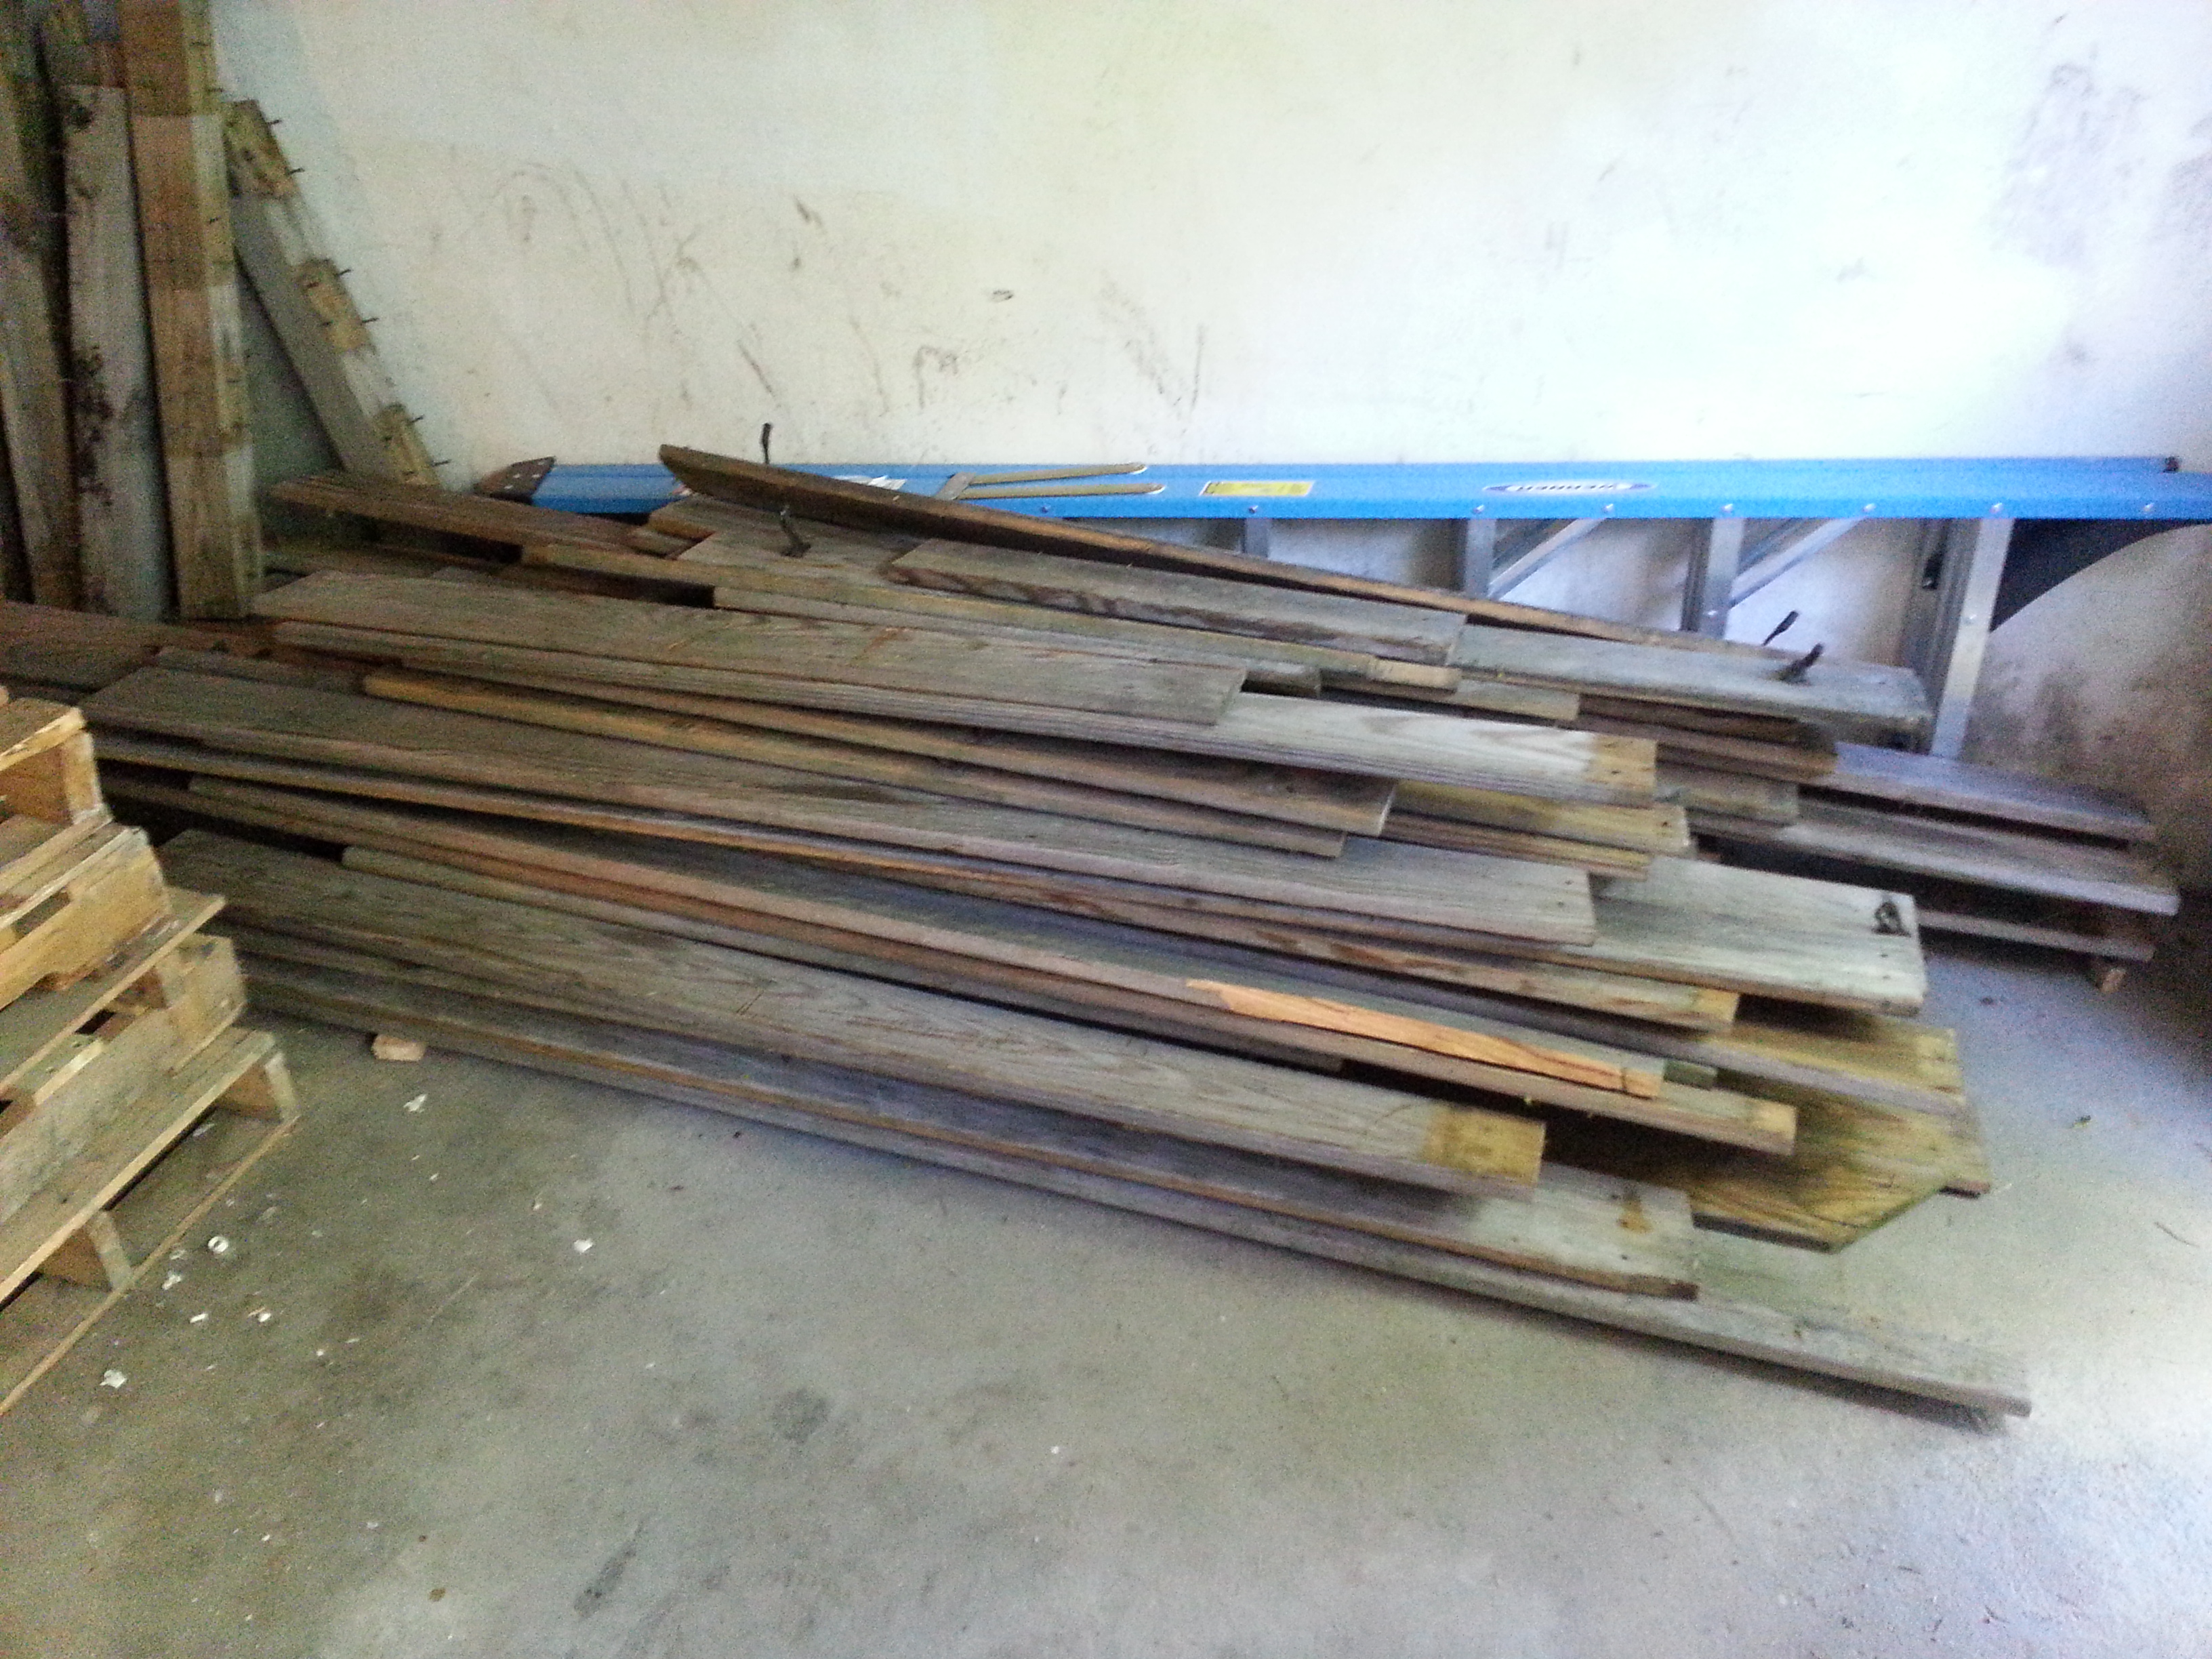
And then, it sat, piled up in my garage. and sat. and sat. Then sat some more. Finally I managed to connect with a local woodworker through my day job who had a 6” jointer that was collecting dust in his shop. He offered to let me borrow it for a while to help clean up that wood.
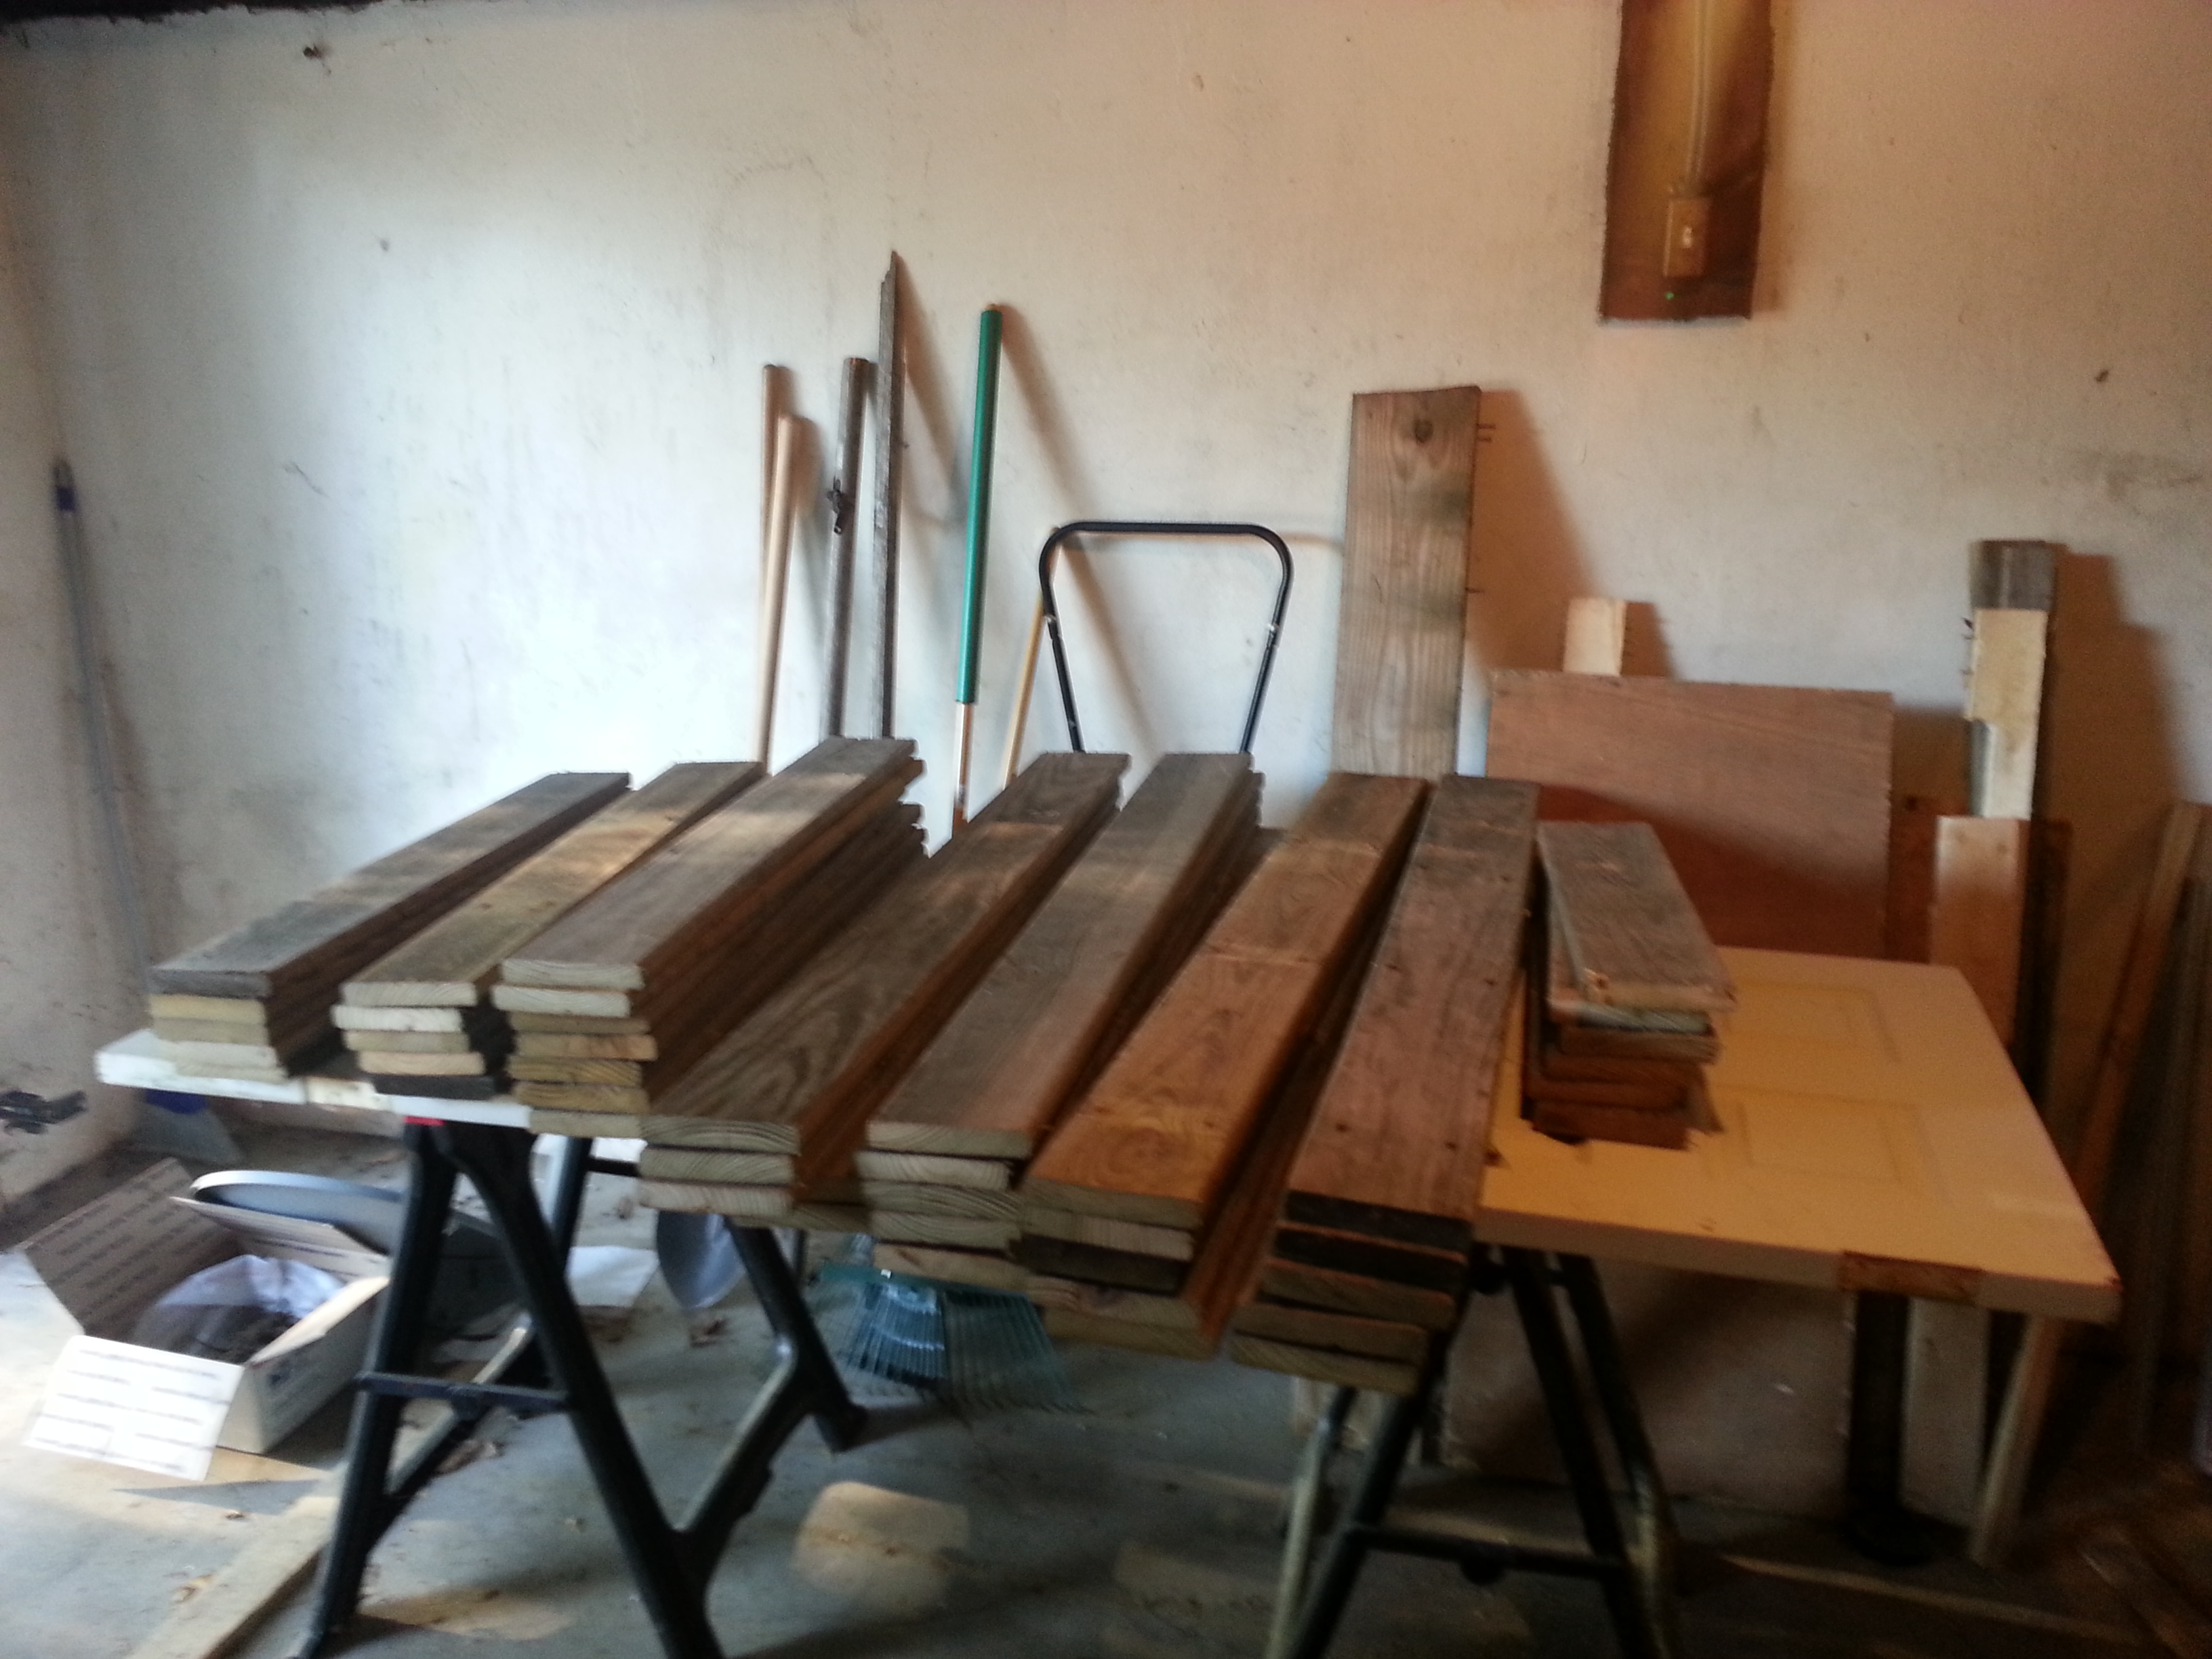
The wood pile
starting from a pile of old, weathered, screw-ridden wood, I began to painstakingly remove each screw, nail and staple I could find. Don’t’ want that going over somebody else’s jointer blades…I wasn’t really up for the task of replacing jointer blades just yet.
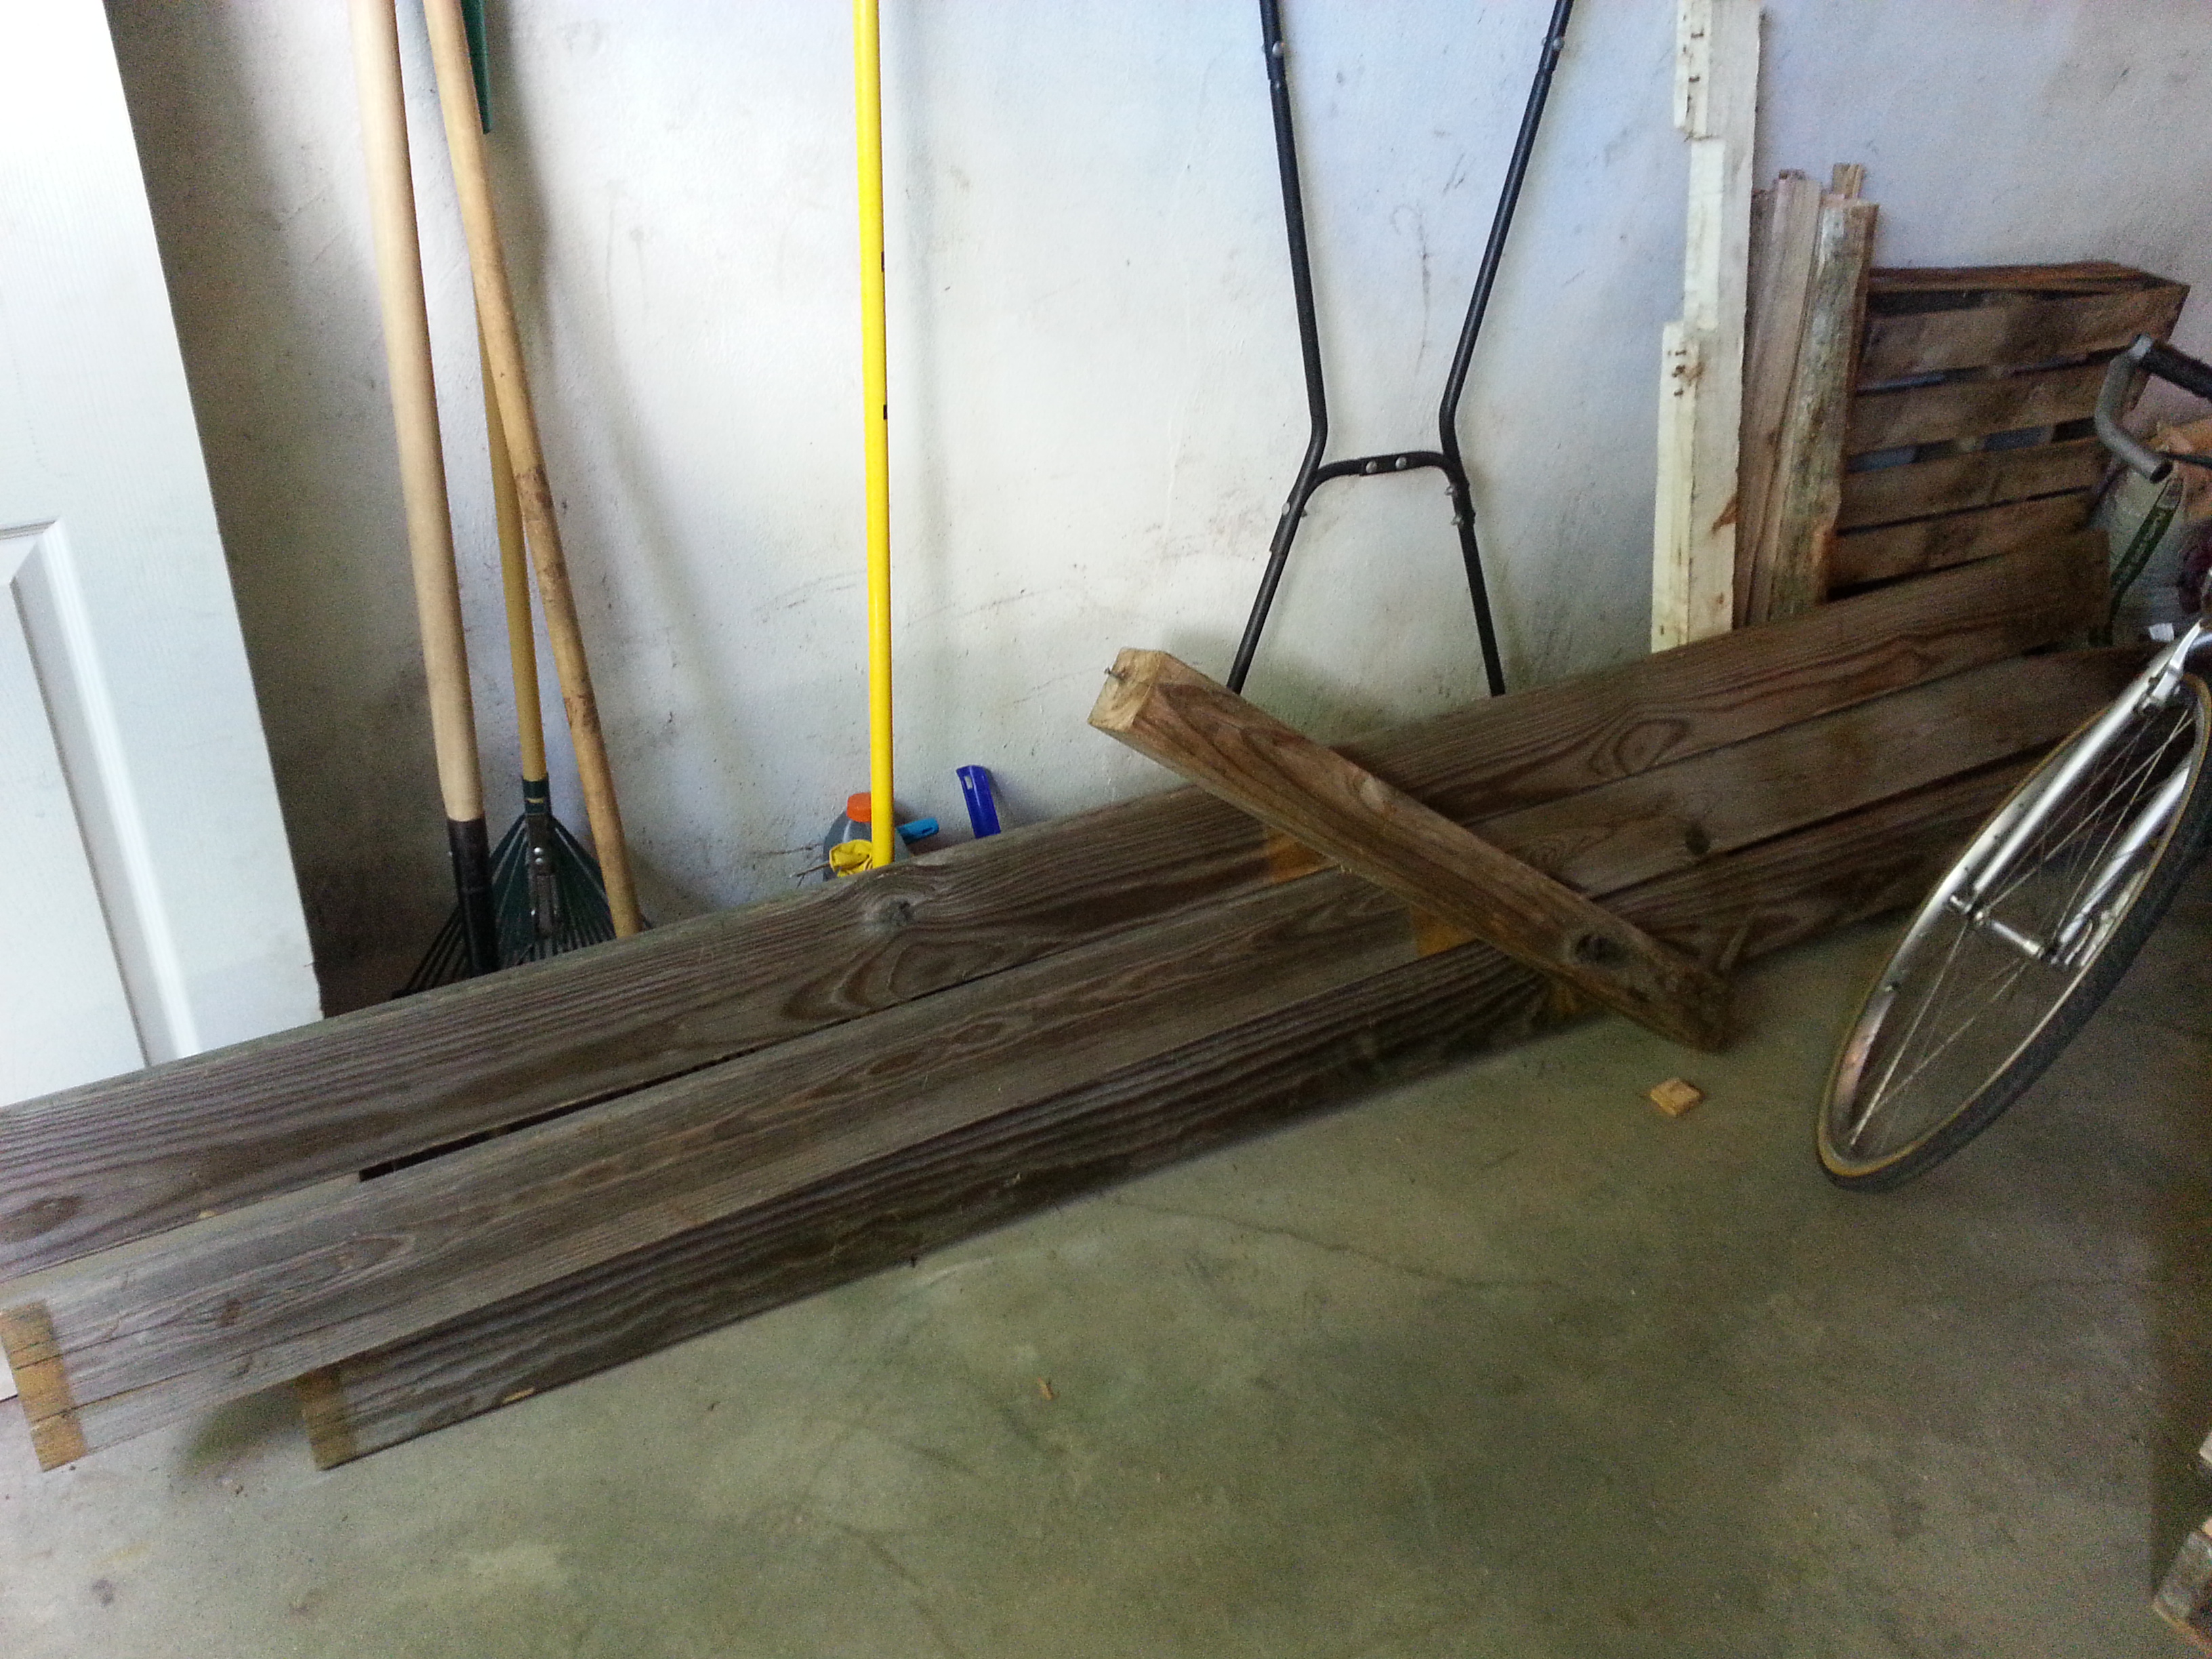
I slowly started moving the pile from one side of the garage to the other as I cleaned it up and deemed it ‘safe’ for the jointer. I also did my best to sort it into the sizes I would need.
Based on the plans from the workbench book, I knew I wanted about 5×5” legs and 5×3” stretchers. I somewhat arbitrarily decided that my base would be about 54” long and 24” wide to support a top of up to 84” or 96” long by 24” wide that was 2-6” thick. To get pieces of wood that thick, I was going to have to glue them up along their face.
That meant that if my legs were about 5” each, then I had to make up 44” of length on my long stretchers, plus two 2.5” tenons on each end (54” total – 5” for one leg – 5” for the other leg = 44” of space in between the legs).
That meant I needed the long stretchers to be about 49” long to give me enough to make the tenons. I ended up roughing them in the 50-52” range to be safe.
The other tool that was lent to me was an old Delta trim saw, which is like a sliding miter saw, but doesn’t lower down from the top, but rather just moves along a track from front to back.
I used the trim saw to rough all of my boards to the necessary length, after removing the screws, nails and staples and stacked them up near the jointer. Trying to eye it and find the best portion of the boards (many had severe splits and cracks along their length) to use.
I also tried to maximize the long boards I had to make the pieces for the top of the bench.
I ended up cutting to 4 different lengths essentially, 34” for the legs, 18” for the short stretchers, 50” for the long stretchers, and 72” for the top. I chose 72” for the top because that’s what I had enough of…I think I only had a couple boards that were longer than 75” or so, and those still had pretty bad splits.

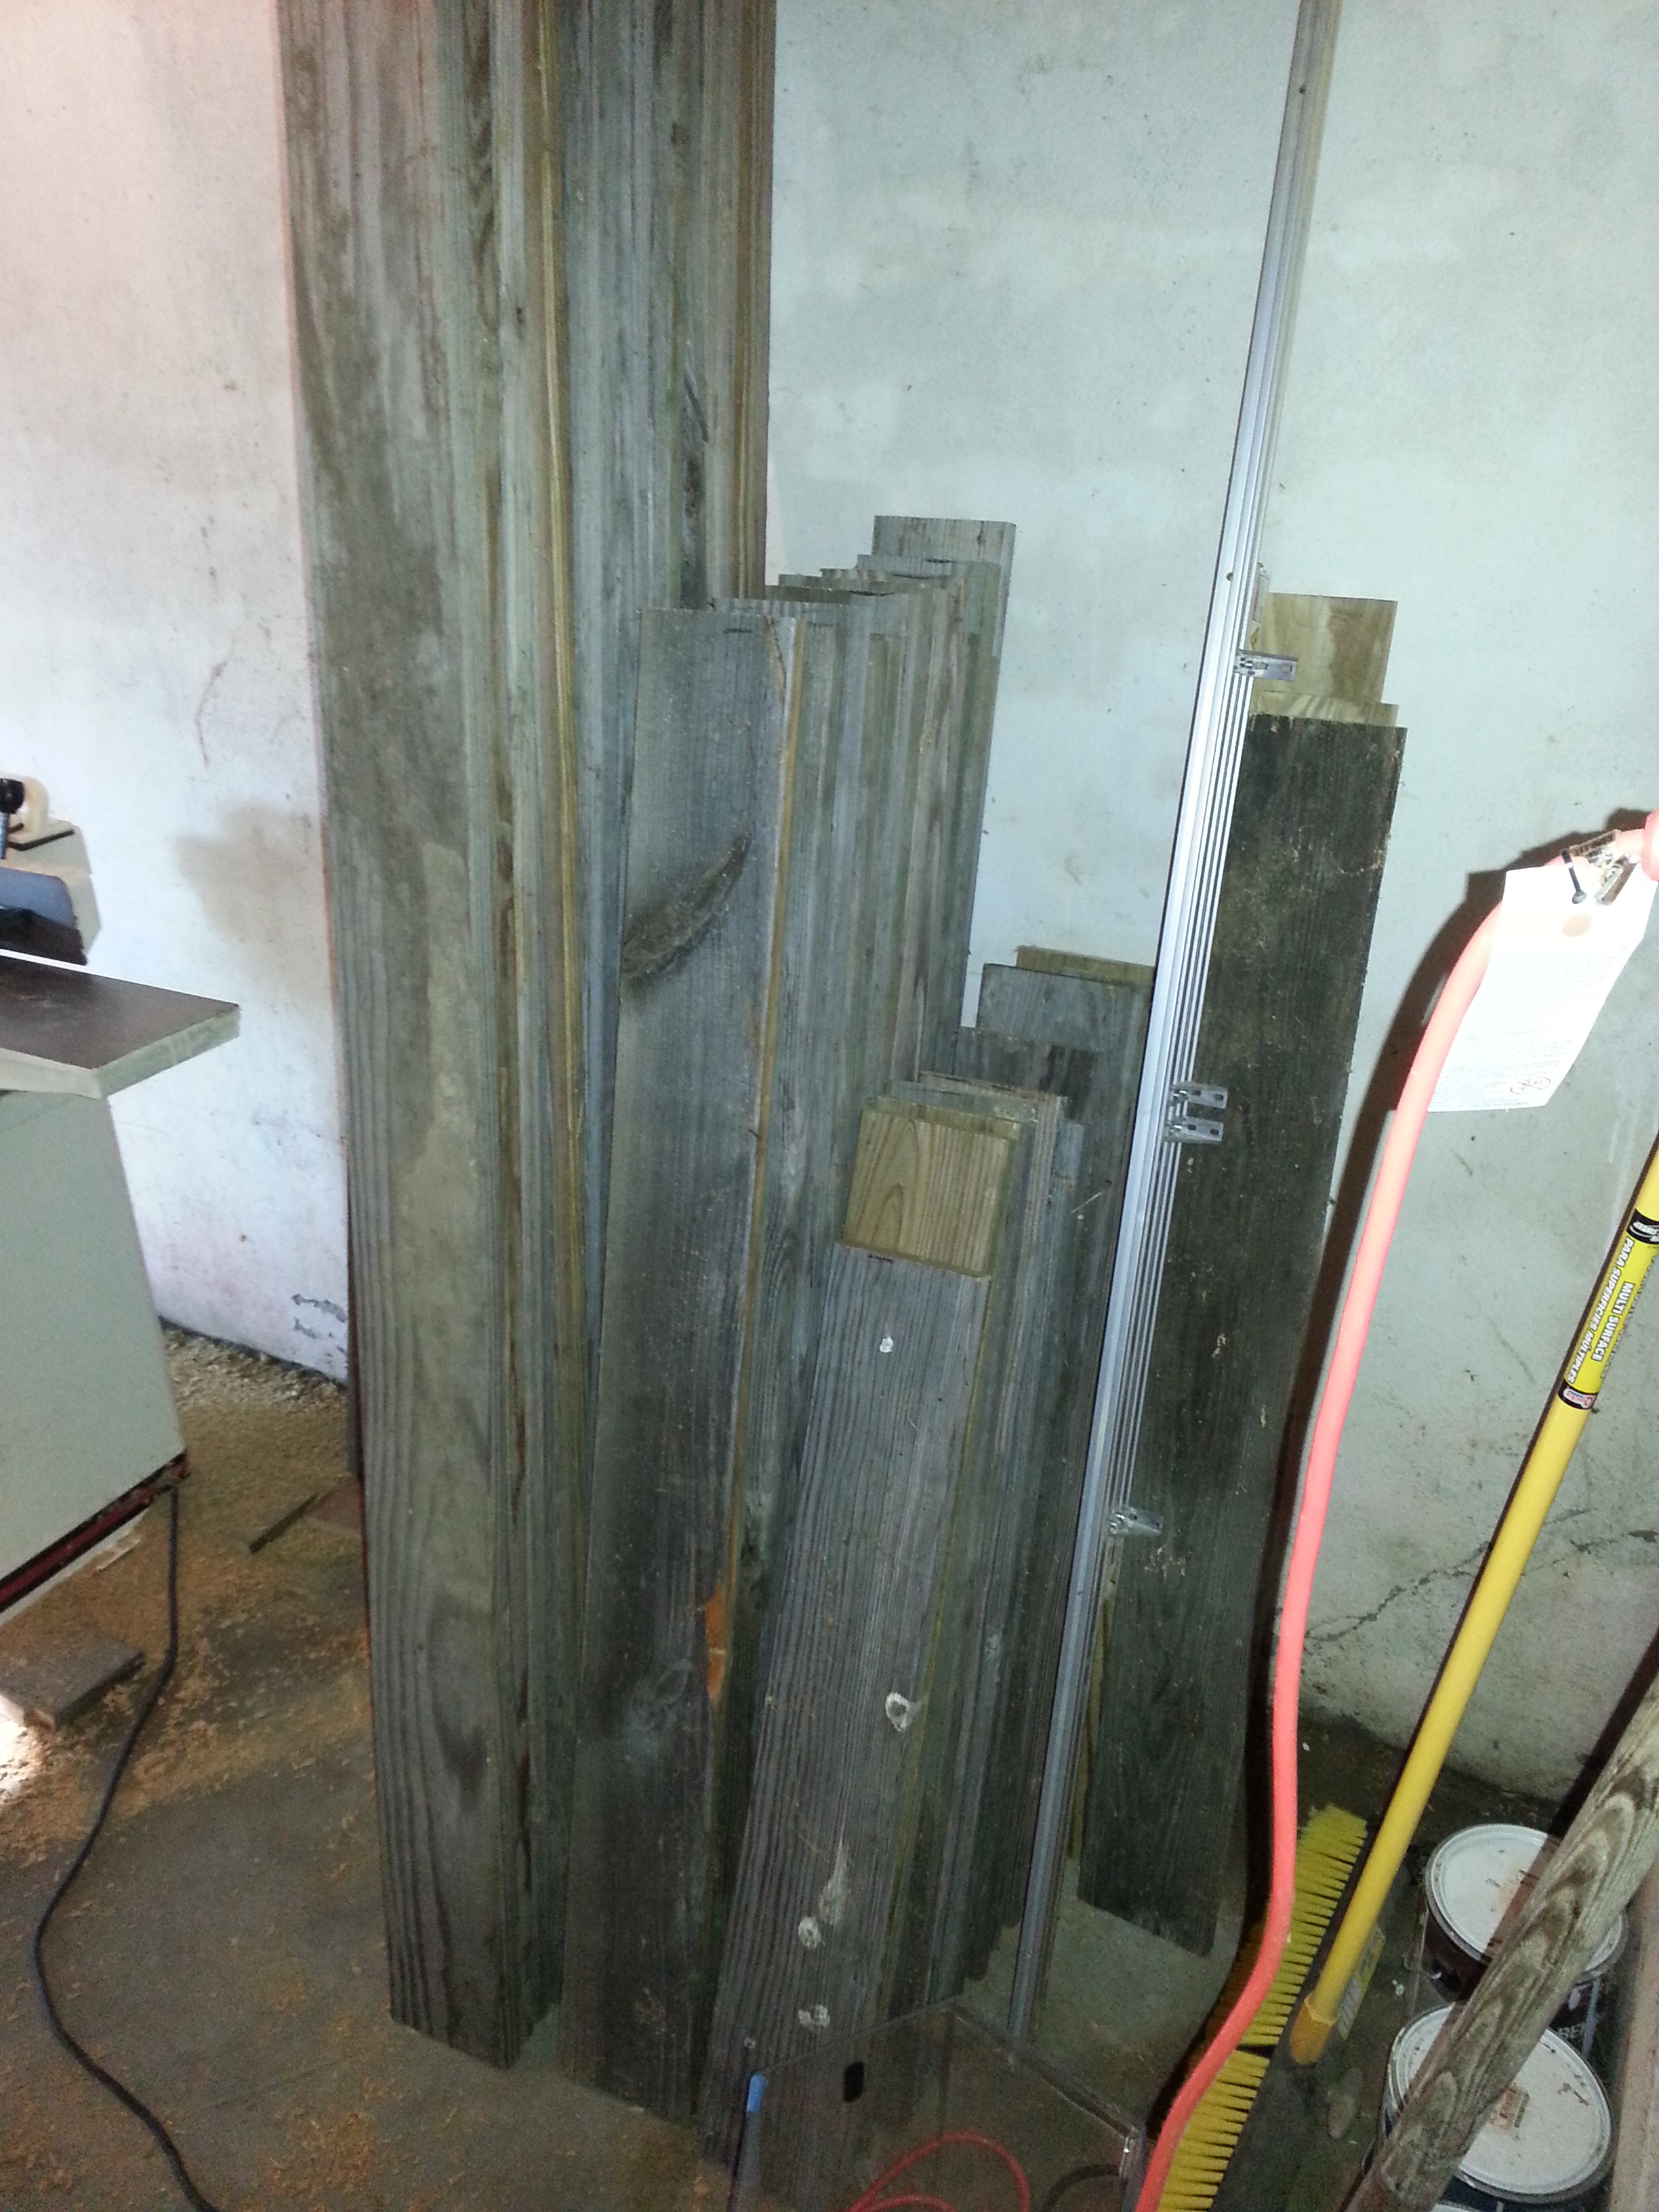
All in all, I had about 30-35 boards that were in the 35”-50” range (many were in the 40’s and ended up being leg boards), 20 or so of the 18-20” boards, and 24 of the 72”ish long boards.
Jointer Time
with a fresh stack of wood next to the jointer, that would turn into my evening project for the next couple months.
I realized one crucial aspect of woodworking if I wanted to make square stock.
I desperately needed a planer to go along with the jointer.
For those new to the craft, a jointer lets you cut one face perpendicular to another face (usually an edge) but will not make the opposite faces parallel to your nice 2 new square faces. If you have stock like a 4×4 or something that’s the same width on the edges and faces, it’s possible, but still hard.
This meant that the boards I was churning out came out looking something like a trapezoid or rhombus. I could have set up the jointer to cut a more square cut, but I told myself this was just a workbench and didn’t deserve such attention to detail (lesson learned).
Putting 6 boards together that are shaped like a trapezoid yields exactly what you would expect it to yield. a piece of wood that is anything but square. I did my best to alternate the odd angles to mostly account for this issue, but it still left my lefts not quite square.
Glue ups
I had several major glue ups that preceded the massive top glue up, and I experimented with several different techniques.
Starting with the legs first, one technique I used was to basically joint all the faces smooth, and then just glue and clamp the boards together to make the leg of an appropriate thickness. This worked well, the boards fit together well and the glue seemed to be very evenly spread throughout the joint.
The second technique I tried was one that I turned to after getting frustrated with the out of square cuts that I was doing on the jointer. I decided to ask my woodworking friend if I could borrow his biscuit jointer.
I took 6 boards that just had a basic skimming on the jointer (they hadn’t gone too far out of square) and put biscuits 1” in on all the faces, every 6” to hold the boards together along with glue.
Clamped it up and the joint seems to hold just fine. I imagine the boards are under a reasonable amount of tension however, and the joints will probably fail prematurely. I expect at that point I will have the tools and knowledge to make a replacement leg that is better suited to the task.
If you’ve ever had to line up something like 18 biscuits on a face of a board that is warped, cupped or bowed, while trying not to let your glue dry, you know that this isn’t a whole lot of fun.
Enter the third technique, it was similar to the second, but instead of a biscuit every 6” I only put three biscuits along the entire length of the leg: one at each end, 1” in from each edge on the face and then a pair of biscuits in the middle. I also jointed the edges of the boards so that they were even, this meant the biscuit jointer was putting the biscuit in the same exact spot in from the edge on all the faces.
This glue up went a lot smoother and I learned a crucial lesson in biscuit alignment.
Clean up and more finishing work
I slowly finished all of the glue ups over time (all except the top…I was postponing that as long as possible) but once completed, I moved on to finishing up the faces of these glued up legs and stretchers on the jointer to give them a nice even face.
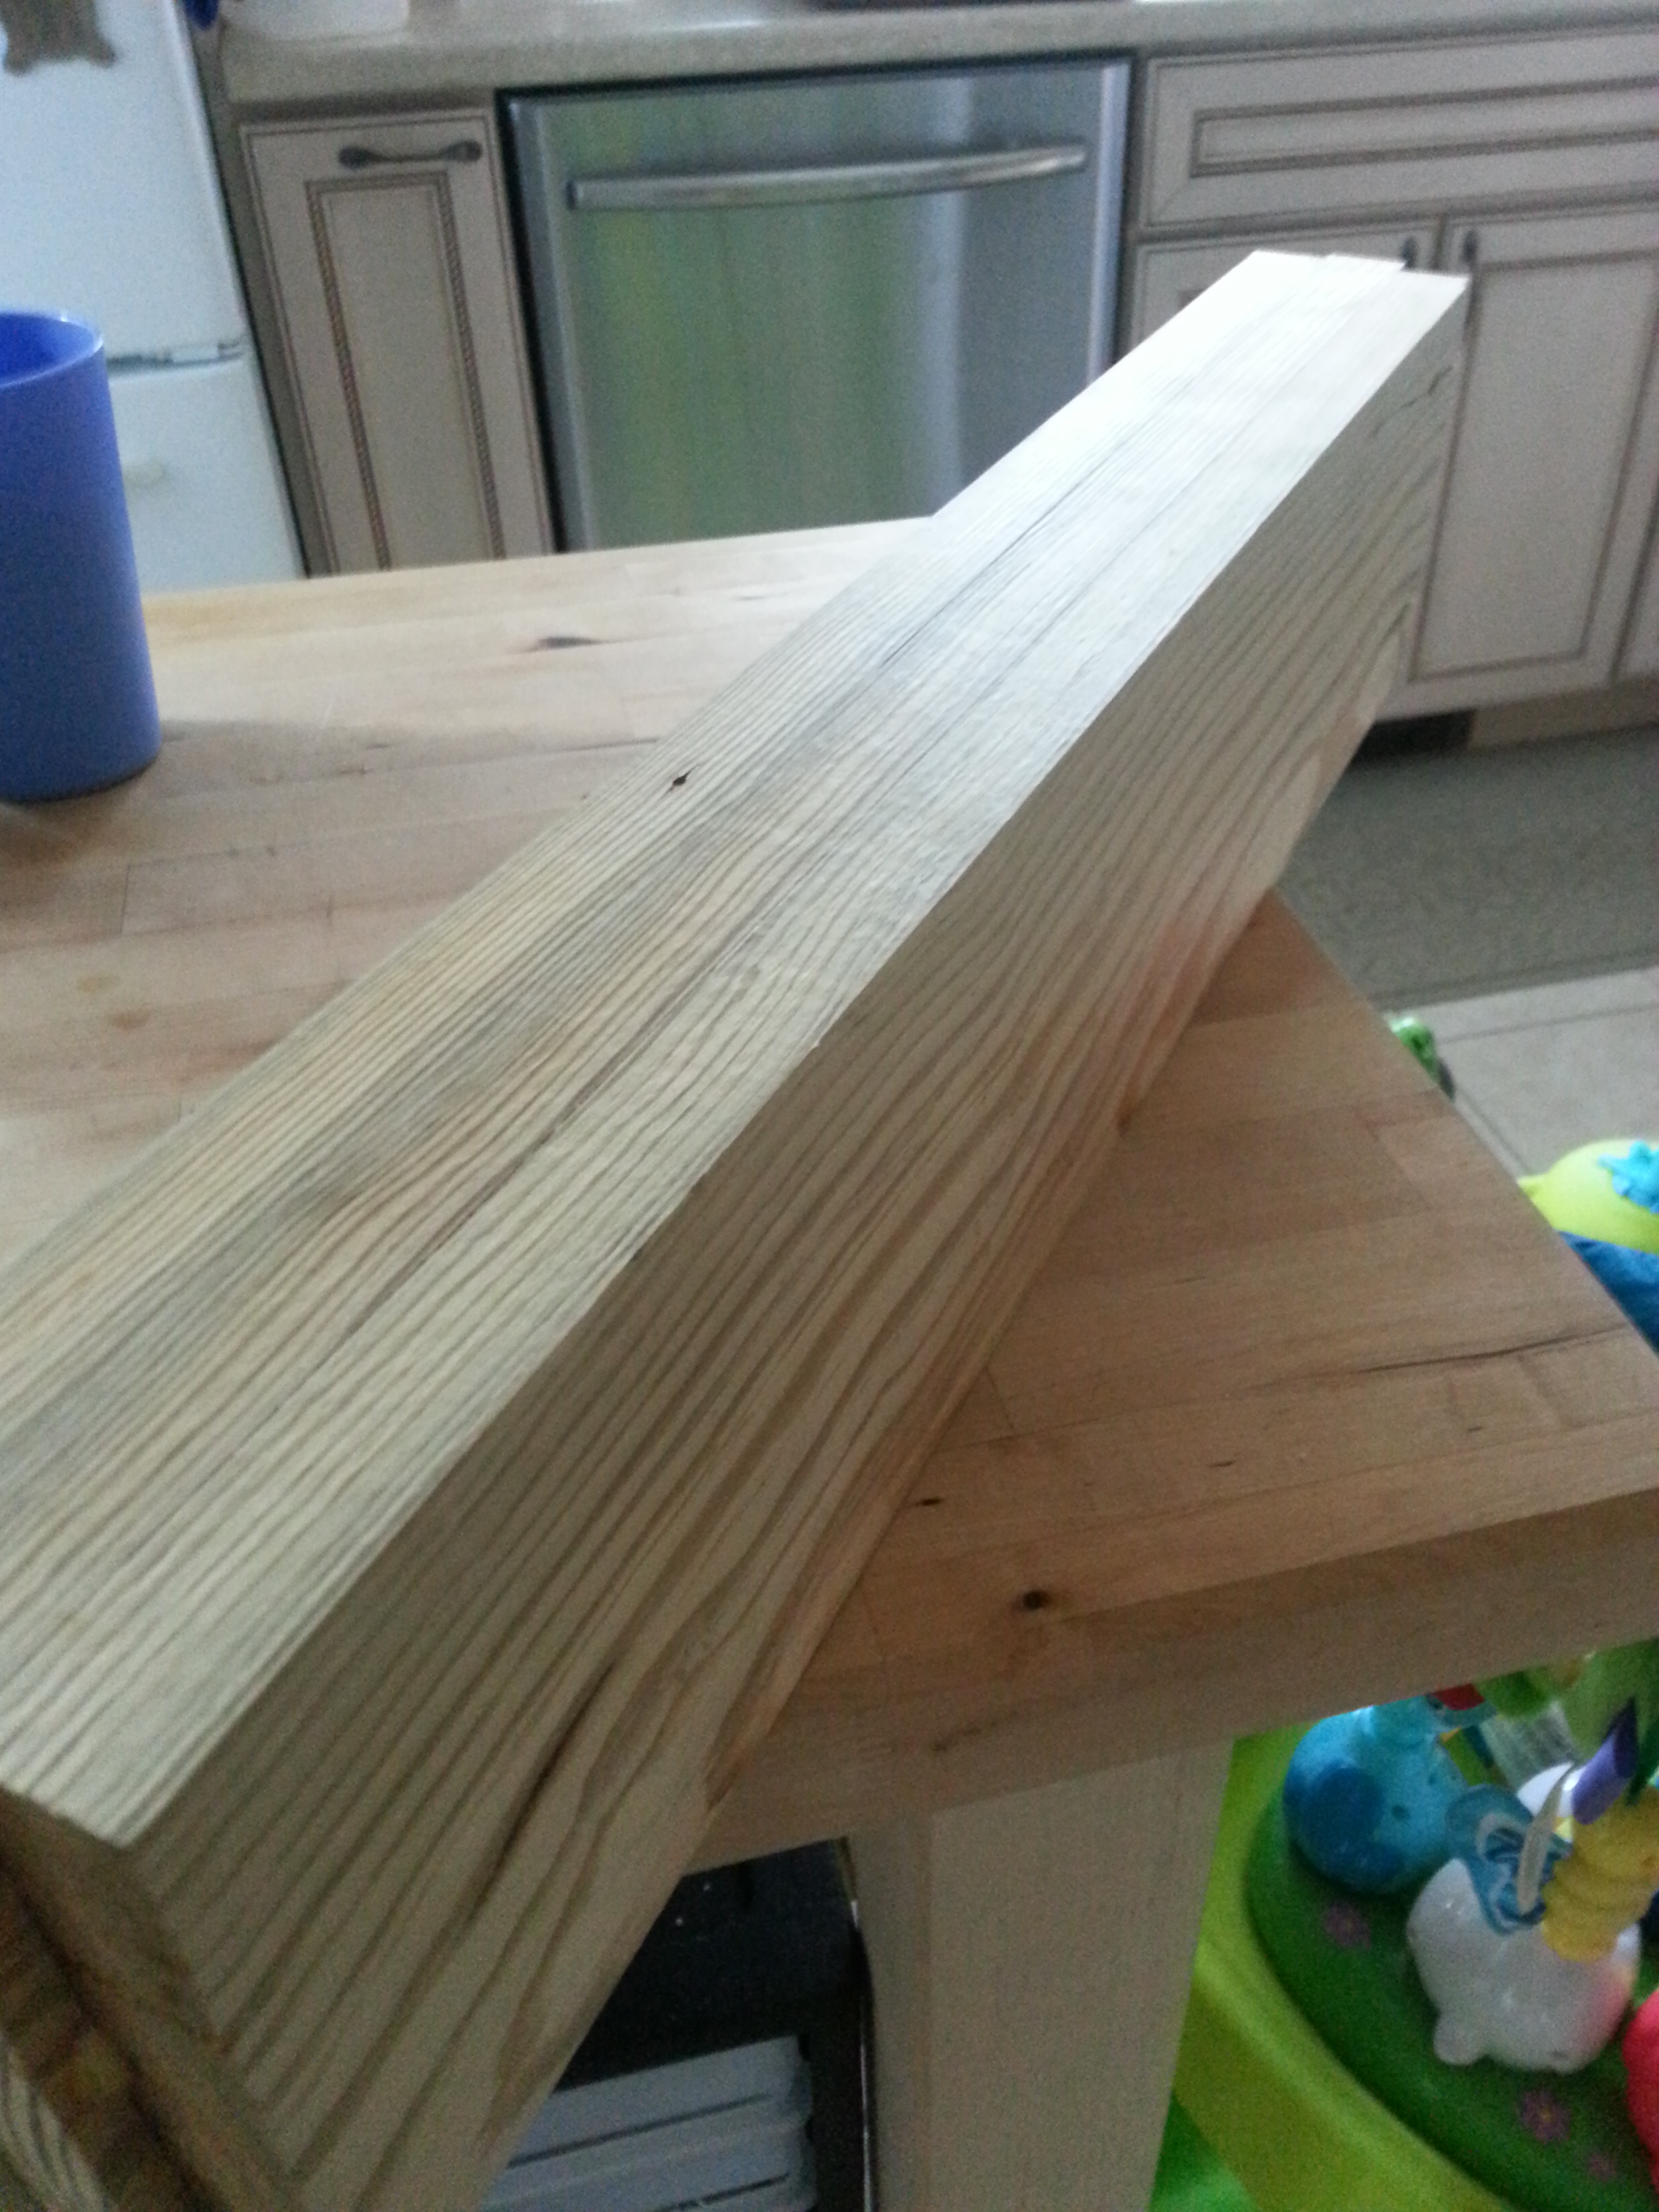
After running the pieces over the jointer, I was left with what seemed to be pretty decent hunks of wood that were starting to look like they might go to a workbench.
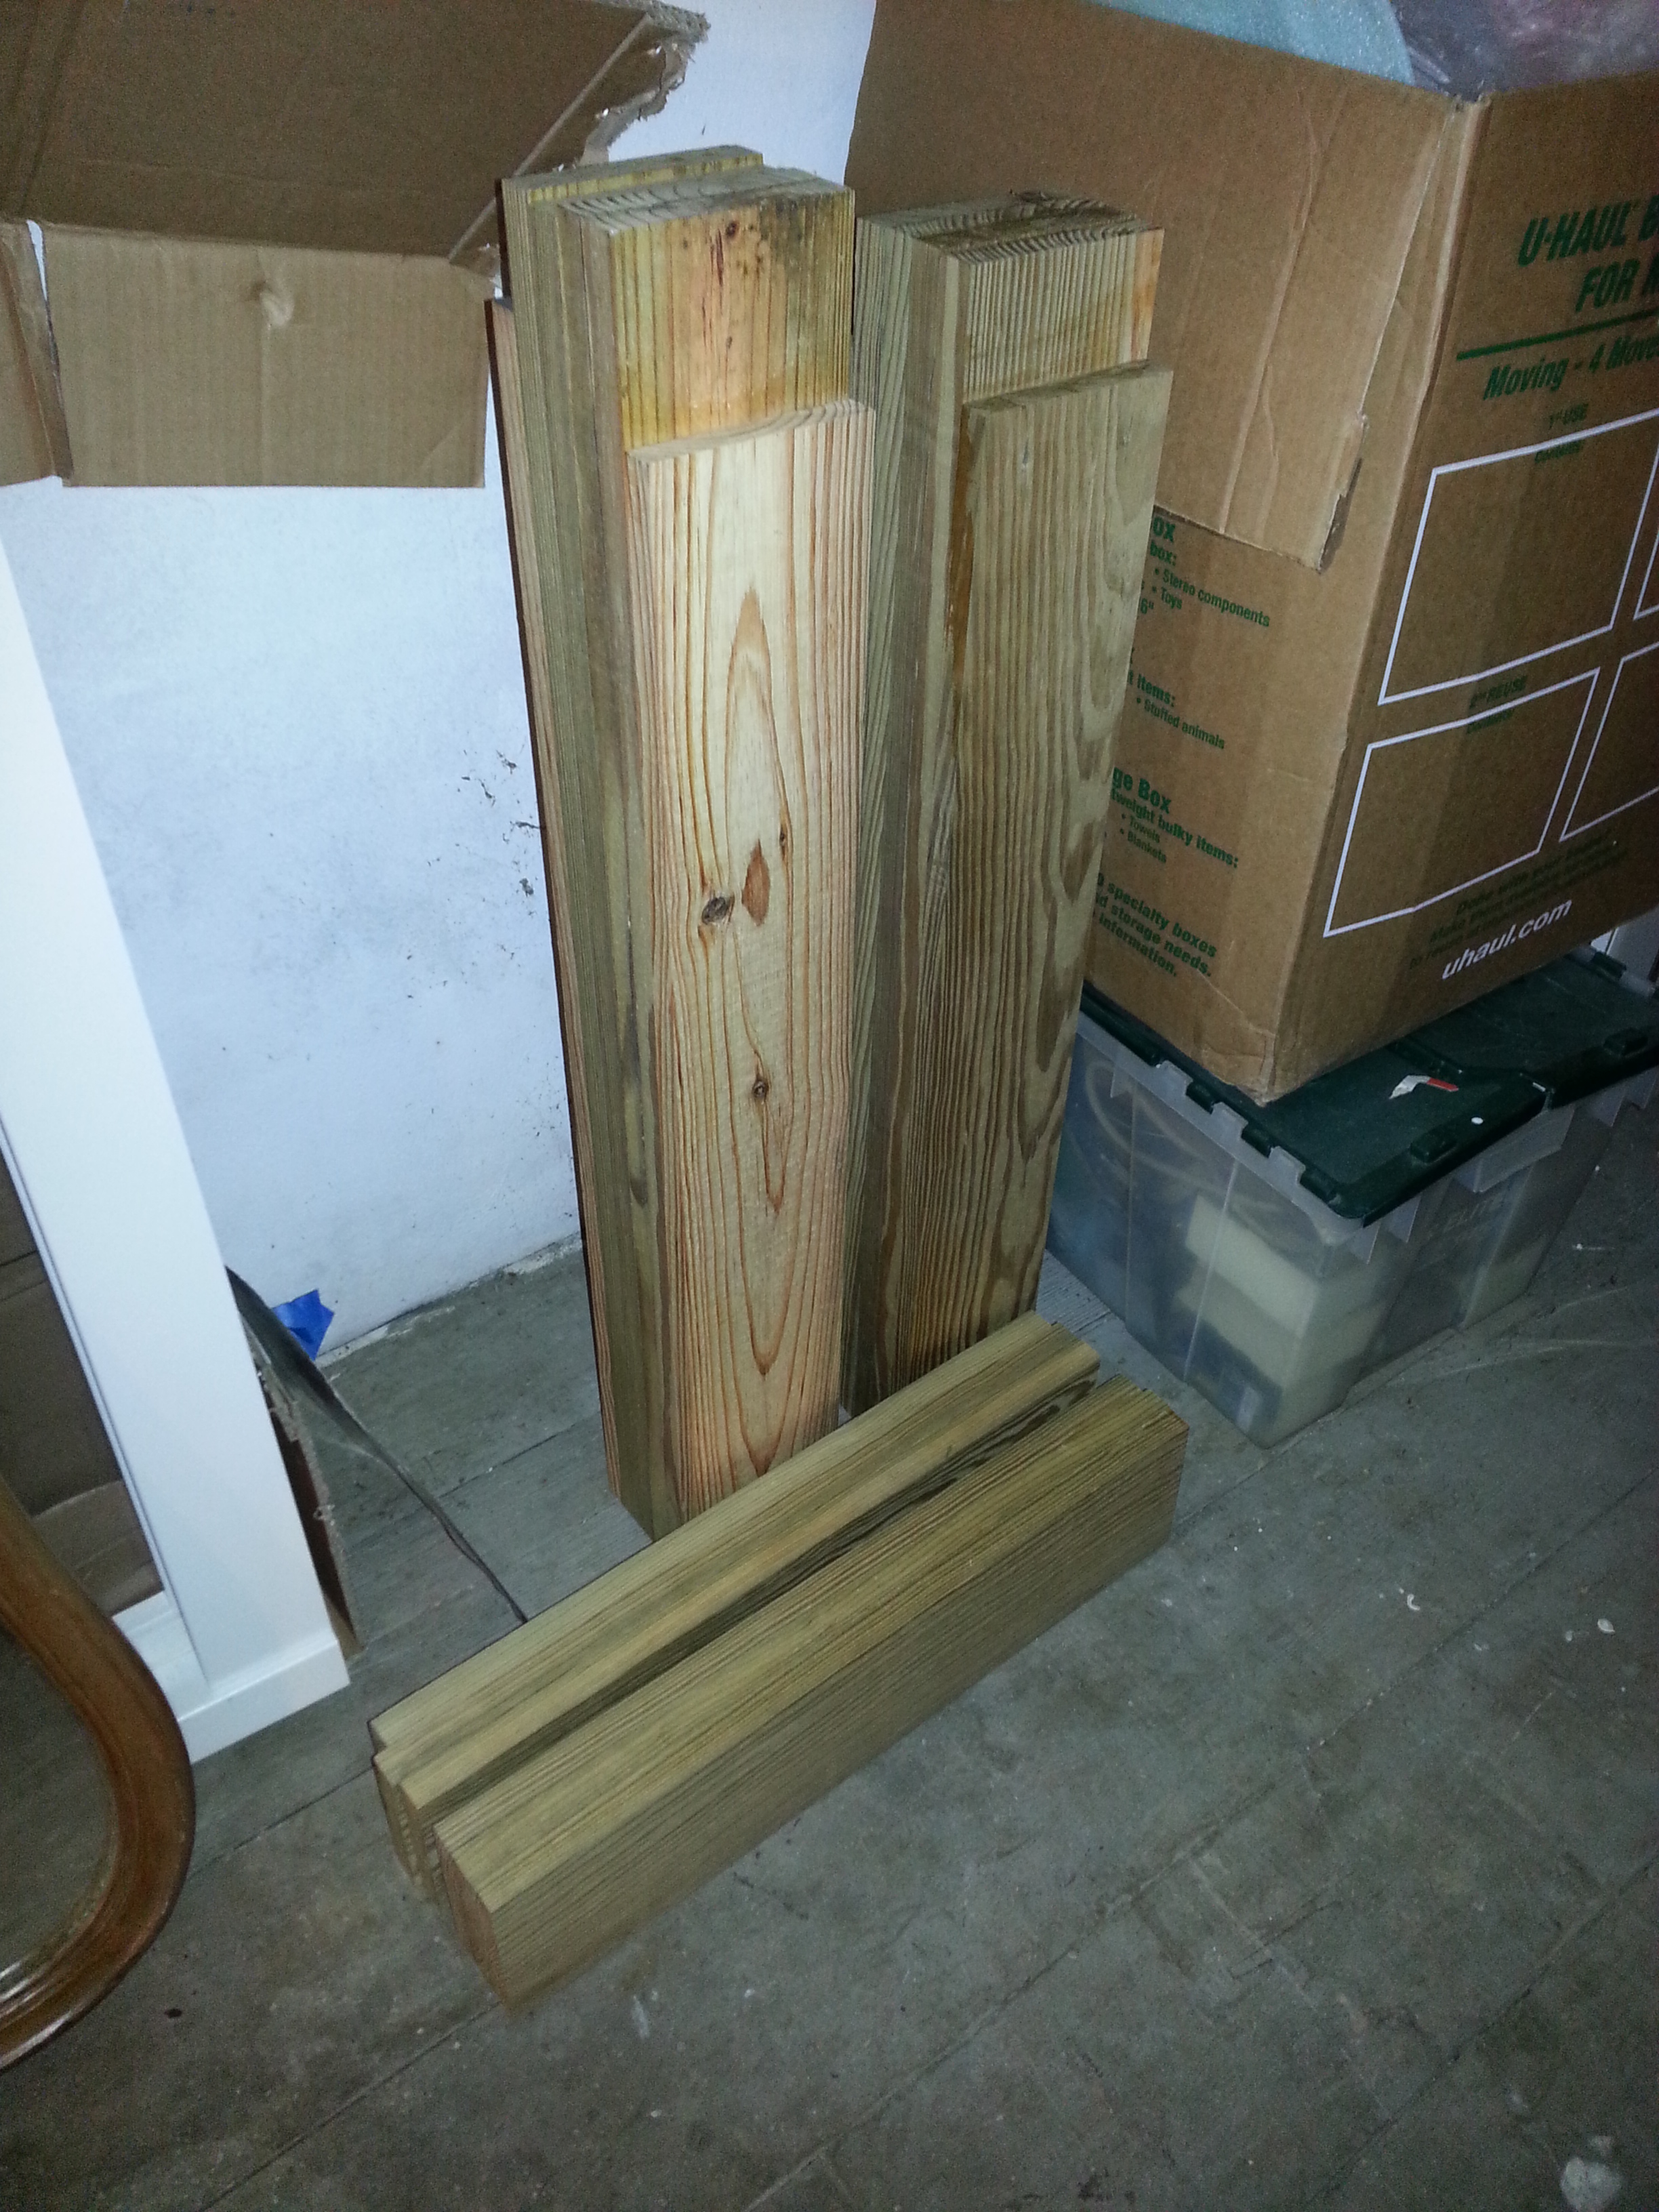
For the legs, I tended to just rough the size out, since I knew that I had cut them long in the first place, so you can see in the previous photo that two of the legs are nowhere near the same length. I also decided to chamfer the feet to help relieve splintering when I dragged this puppy around the room. This was also an idea inspired by Schwartz’s book.
I used my router with the chamfer bit, lowered about a ¼” below the base to give me this nice relief around the bottom edge.
Joinery
I picked myself up a useful little ring bound book called Joints and it gives you a brief overview and execution details of many common types and styles of joinery. It helped me learn a bit more about the mortise and tenon joint, which I would use extensively throughout this project.
I also picked up the concept of drawboring from Schwartz’s book, which gives my bench a touch of that hand crafted feel that I was hoping to bring to it. More on this later.
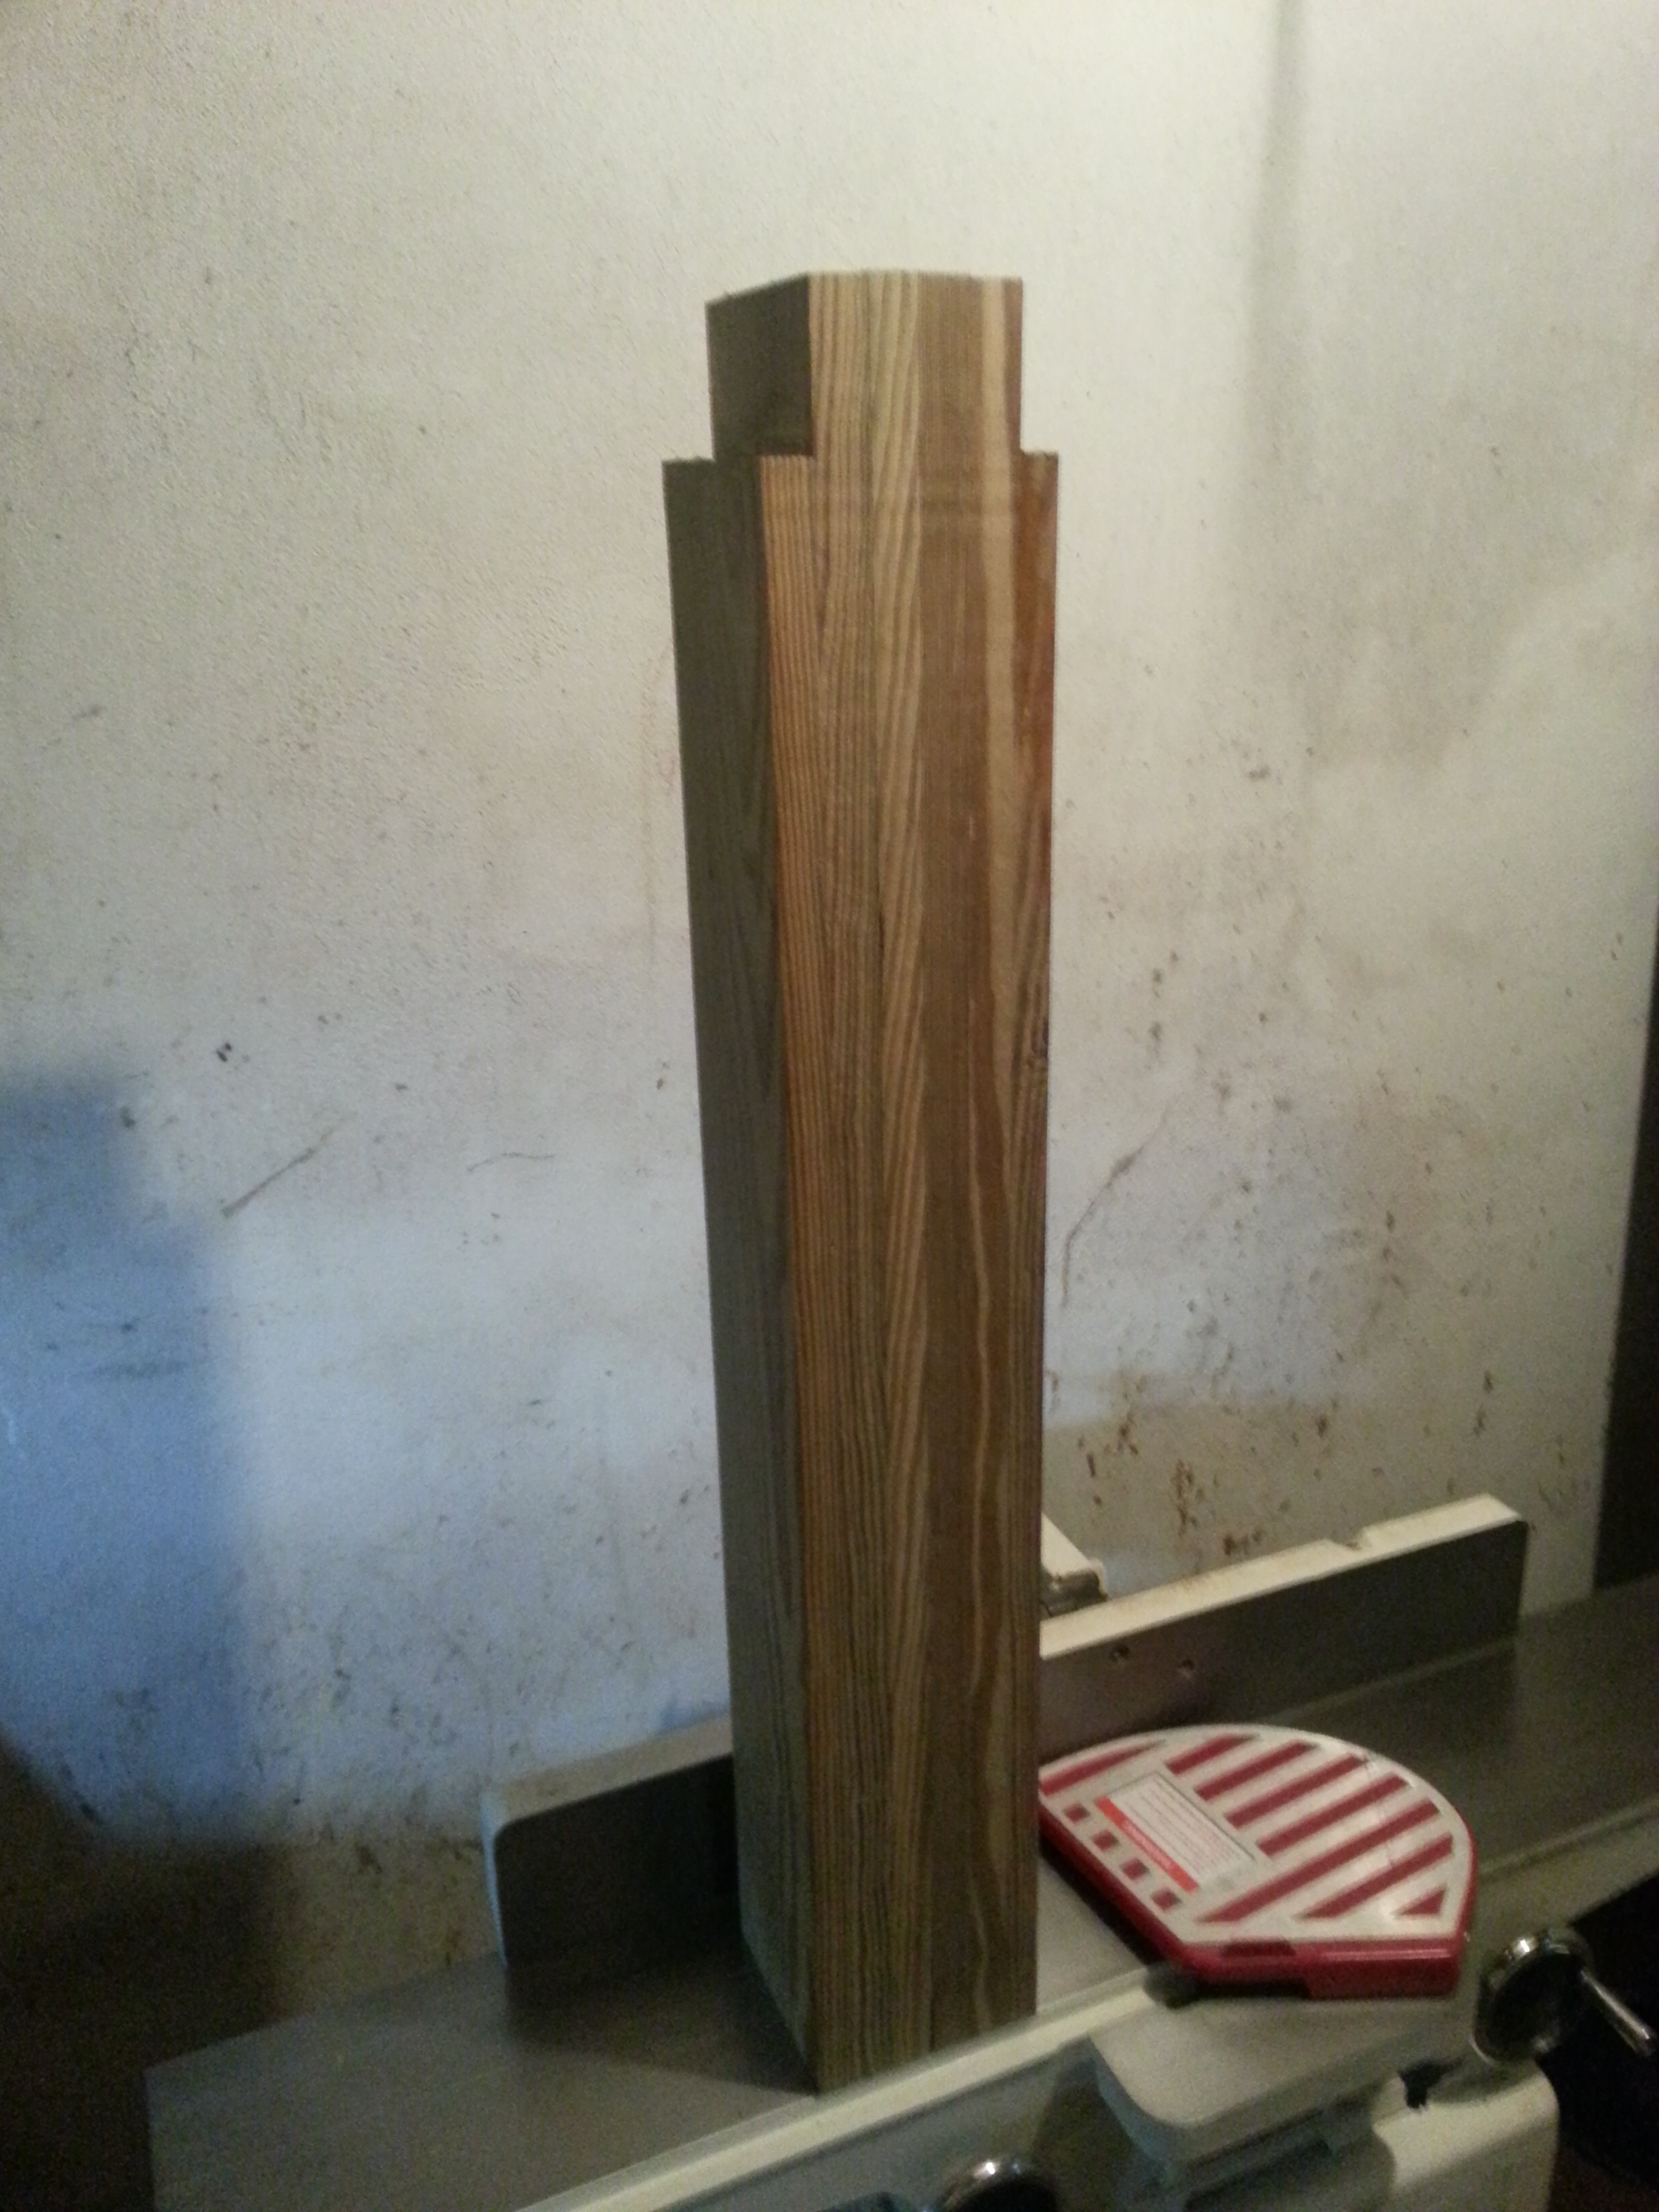
For now, I just wanted to cut the tenons on the tops of the legs that would slip into the bench top. Rough dimensions on these were 1” shoulders (only on the the front and back faces) and about a 2 ¼” tenon length.
I say these were rough dimensions because as I am cutting the shoulders, they were often close enough to the joining faces of two of the boards, that it ended up splitting along the face and deepening the shoulders. There was significant enough tenon left over that I wasn’t concerned.
I also didn’t’ create perfectly square tenons (by any stretch of the imagination) but I was planning on doing the bench top mortise layout only after cutting the tenons and building the base, so I would just outline then anyway and not rely on measurements of where they should be.
I am learning, and this is a workbench, so I made sacrifices where I thought I could afford them. The bench seems no worse for wear now.
This is one attempt at a method with a straight edge and a router with a straight bit set to about 1” depth. I had no way of extending the reach of the bit more than an inch or so to the right of the shoulder, so I had to saw the remaining chunk off by hand after getting to the point pictured below.
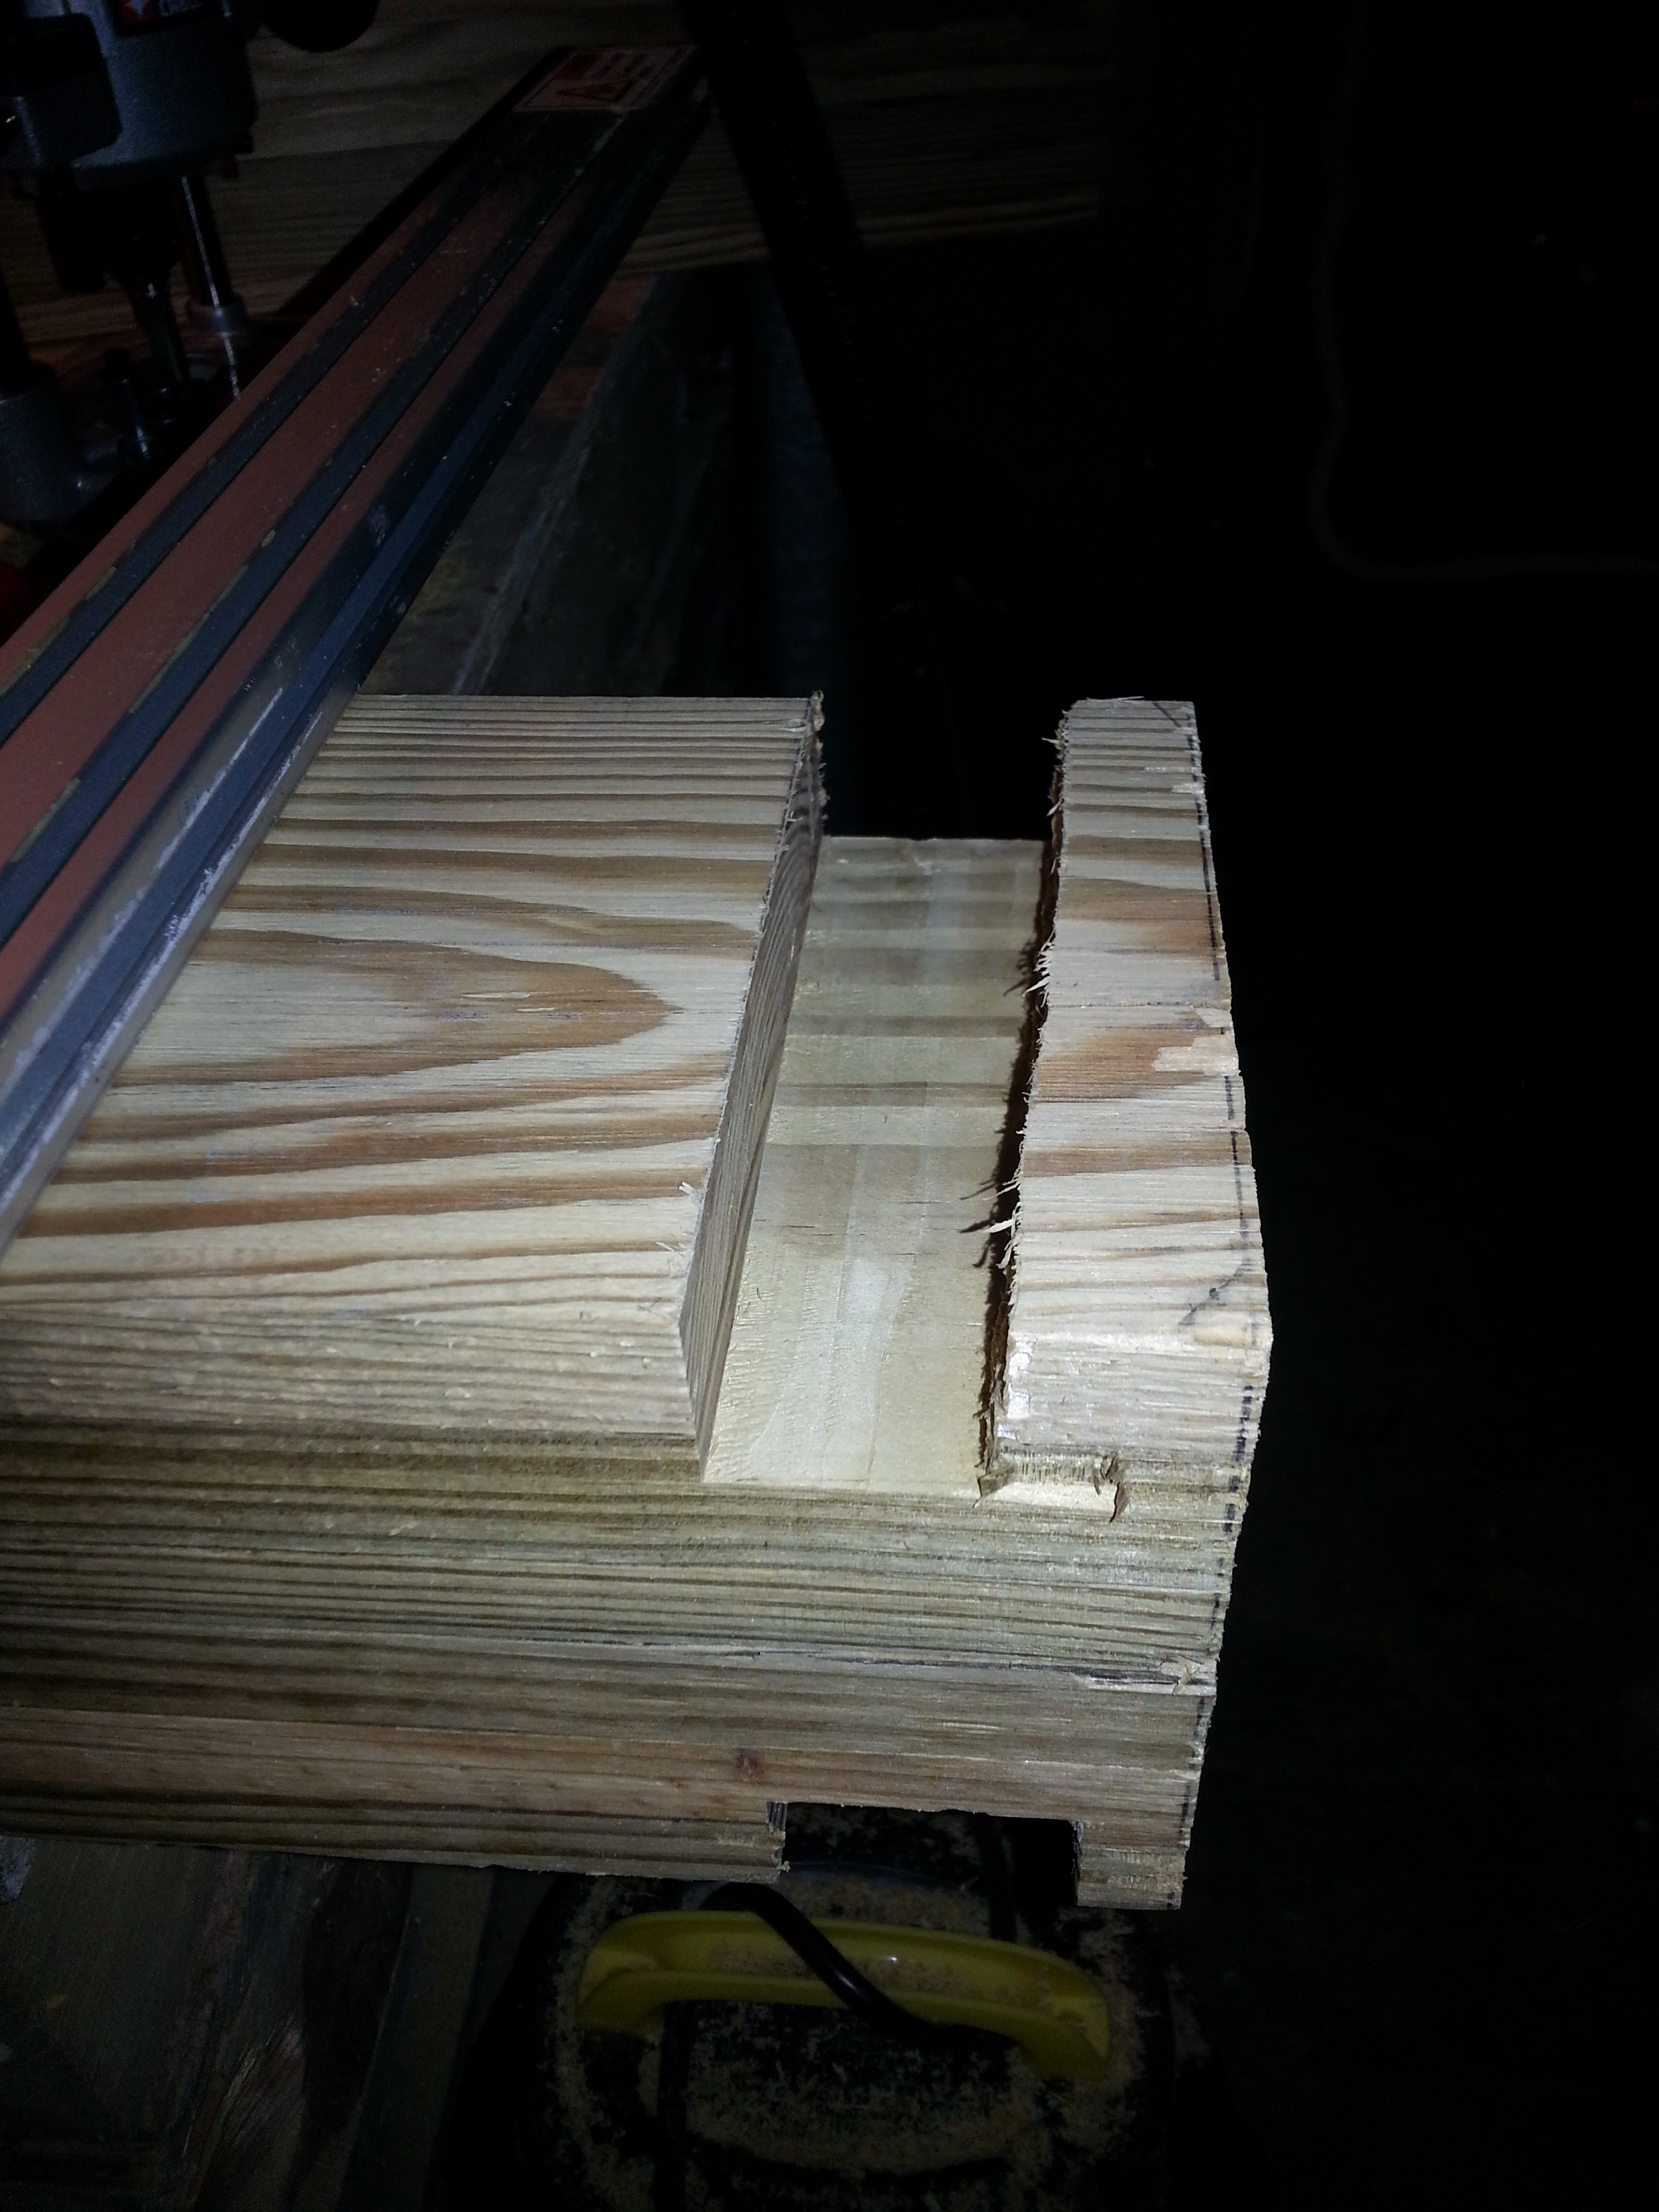
I now have a Bench Dog router base which gives me MUCH more balance and extension on my router bit’s reach that I could have done this that way, but it forced me to try my hand at hand cutting tenons.
Given the setup time to get the router set up with the straight edge in exactly the right spot, I cut the other three tenons by hand, first by sawing down the shoulder to my scribed depth, and then cutting the cheeks after standing the leg up and clamping to the side of my pallet stack…er, I mean workbench.
This is the layout mark of a stretcher on the leg…looks nice and square, no? I have also moved away from using framing pencils to mark my woodworking cuts…a full ⅛” of pencil mark does little to incite accurate cuts. I now use a .9mm mechanical pencil, which is perfect for the job.
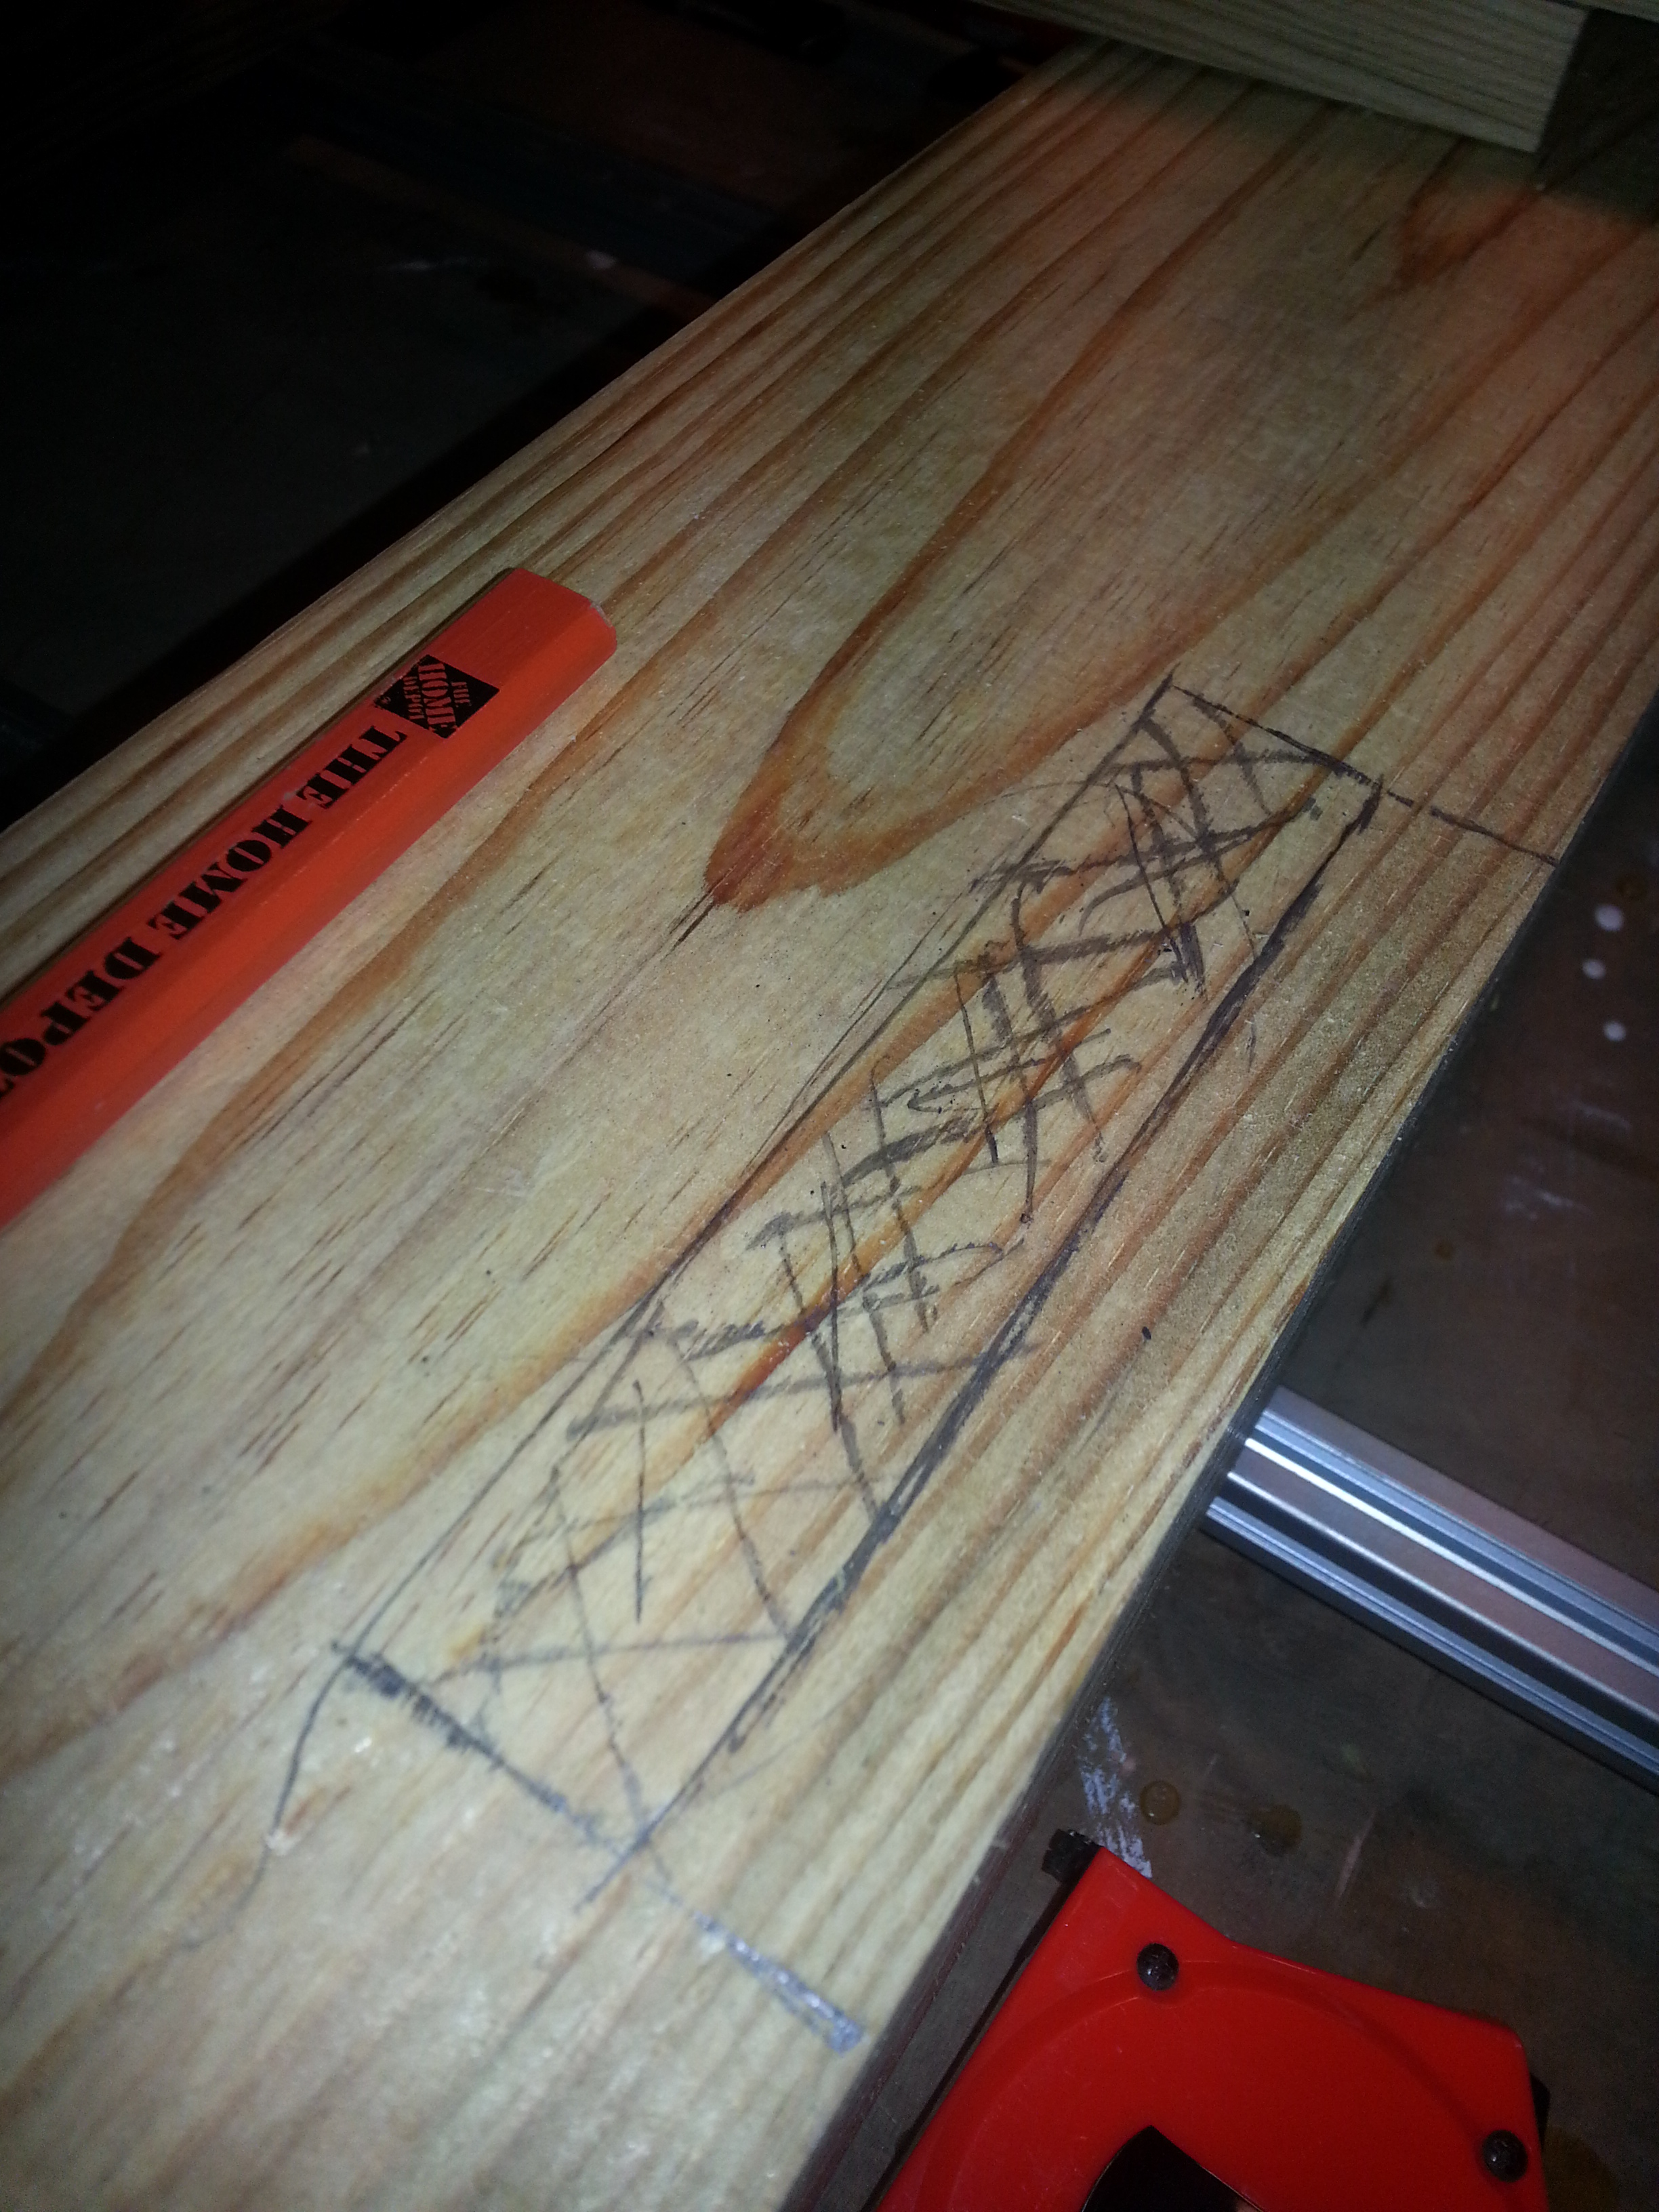
You can see the merit in fitting in place rather than relying on drawings or plans to mark your joinery! Perhaps it’s a bit hard to see, but my tenons tended to slope in towards the ends, making them somewhat oval shaped rectangles, rather than true rectangles. I’m pretty sure these were my first hand cut tenons, so cut me some slack!
Assembling the Sides
I decided to build the base first so that I could throw a door on top of it or somehow use it to help me build the top, which in hindsight was a good choice.
The base was good joinery practice too. Since I had decided to go with a split top roubo, I needed horizontal stretchers between the front and back legs on each side to support the insides of each of the two large top pieces. Had I made a full roubo top, the top itself would have been enough to bridge the gap between front and back side legs.
These stretchers were actually an afterthought. I didn’t really settle on a split top roubo until I realized I didn’t’ have quite enough wood to make the top (I had 24 one inch boards and a few were pitifully cracked and warped). Making a split top meant I only needed about 22 or so, so I could cull out the worst of the boards I had earmarked for the top.
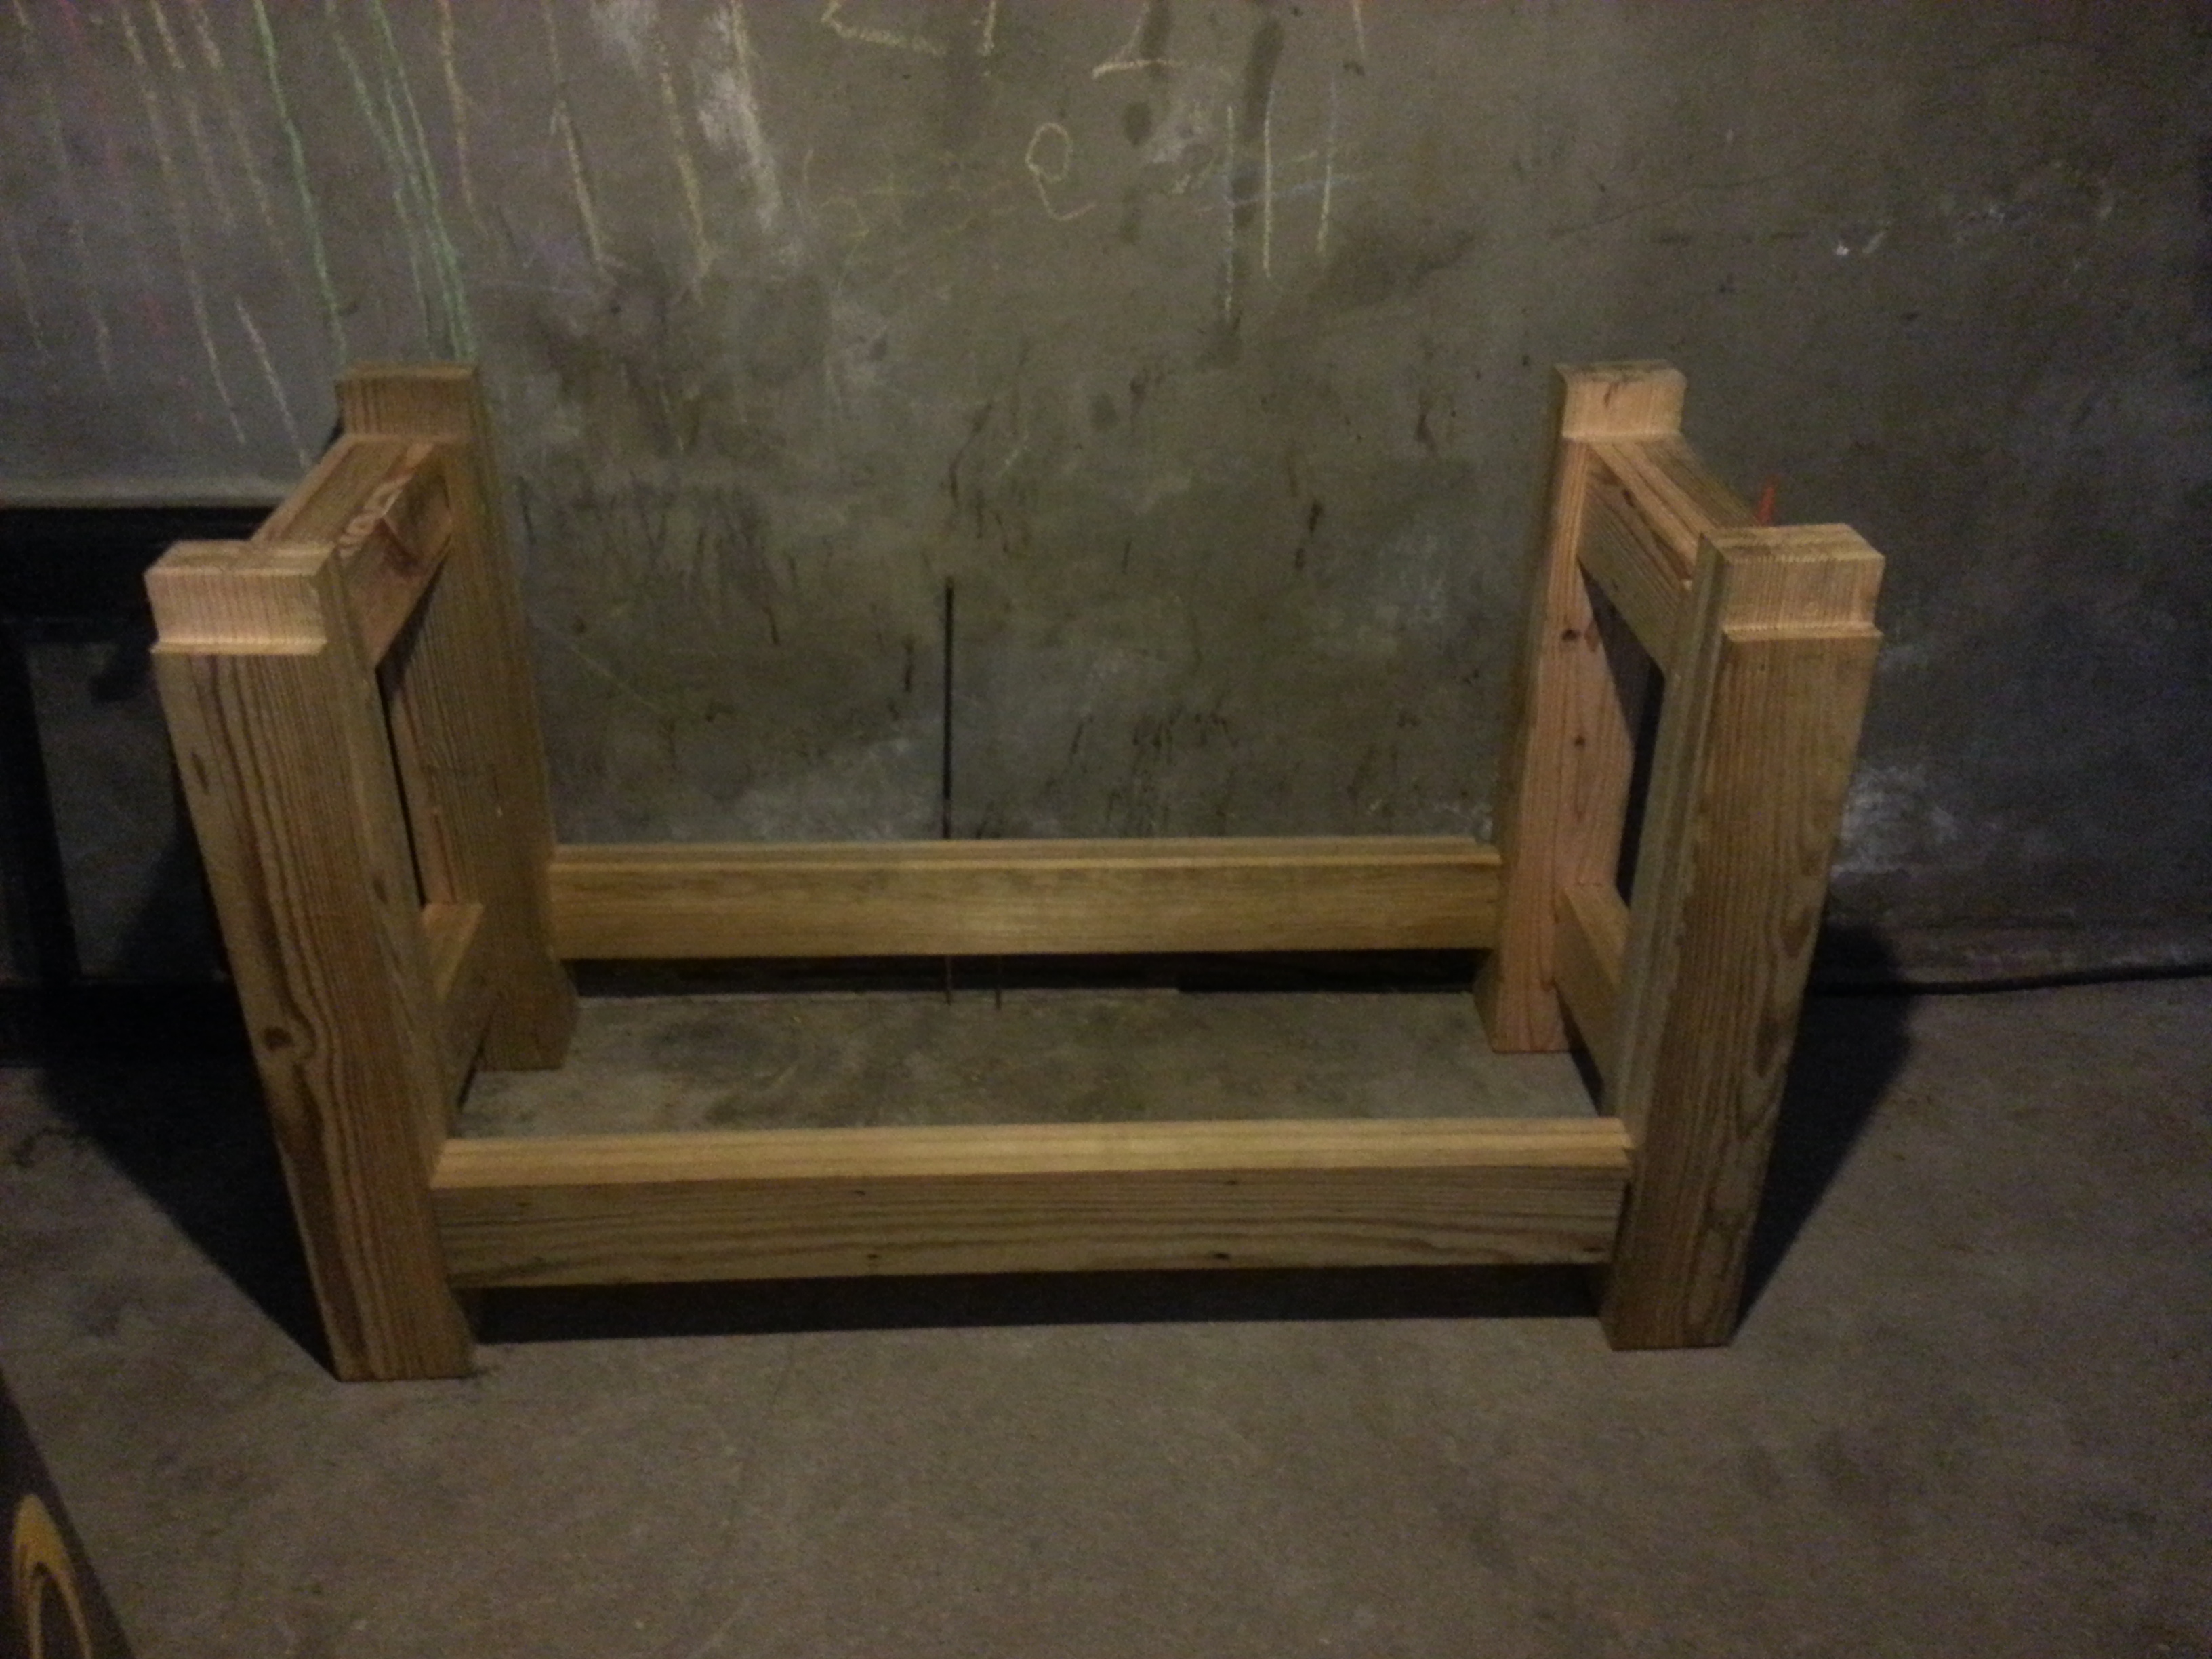
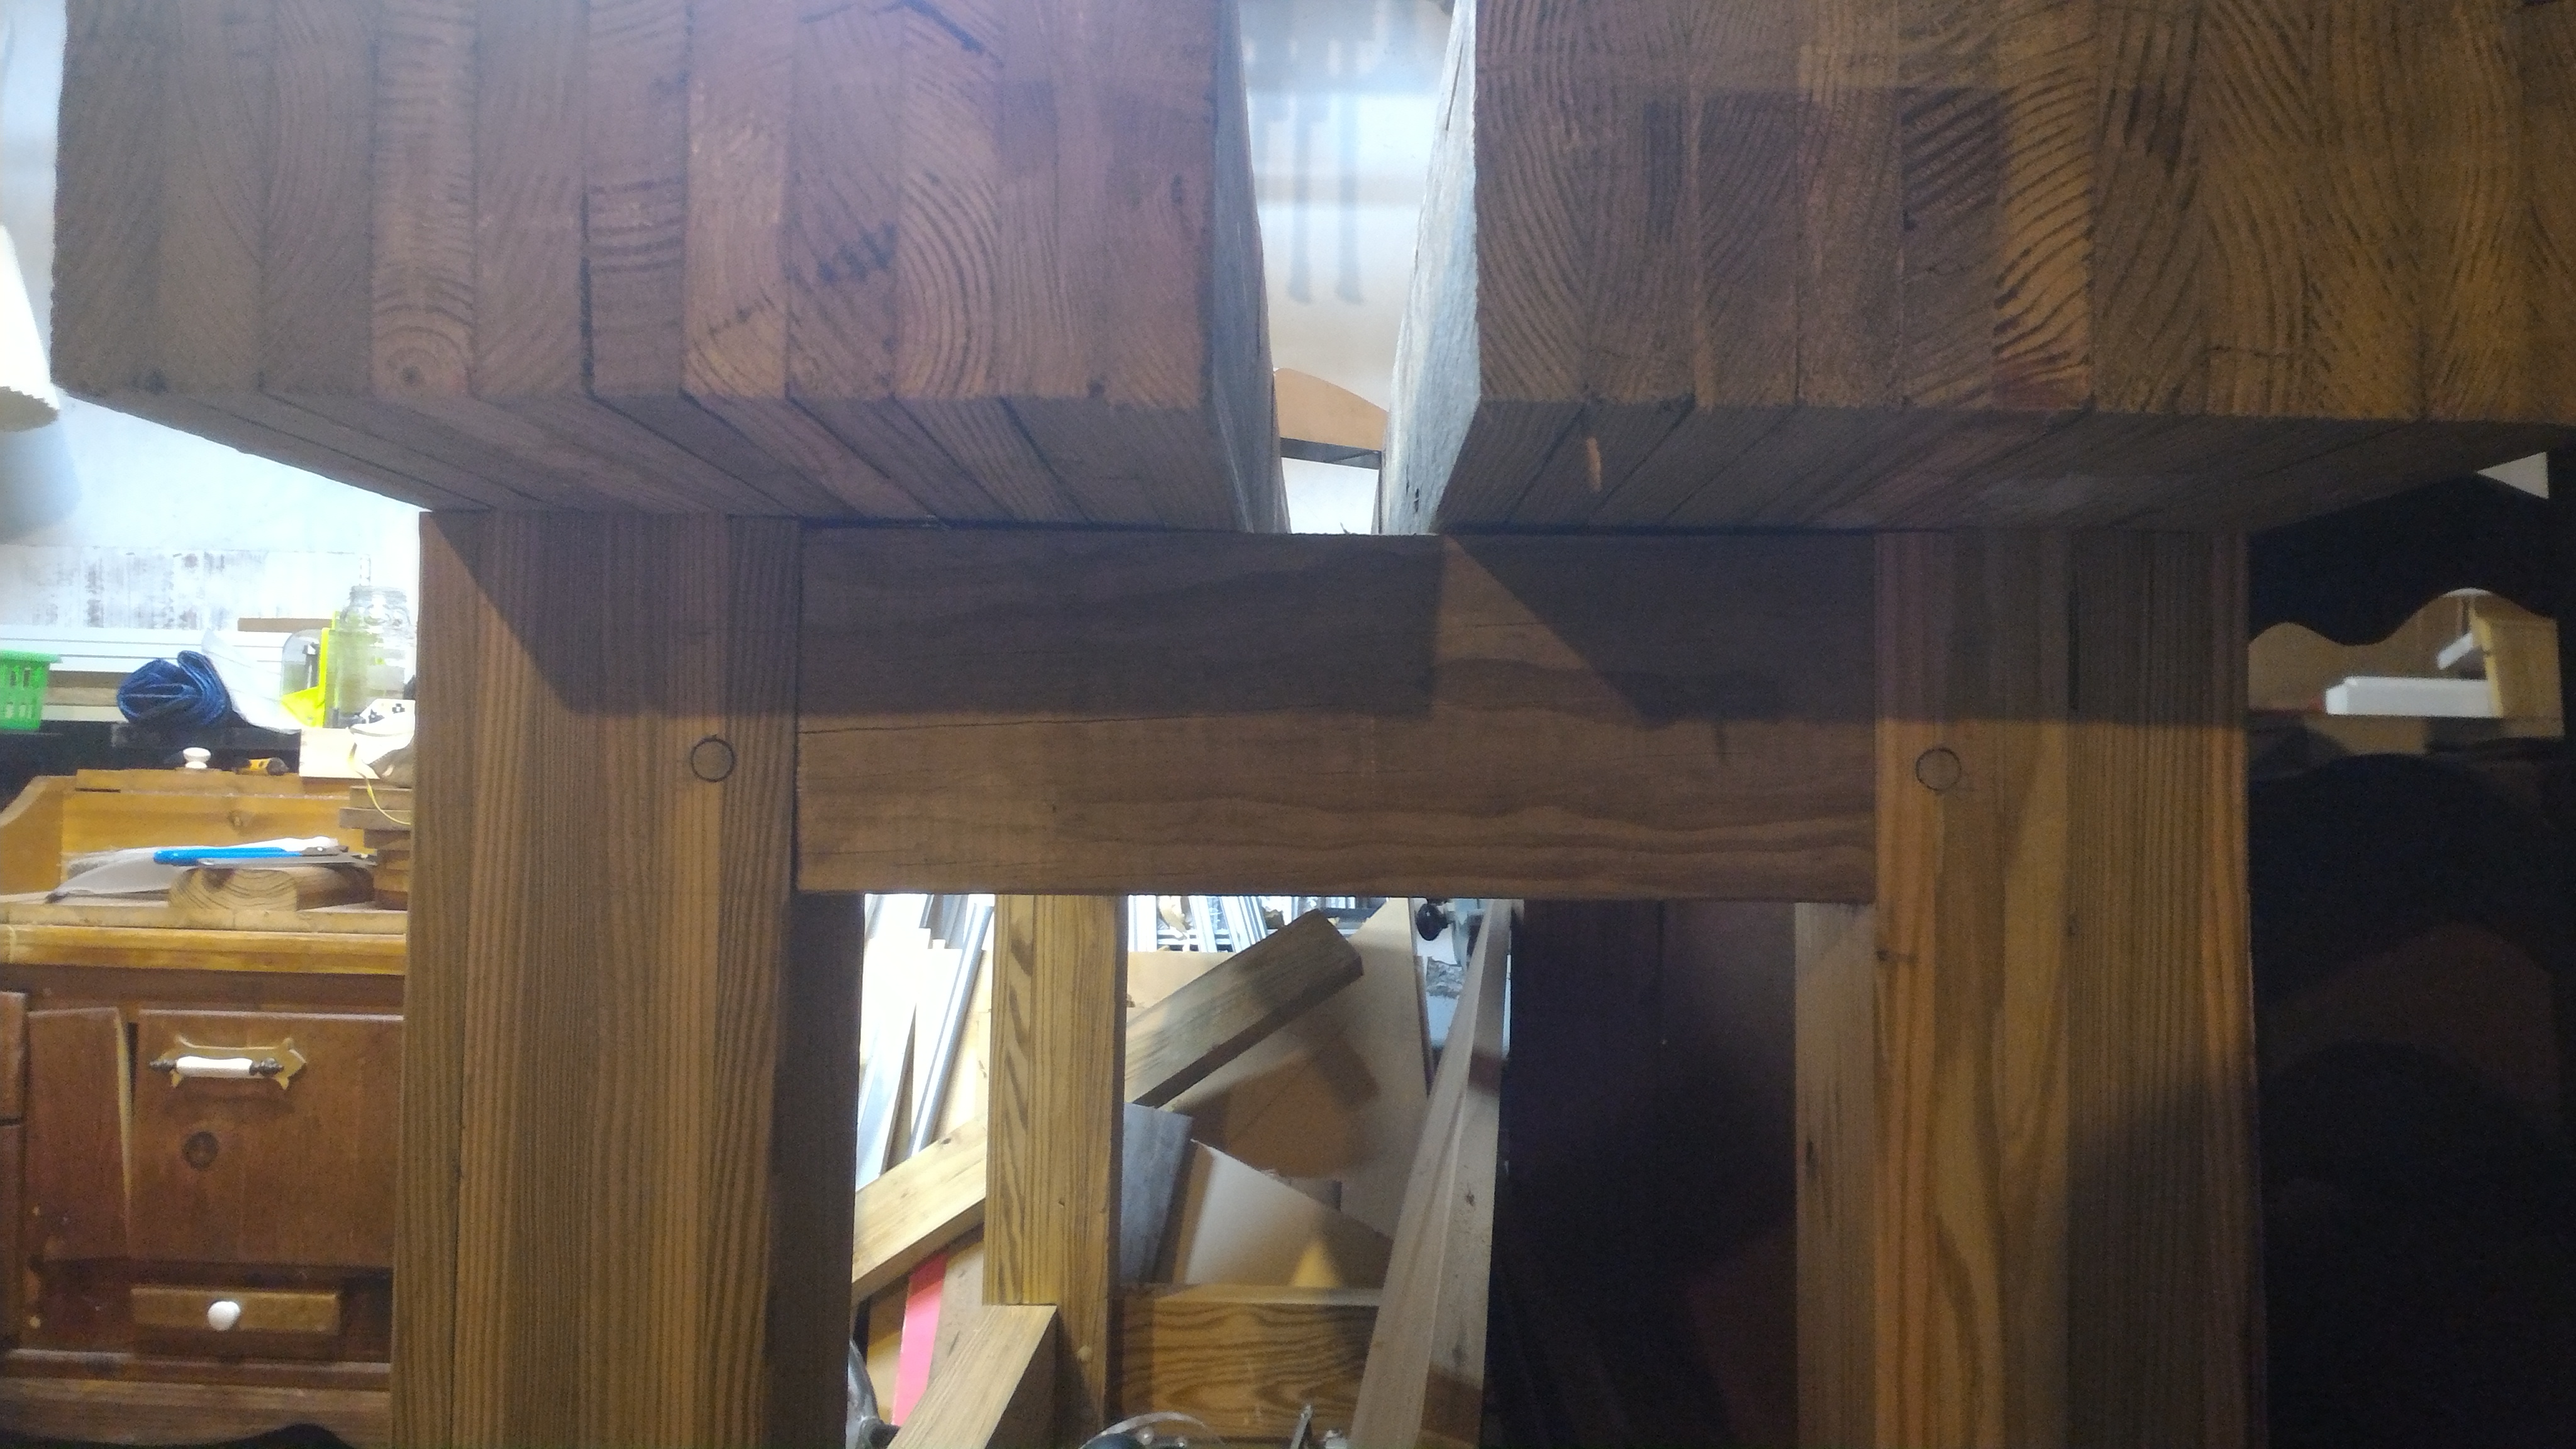
For reference, to help you visualize the end result as I go through the joints in the base, here is a picture of the dry fit of one of the sides. You can see the top stretcher that is meant to support the insides of the two top pieces.
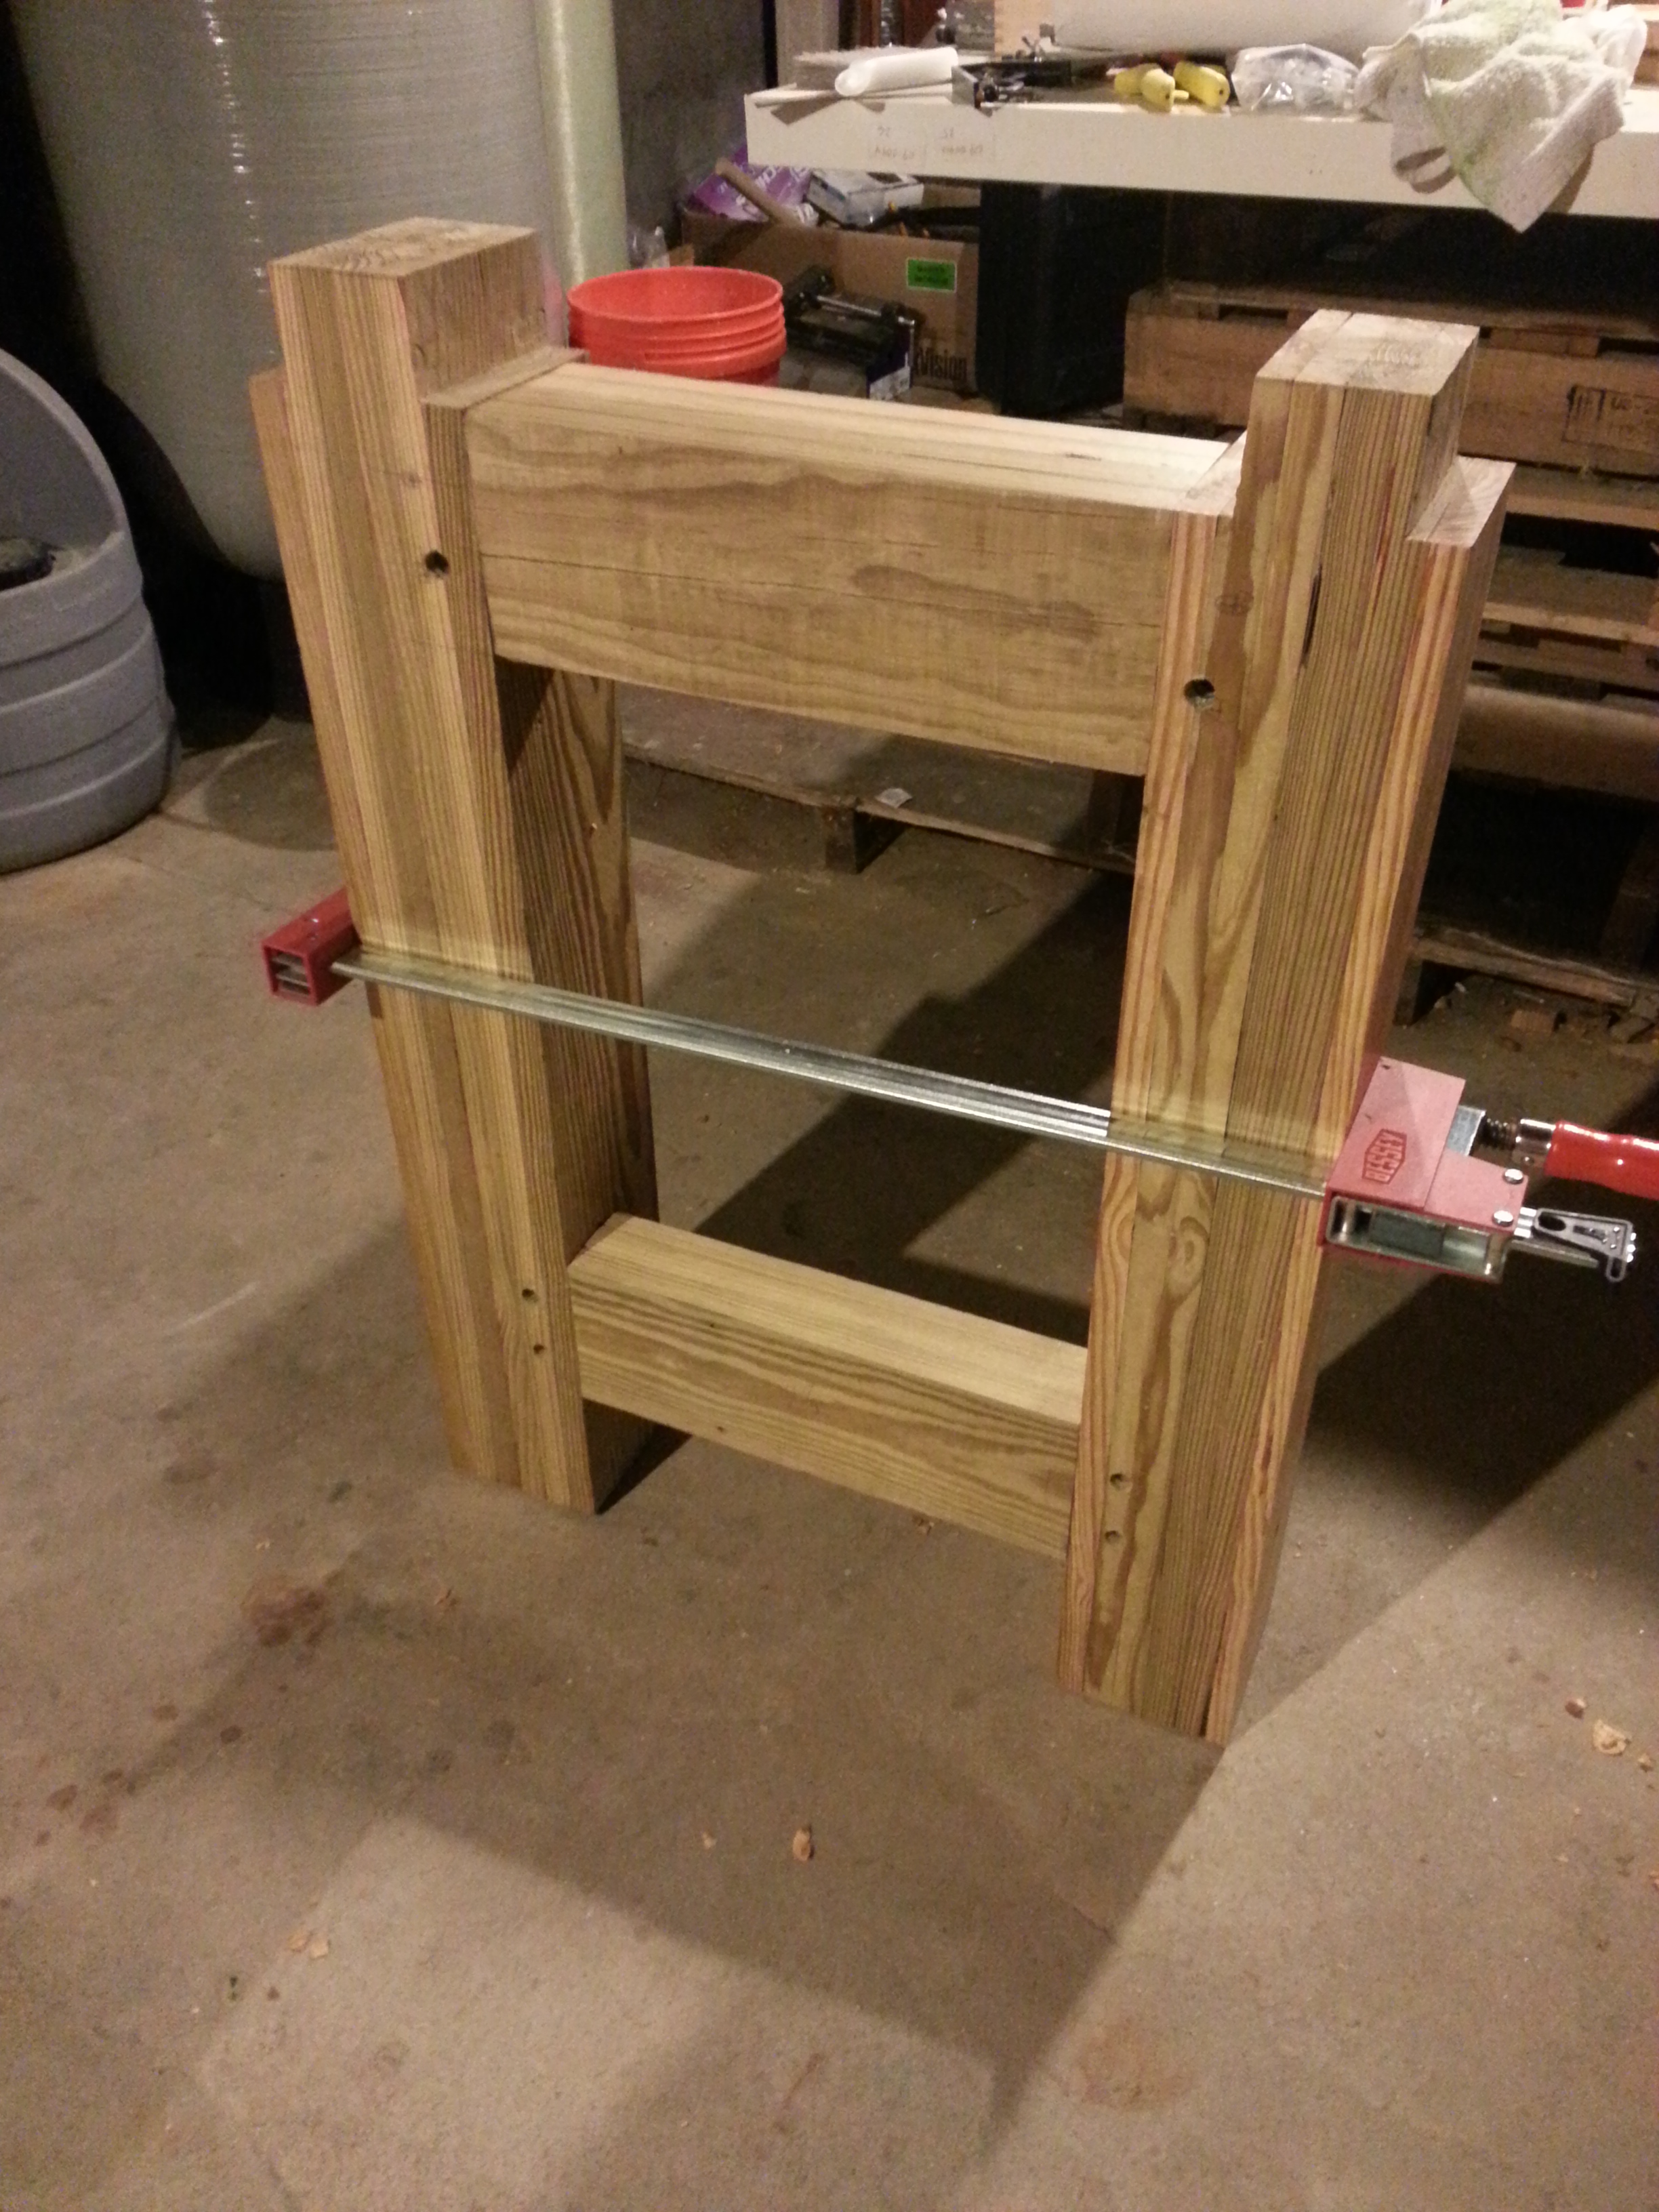
The joints for each stretcher were pretty simple mortise and tenons. I also learned something recently that, had I known upon embarking on this project, would have guided me to make my tenons thinner with more shoulder on all 4 sides:
Mortise and tenon joint strength comes from the surface area of long grain gluing, not the width or thickness of the tenon itself.
This means (to an extent) that a thinner tenon has just as much holding power as a thicker tenon of the same length.
Increasing the shoulder size would have increase that racking strength of the base as well. As built, the tenons only had a shoulder on two or three sides to enable me to make the largest tenon possible (which I now know to be a misguided assumption). This will theoretically allow the workbench to rack in the directions that lack shoulders.
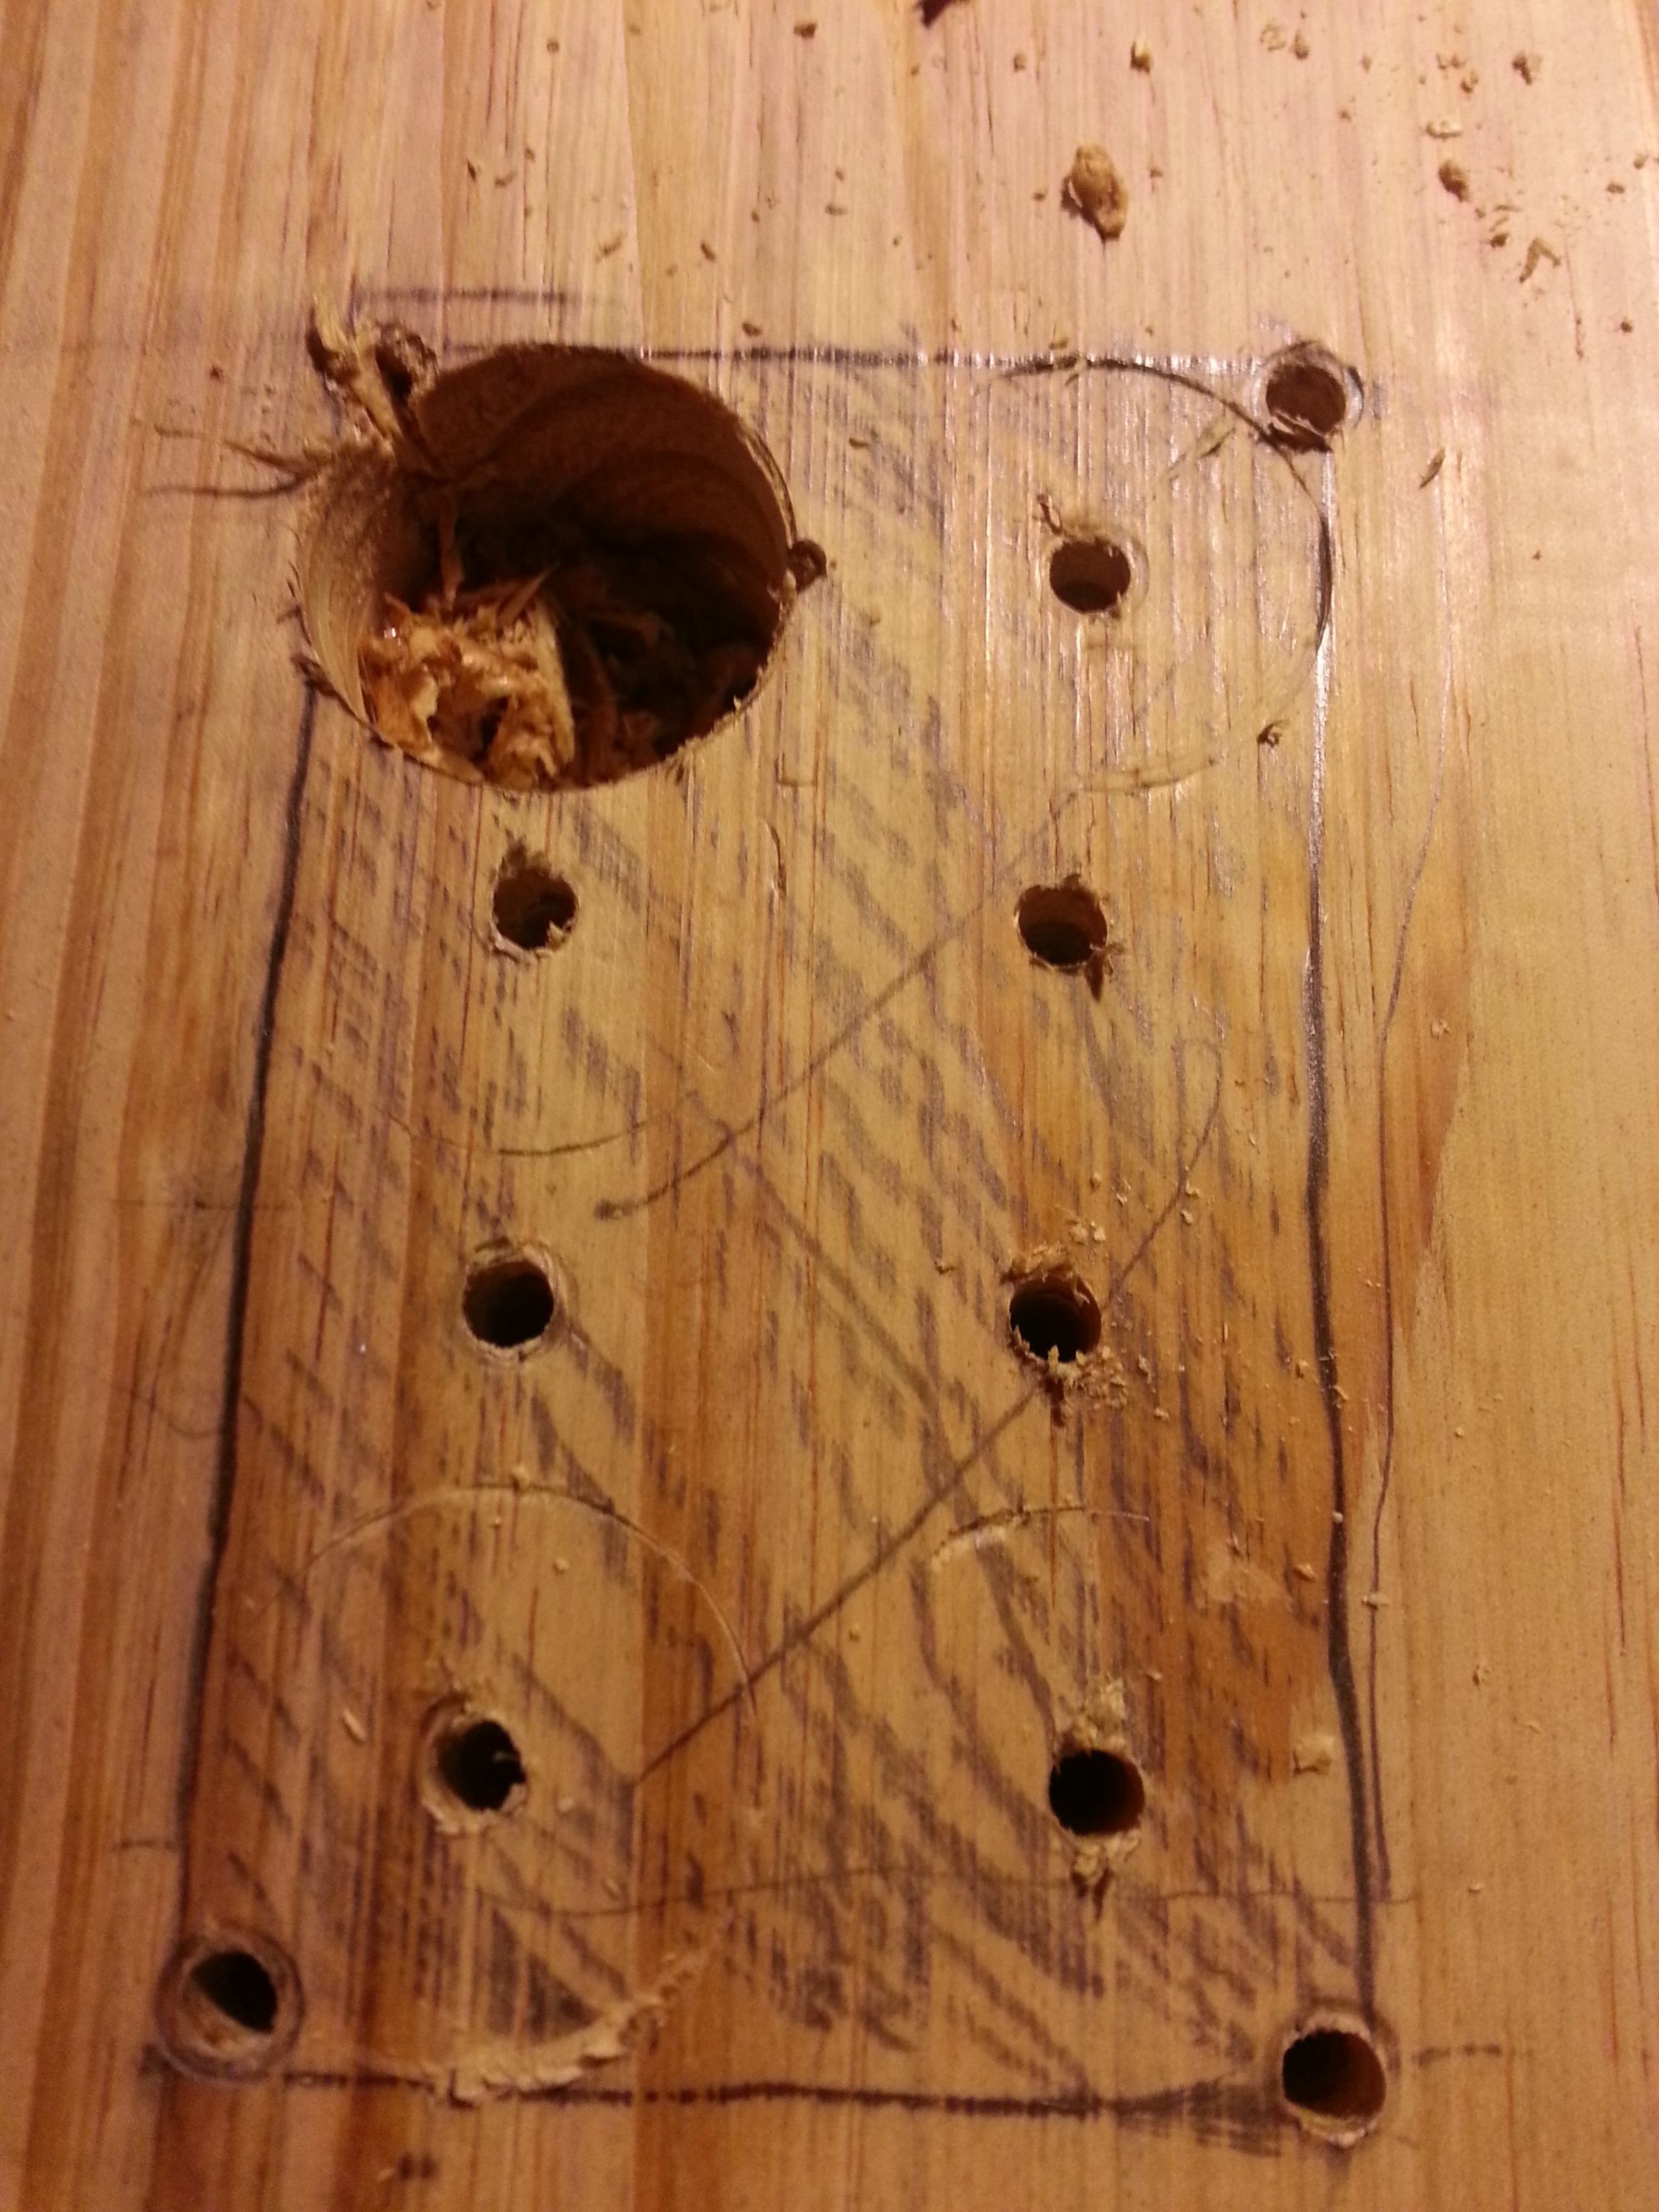
Here is the mortise for one of the top stretchers, where the only shoulders are 1” on the outside and 1” on the top. The tenon is flush with the stretcher along the bottom and inside (toward the center of the bench).
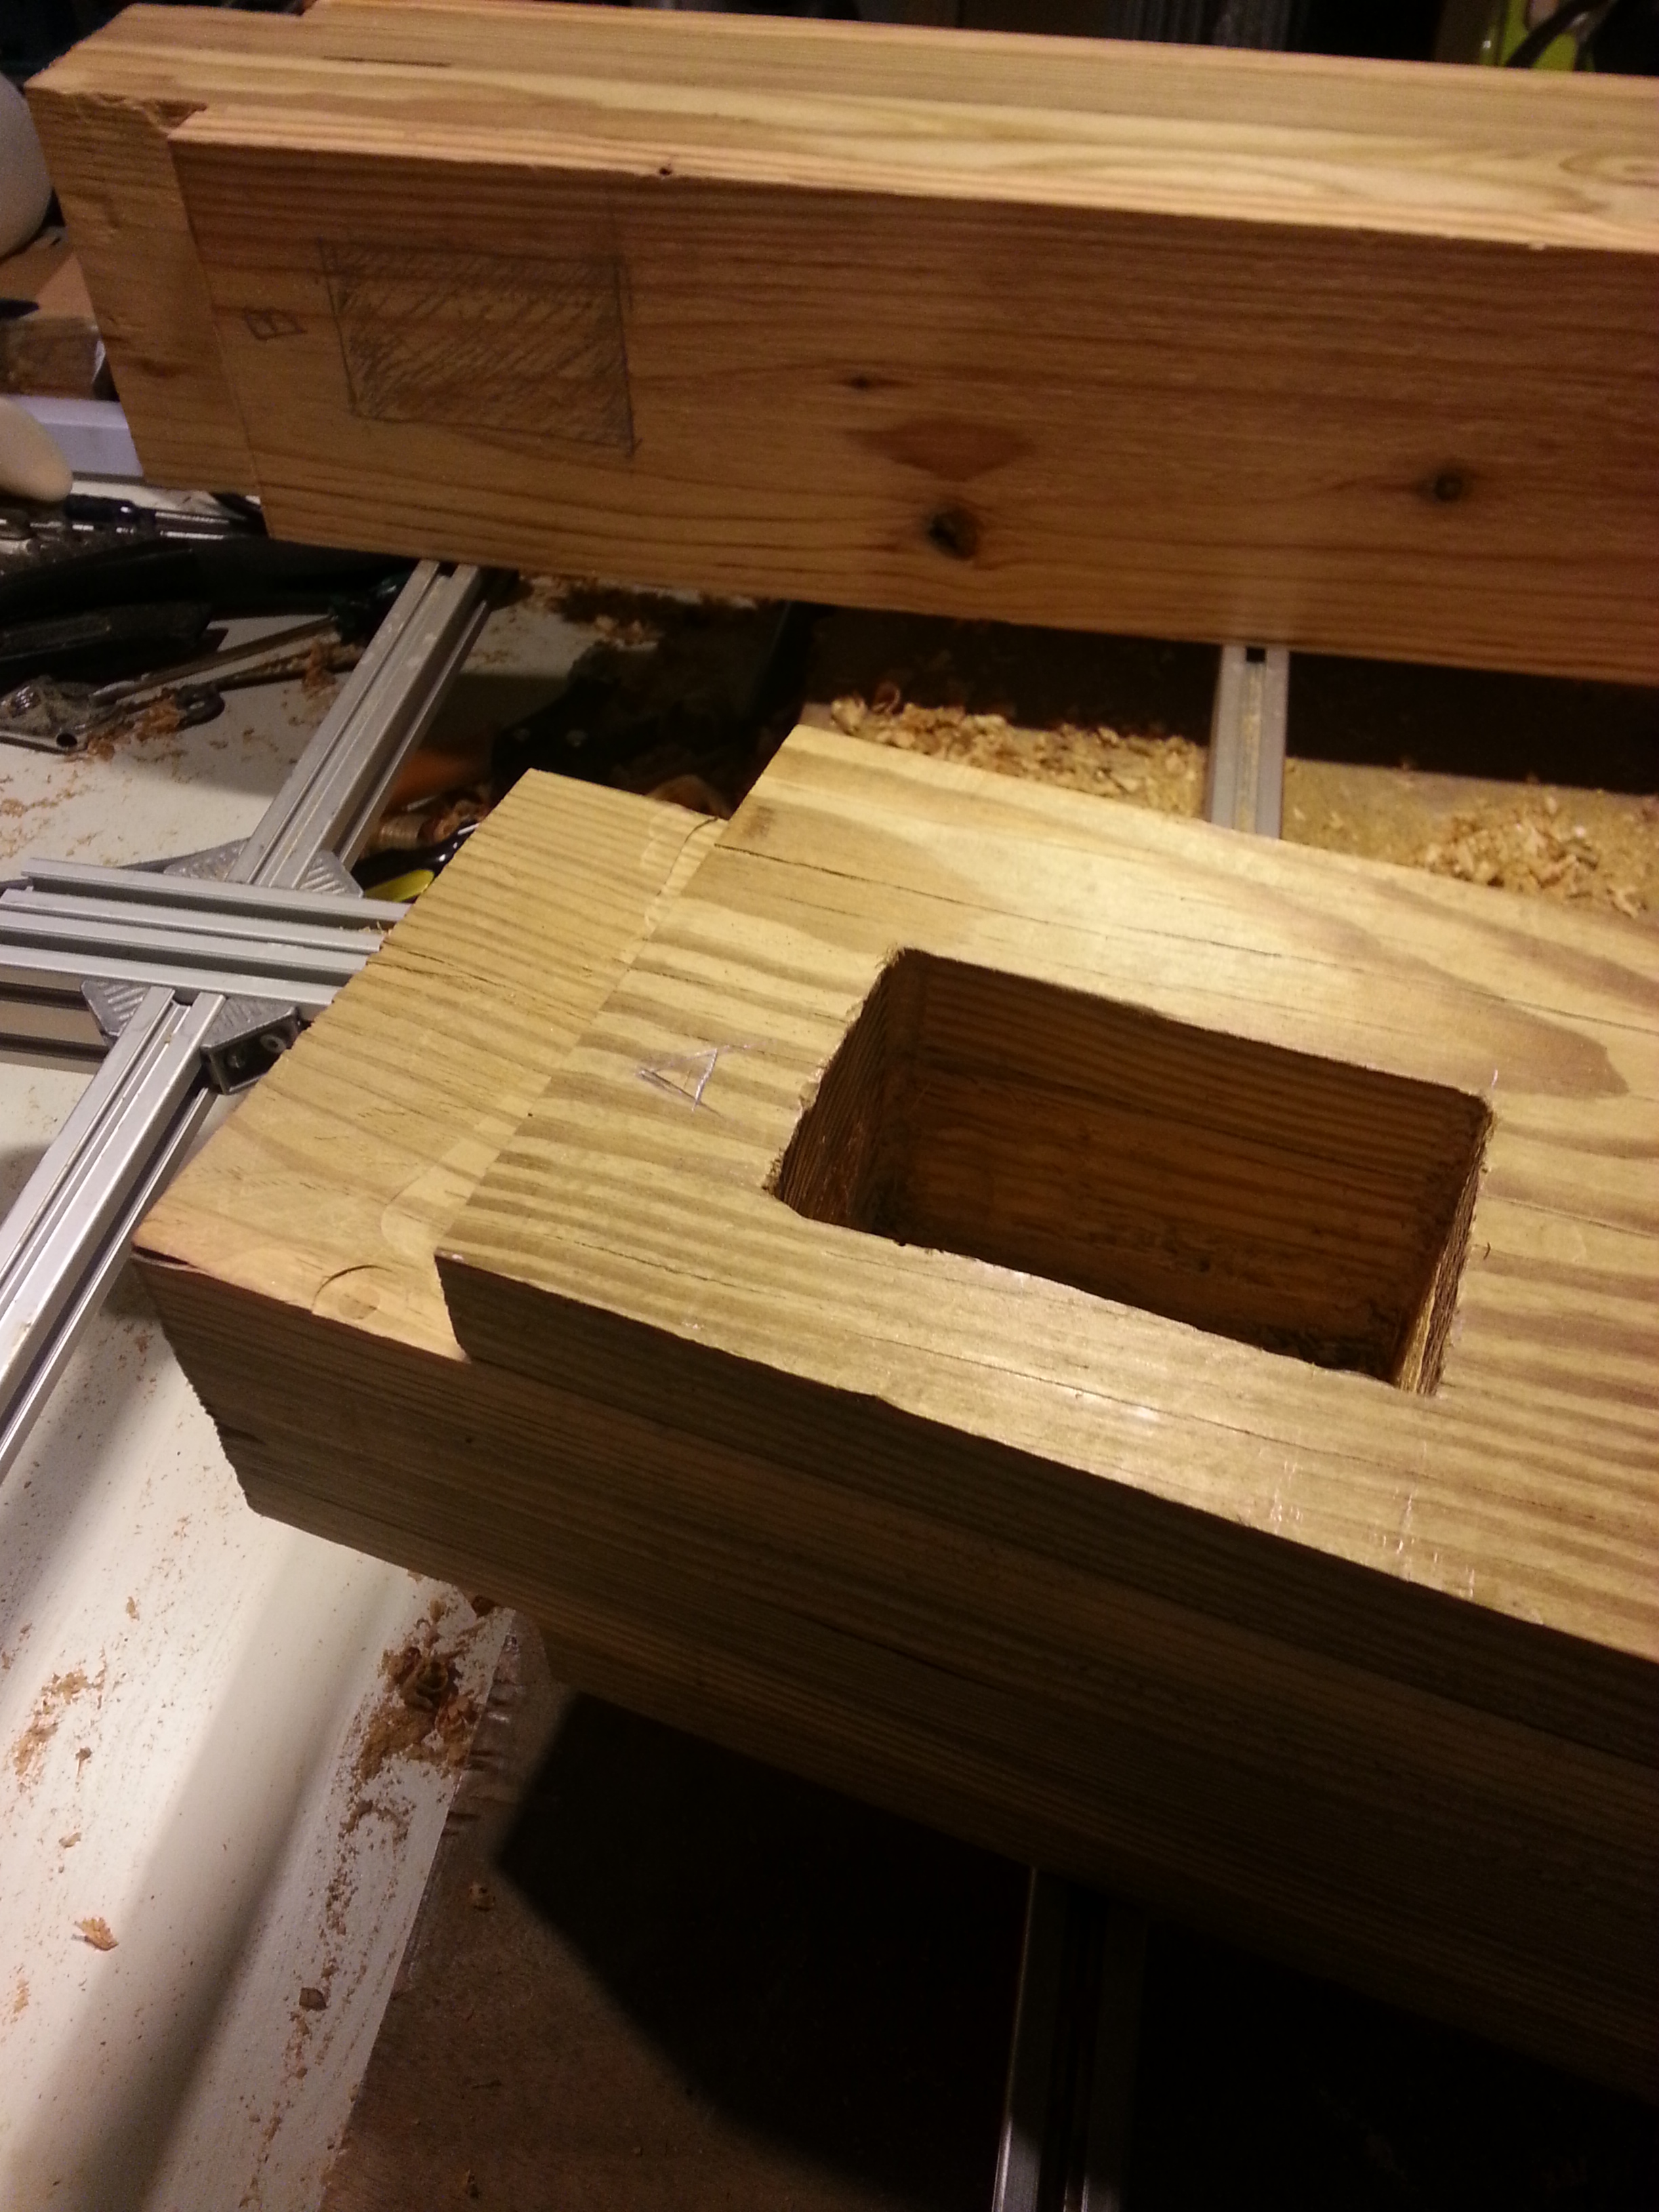
I will also note that chopping out the waste from one of these mortises (let alone twelve!) is quite the tiring task. I also don’t have a drill press so all these drill holes to remove the majority of the waste was done with my handheld drill. I had sore shoulders for a few weeks as I was cutting all these mortises.
Once all the joints were cut, I wanted to draw bore them and not glue them, just in case I screwed up…I could drill out the pin and take the joint apart. Looking at it now, I’d say it’ll hold together for a good long while.
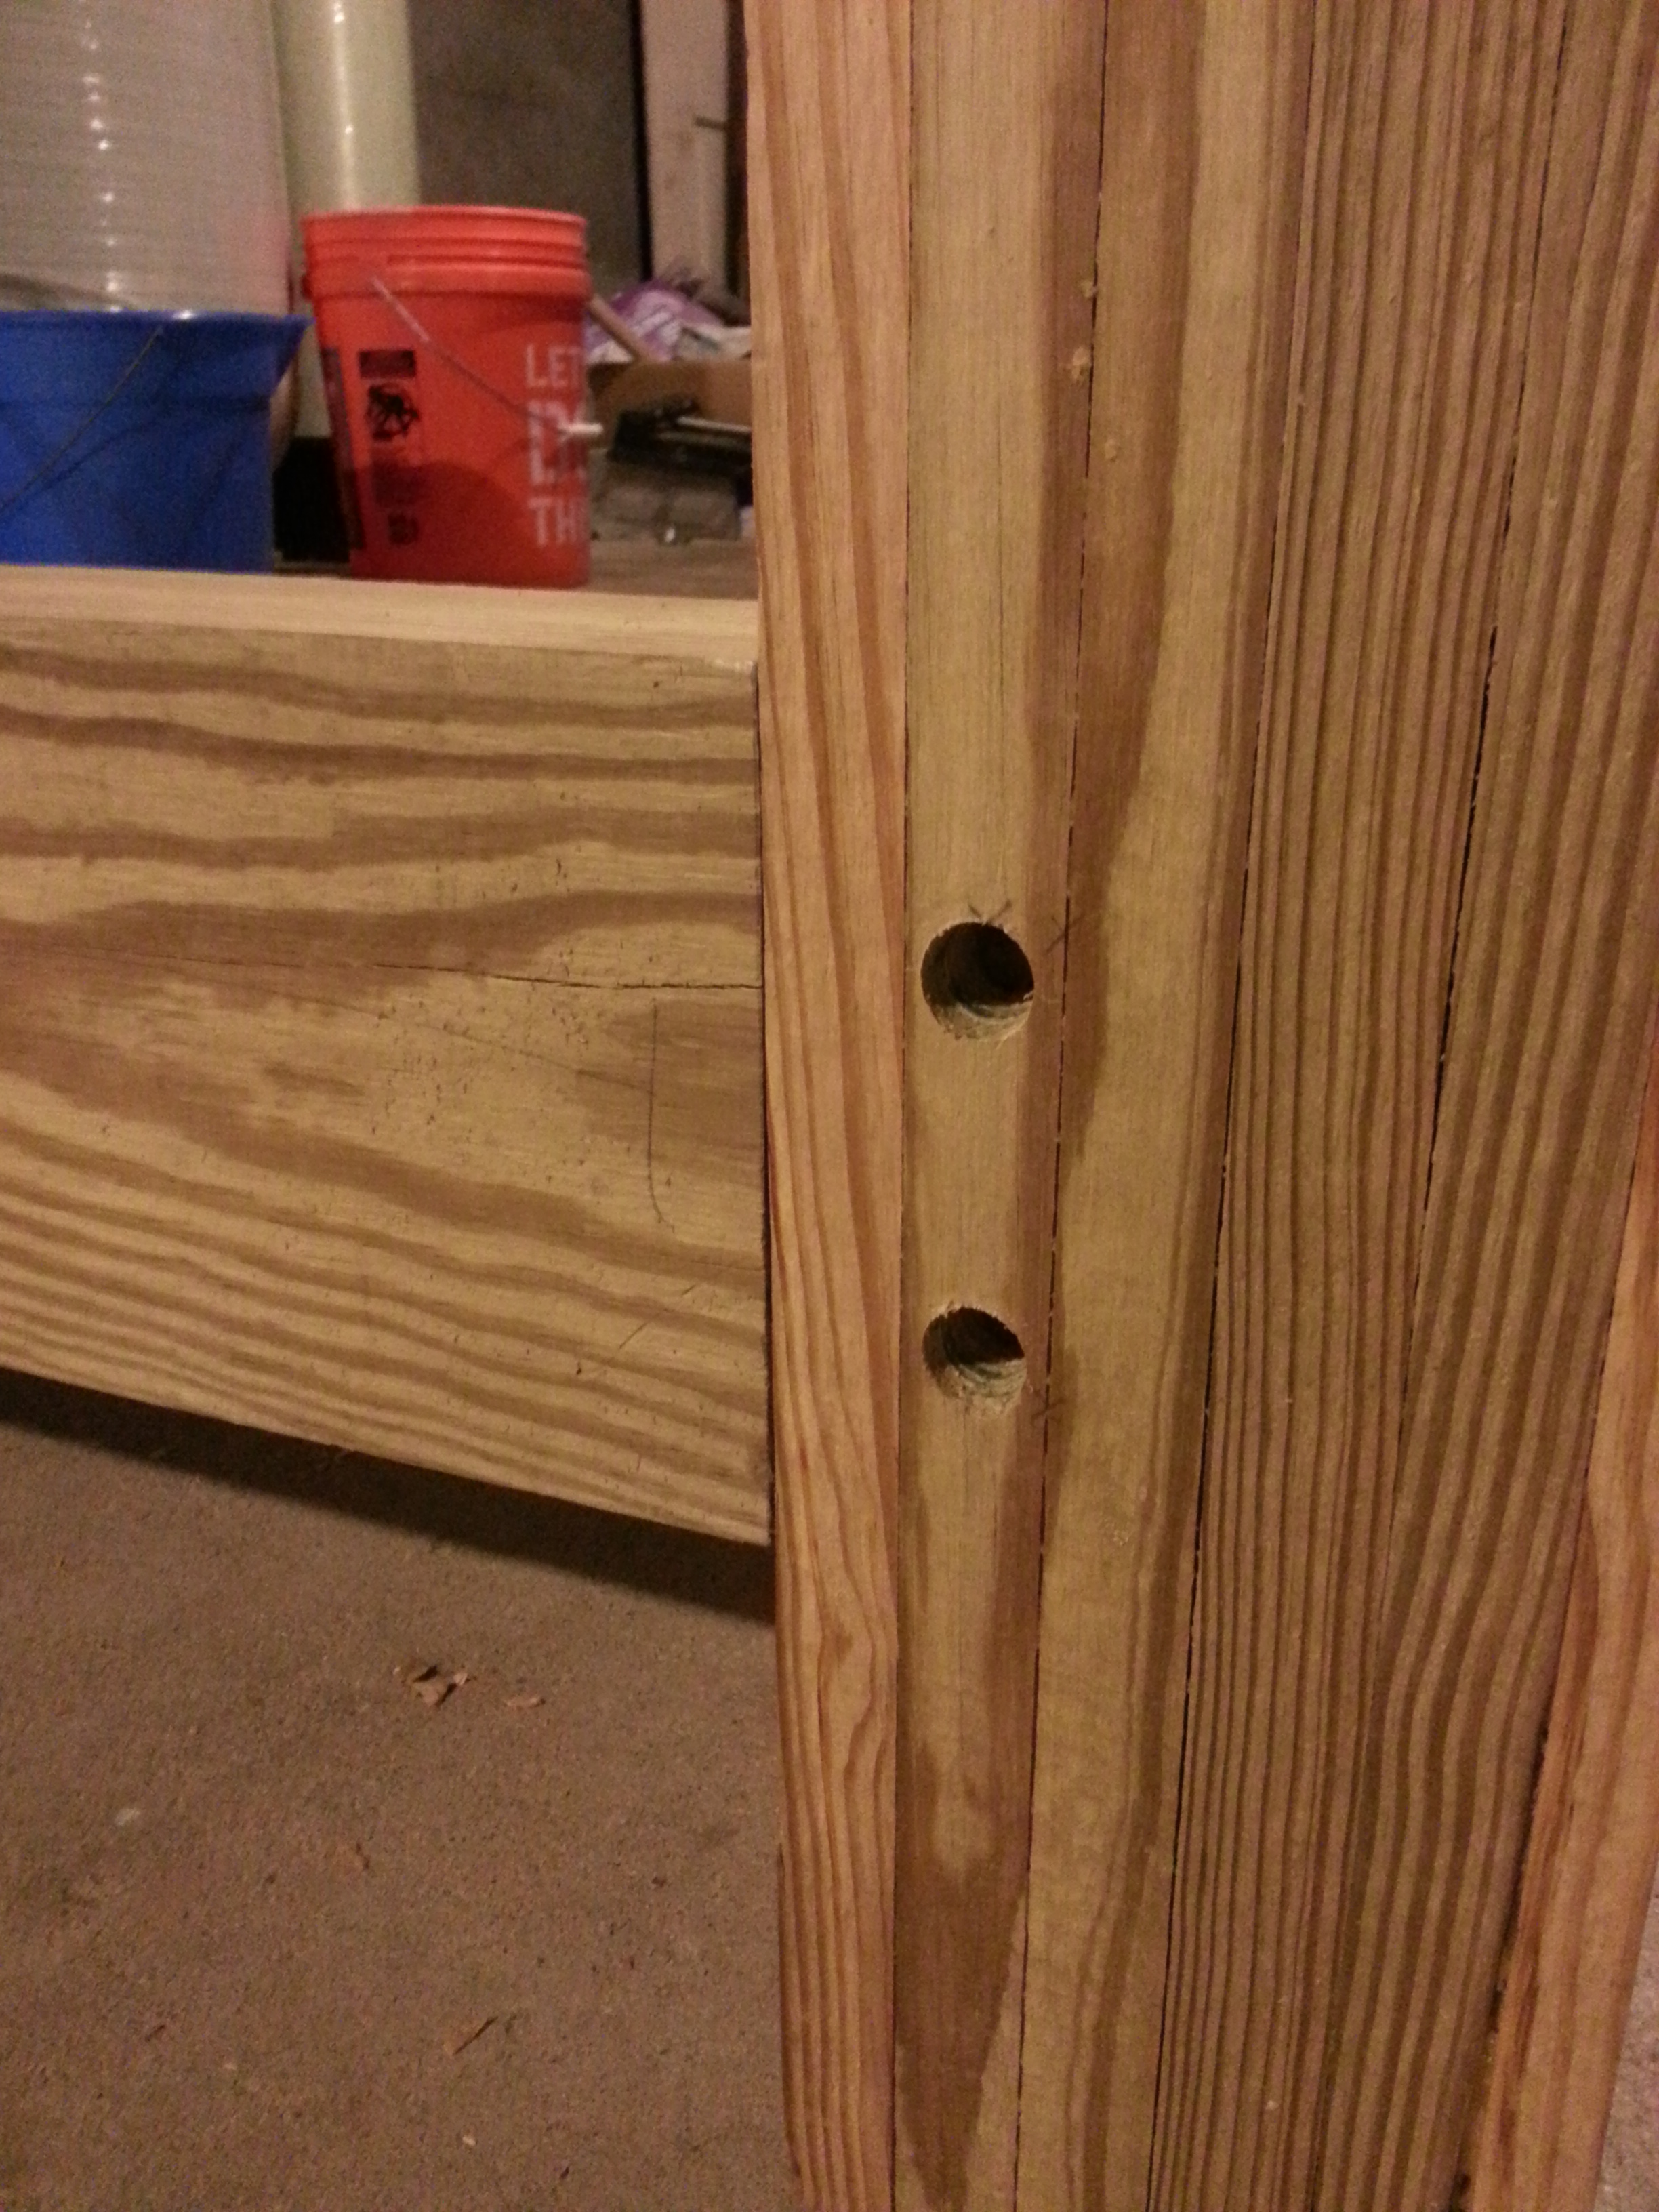
You can see the drawbore holes in the first side dry fit photo, and also in this one:
For the drawbore pins, I didn’t want something that was too strong when compared to my pine, so that the pin wouldn’t rip out the drawbore hole as it pulled the joint tight, so I went with poplar. The local home store had ½” poplar dowels that were perfect for the job.
To drawbore these joints this is the process that I followed:
- Put sacrificial stock into the mortise to prevent tear out
- Drill half inch hole completely through the leg, passing through the middle of the sacrificial “tenon”
- Dry fit real tenon in place in the mortise
- Mark the drill mark through the hole I drilled in step 2
- Pull the tenon out, make the ‘real’ drill mark about 1/16” towards the shoulder
- Drill just the ½” tenon drawbore hole on the modified mark on the tenon
- Make a drawbore pin
- Take the dowel, cut it 1-2” longer than the length of the entire hole through the leg
- Narrow one end with your utility knife or chisel, almost as if you were sharpening a pencil. This allows the pin to slide in the tenon even though it’s offset by 1/16”
- Insert the tenon back into the mortise
- Mallet the pin through the drawbore hole (watch as the joint tightens up…that’s my favorite part!)
- Once enough of the pin has extended through the hole to fill the drawbore hole, flush cut both ends and voila! One drawbored mortise and tenon!
Since my tenon shoulders weren’t perfectly square, the squareness of the side would tend to go out of whack when I tightened up the joint. Because of that, I needed the entire side dry fit as I was hammering the final drawbore pins into the joints, to make sure it would all fit in the end. It was also beneficial because it let me clamp the joints as I was drawboring which relieved a bit of the strain on the drawbore hole in the tenon as I hammered it through.
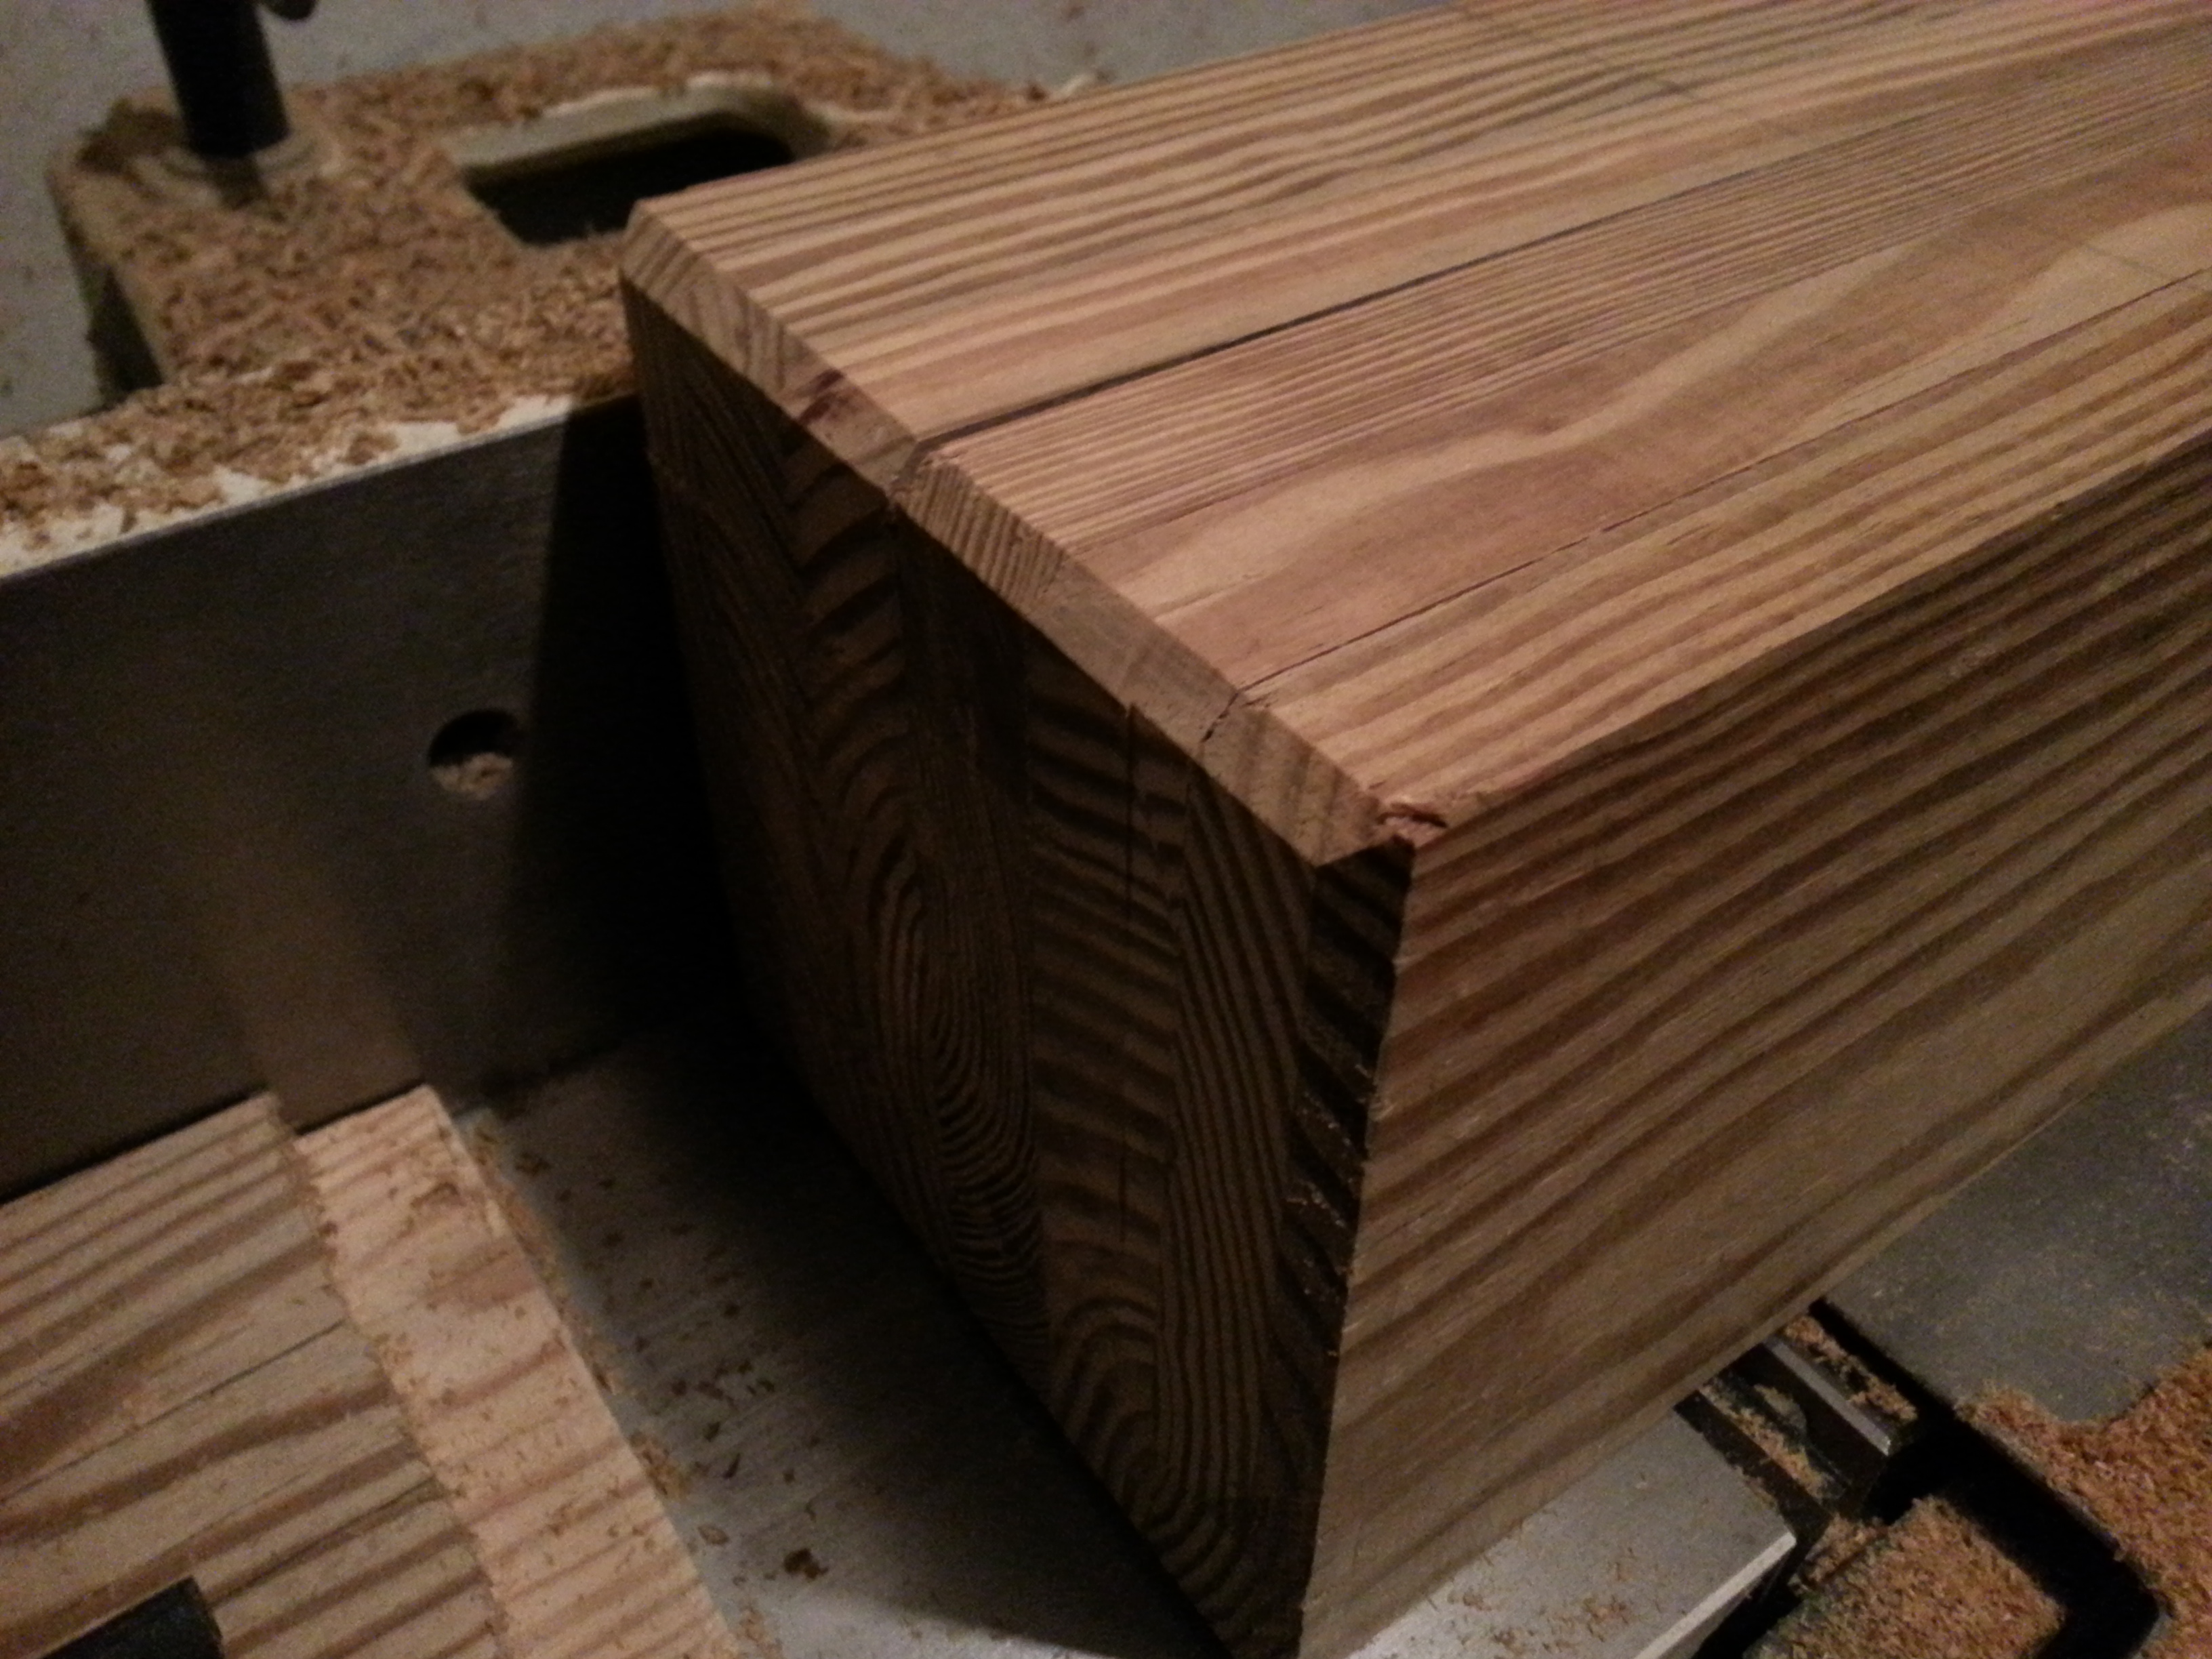
Here are a couple pics of the joint after drawboring. I didn’t make all my pins long enough, so I had to cut some of them flush where there was still a taper on the end. This means that what you see in the hole is a little gap all around the pin inside the hole. Bummer. At least there’s always next time. It also wasn’t enough of a big deal to cut more pins, partly because it was structurally sound, but mostly because I didn’t want to take the pin out and risk ruining the joint.


Assembling the Base
After each side assembly was done, I was able to dry fit the entire base with the long floor stretchers along the front and back. If you look closely at the next photo, you can actually see the bottom right joint still was a bit tight and needed some paring to get it down to size.
Since I want to be able to move with this bench eventually, I needed to make the base come apart, so I decided to use lags to hold the long stretchers in place, rather than glue or drawbore pins.
I drilled pilot holes through the backs of the long stretcher mortises (in the center of each), dry fit the joints, then drilled back through the pilot holes from the other side into the tenons.
Once those pilot holes were drilled deep enough into the tenon, I pulled the tenon out and drilled a larger clearance hole through the leg to accommodate the lag screws I got, and routed out a flat countersunk hole for the washer on the lag screw. I didn’t have a forstner bit large enough for the washers, so had to eyeball it by hand with the router straight bit. They came out ugly in my opinion, but I don’t ever see this part of my bench, so I didn’t really mind. I’ll come up with a nicer way to do this on my next bench, but it works for now.
Gluing the Top
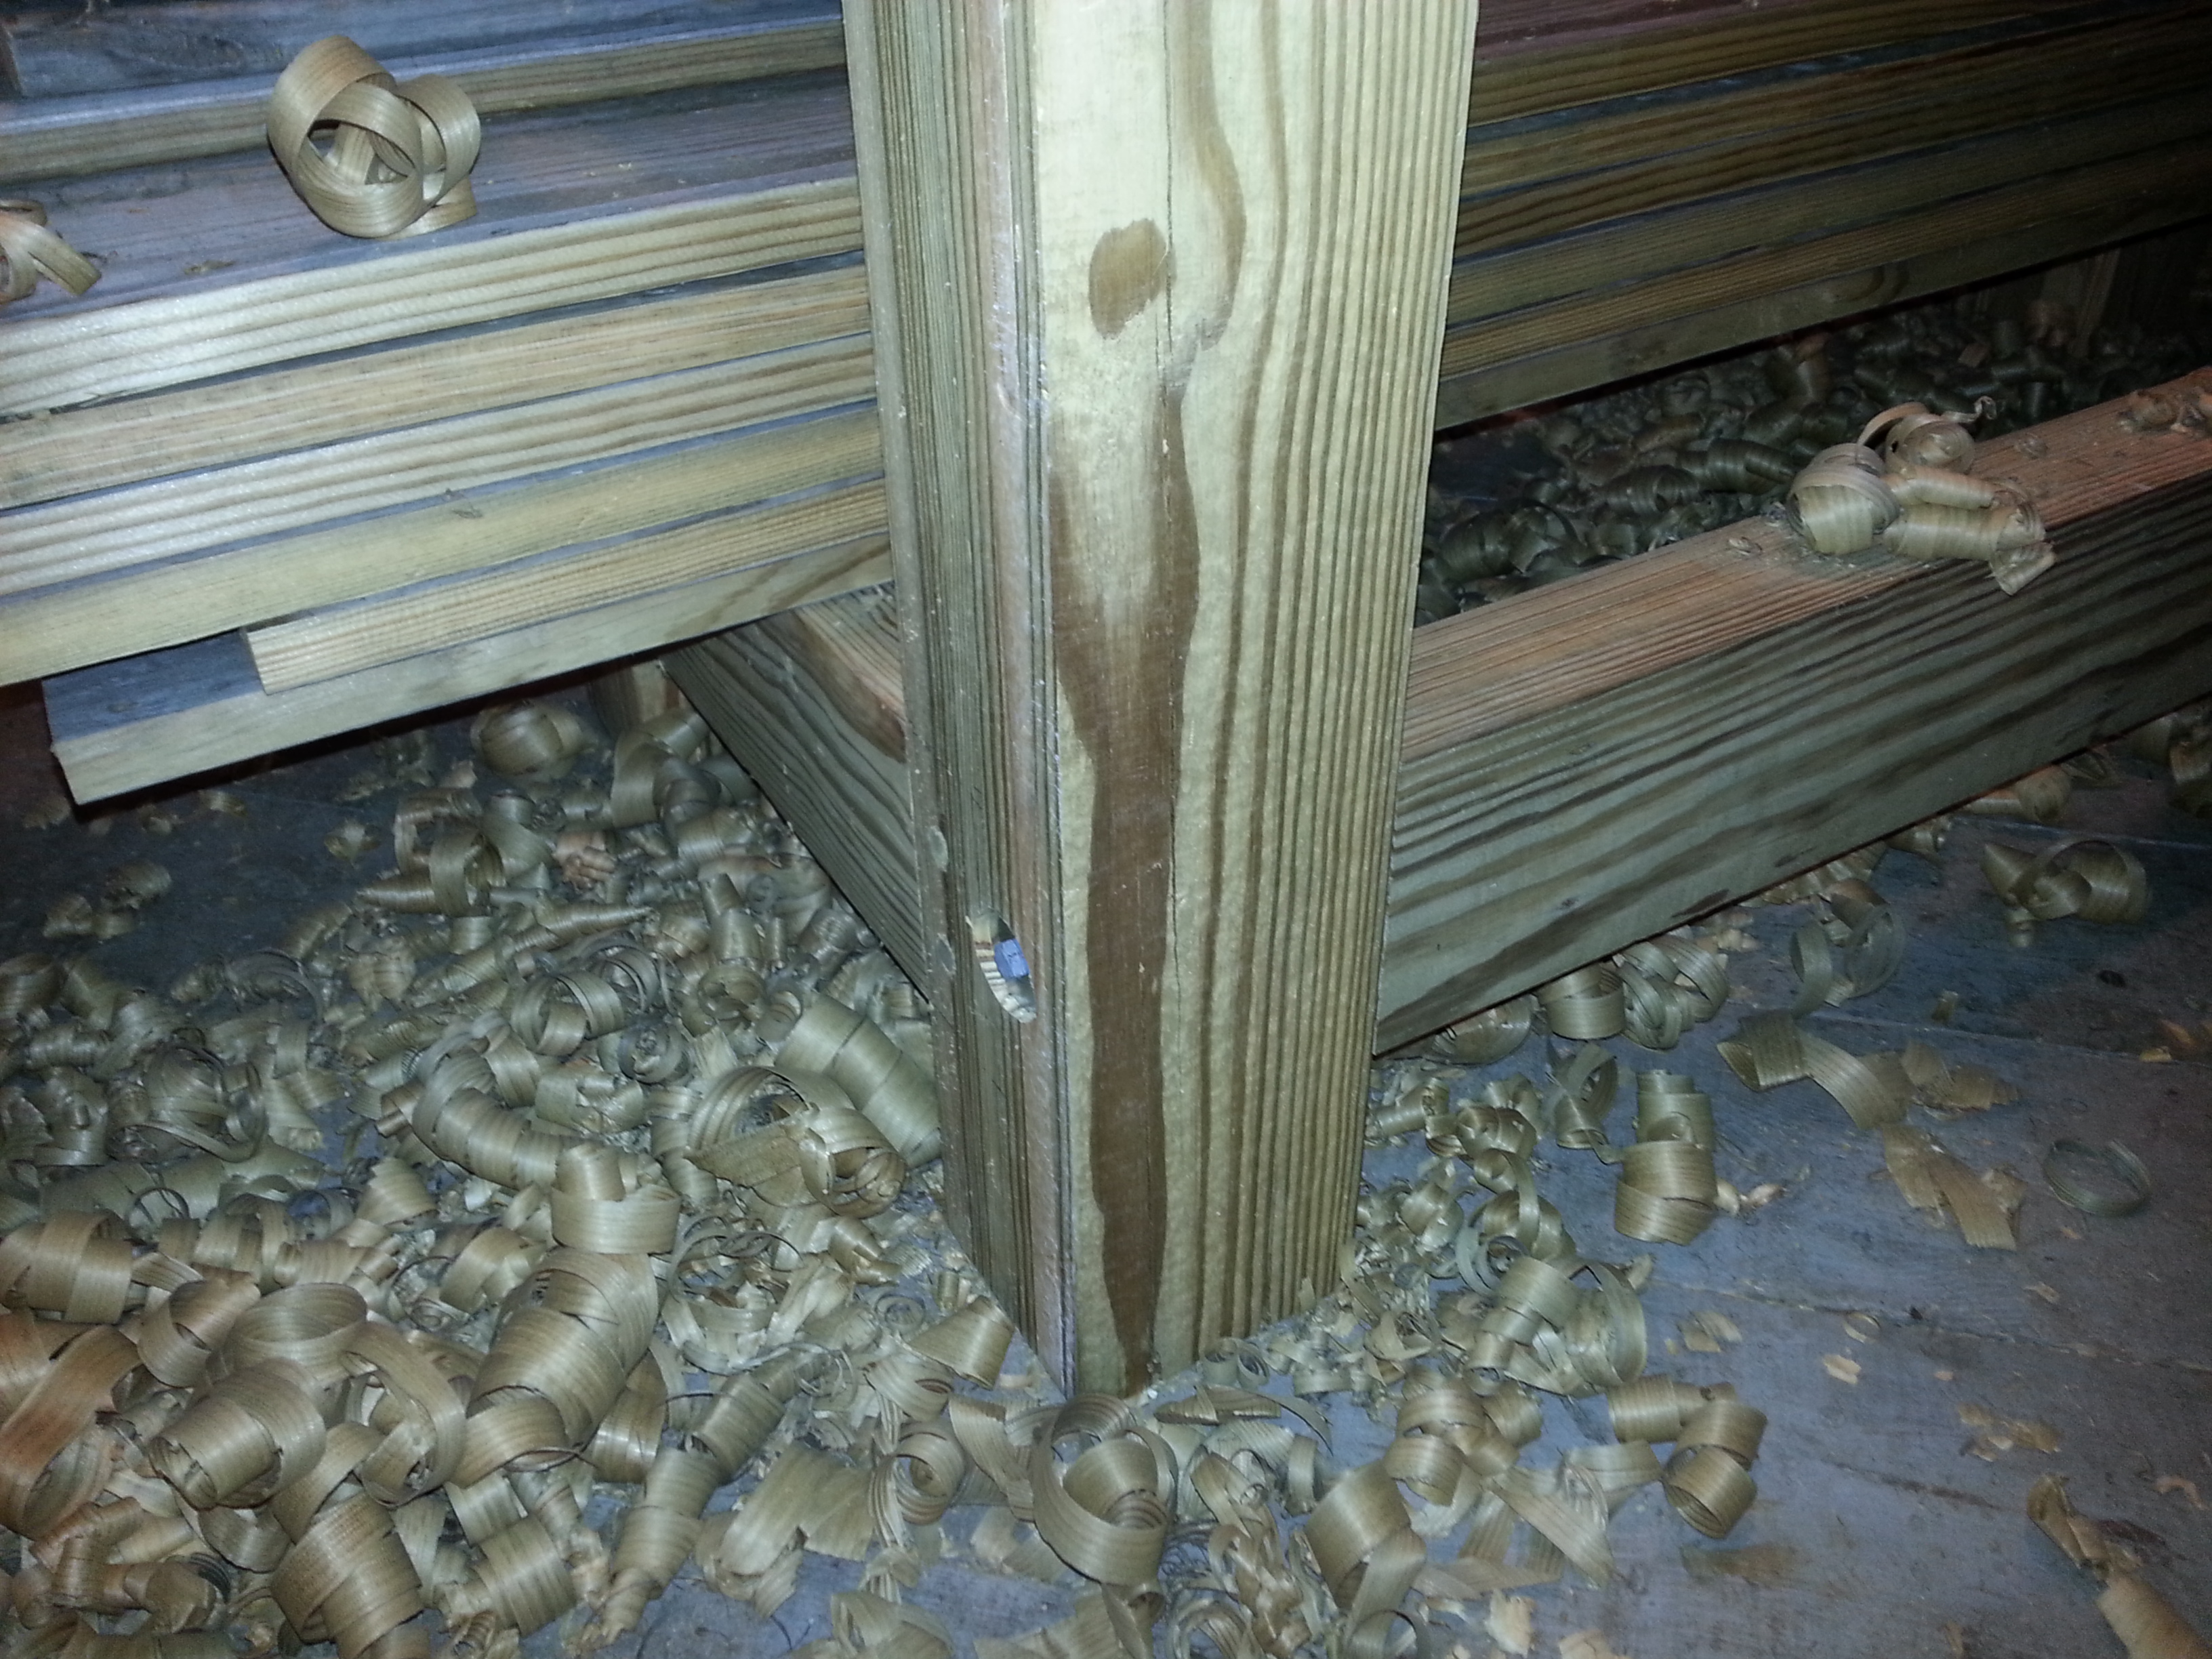
At this point, I had a reasonably functional workbench, at least for edge planing the top boards.
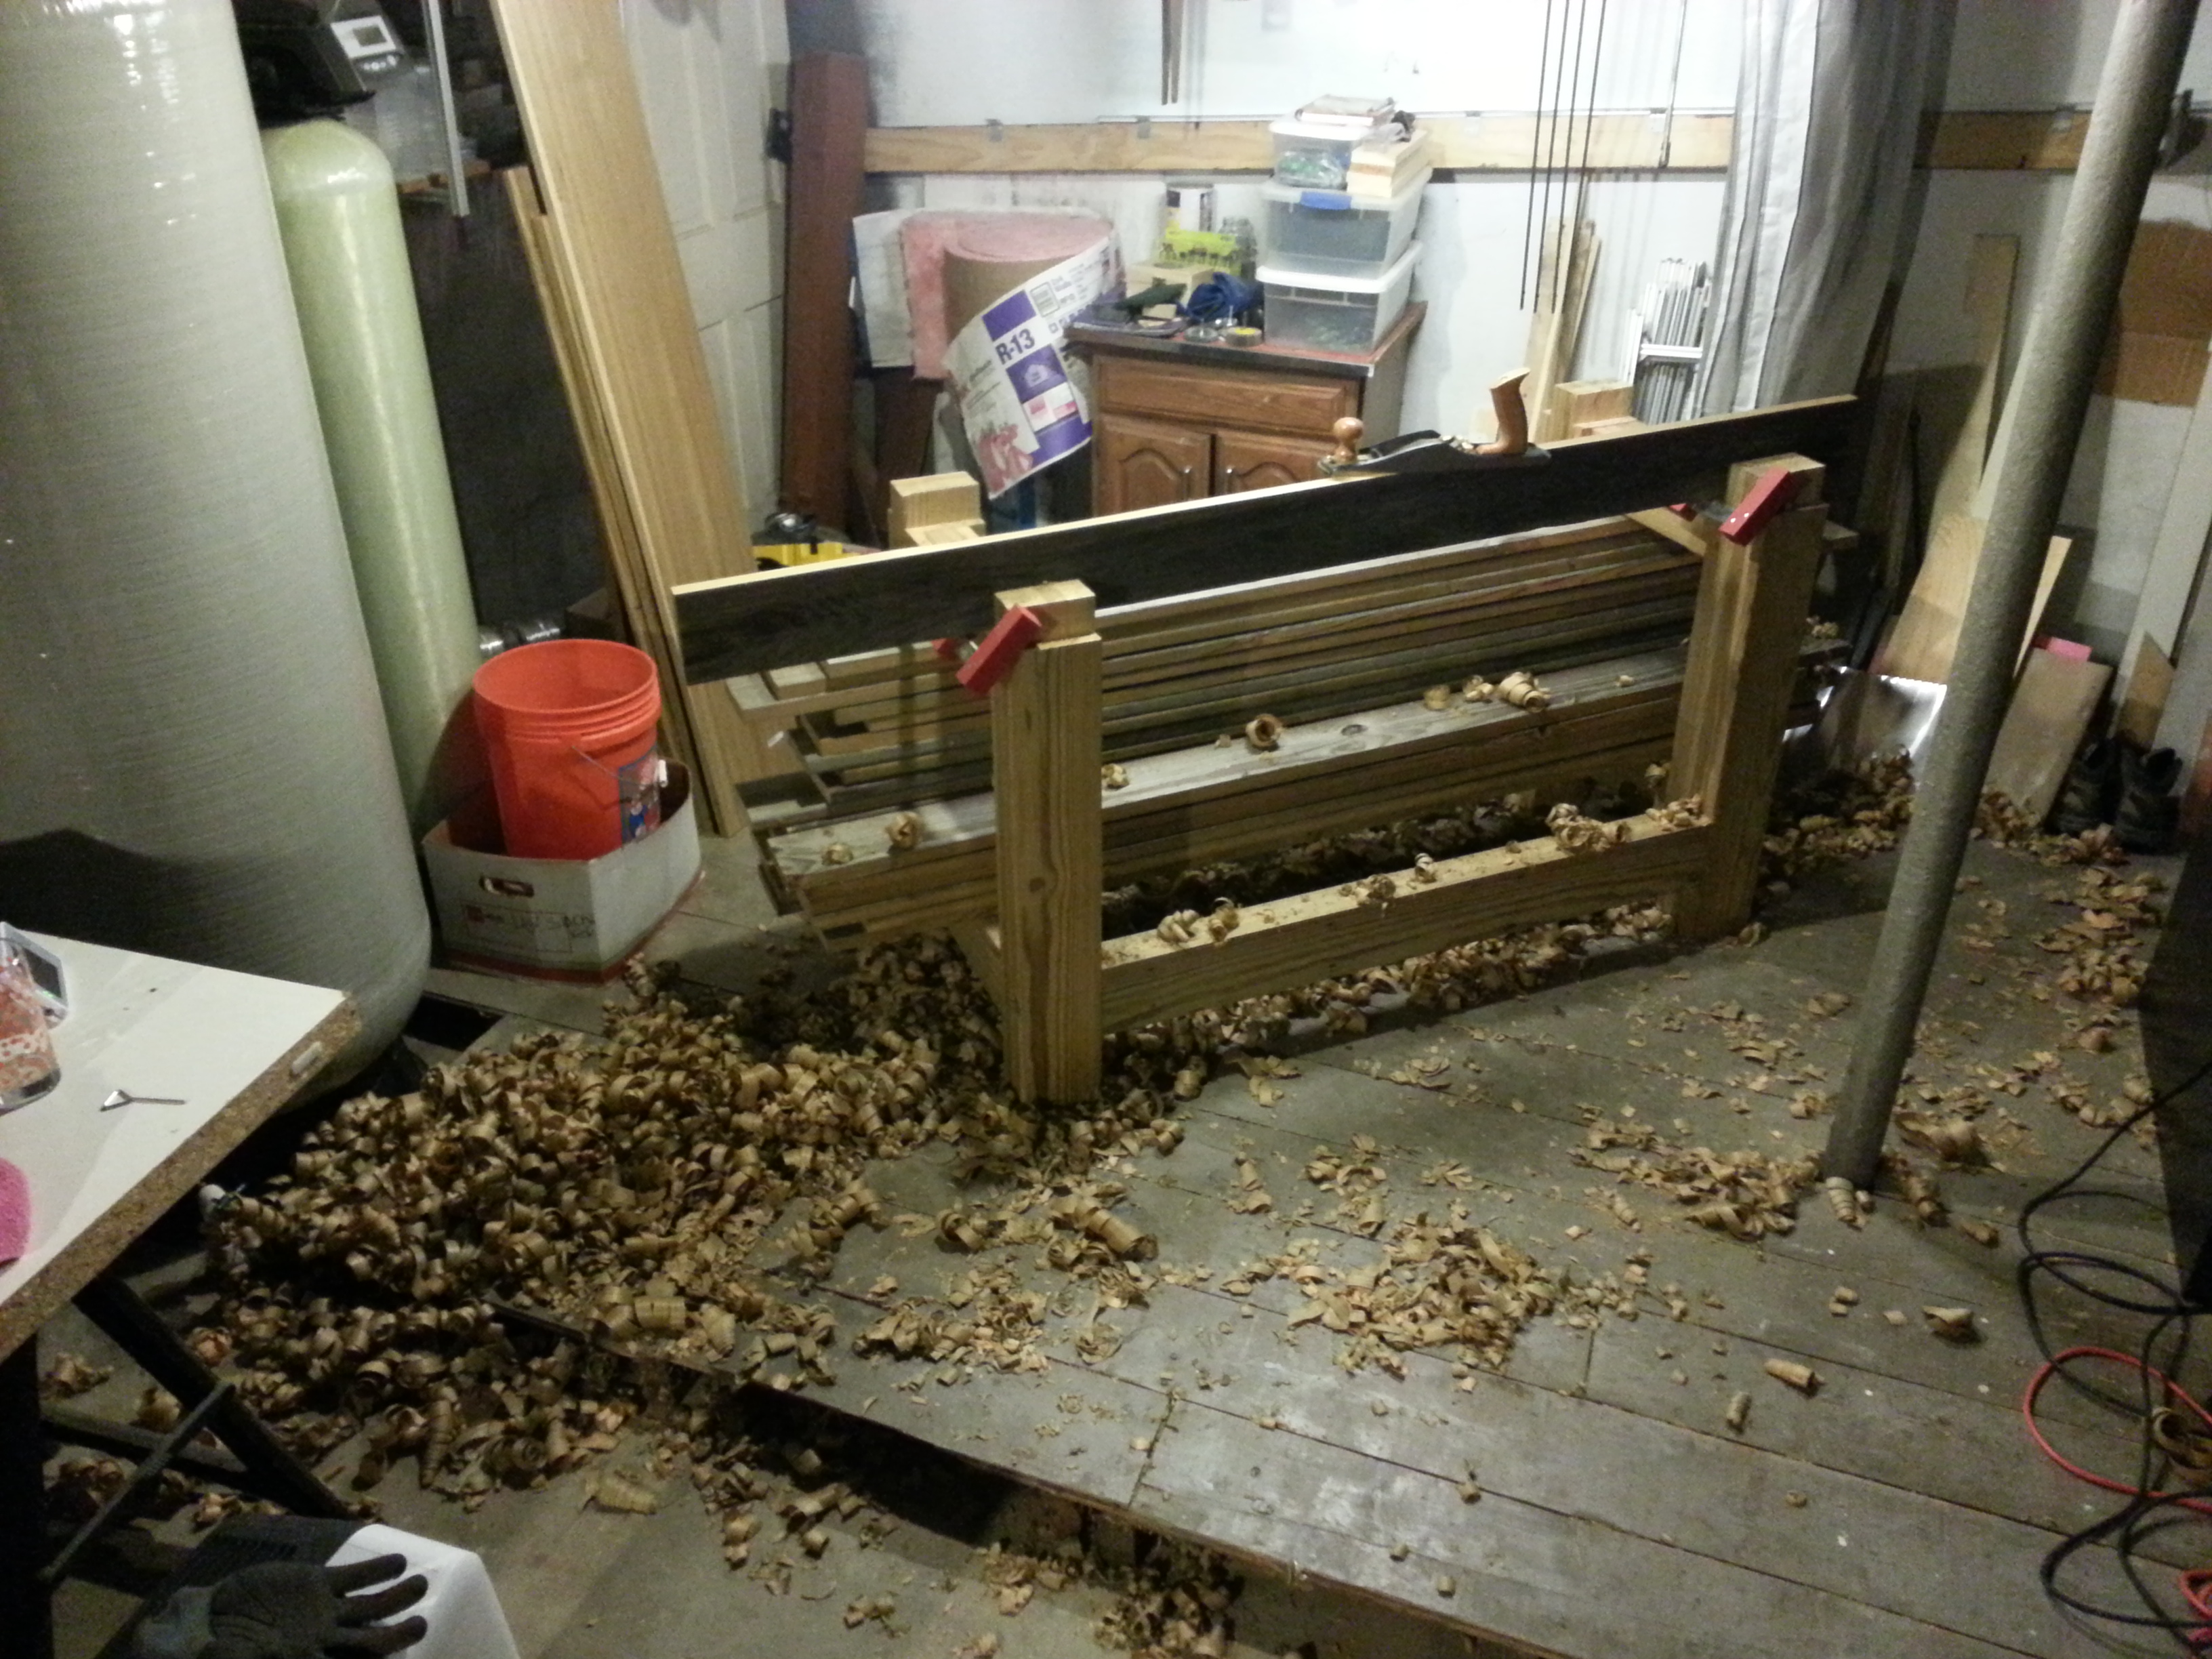
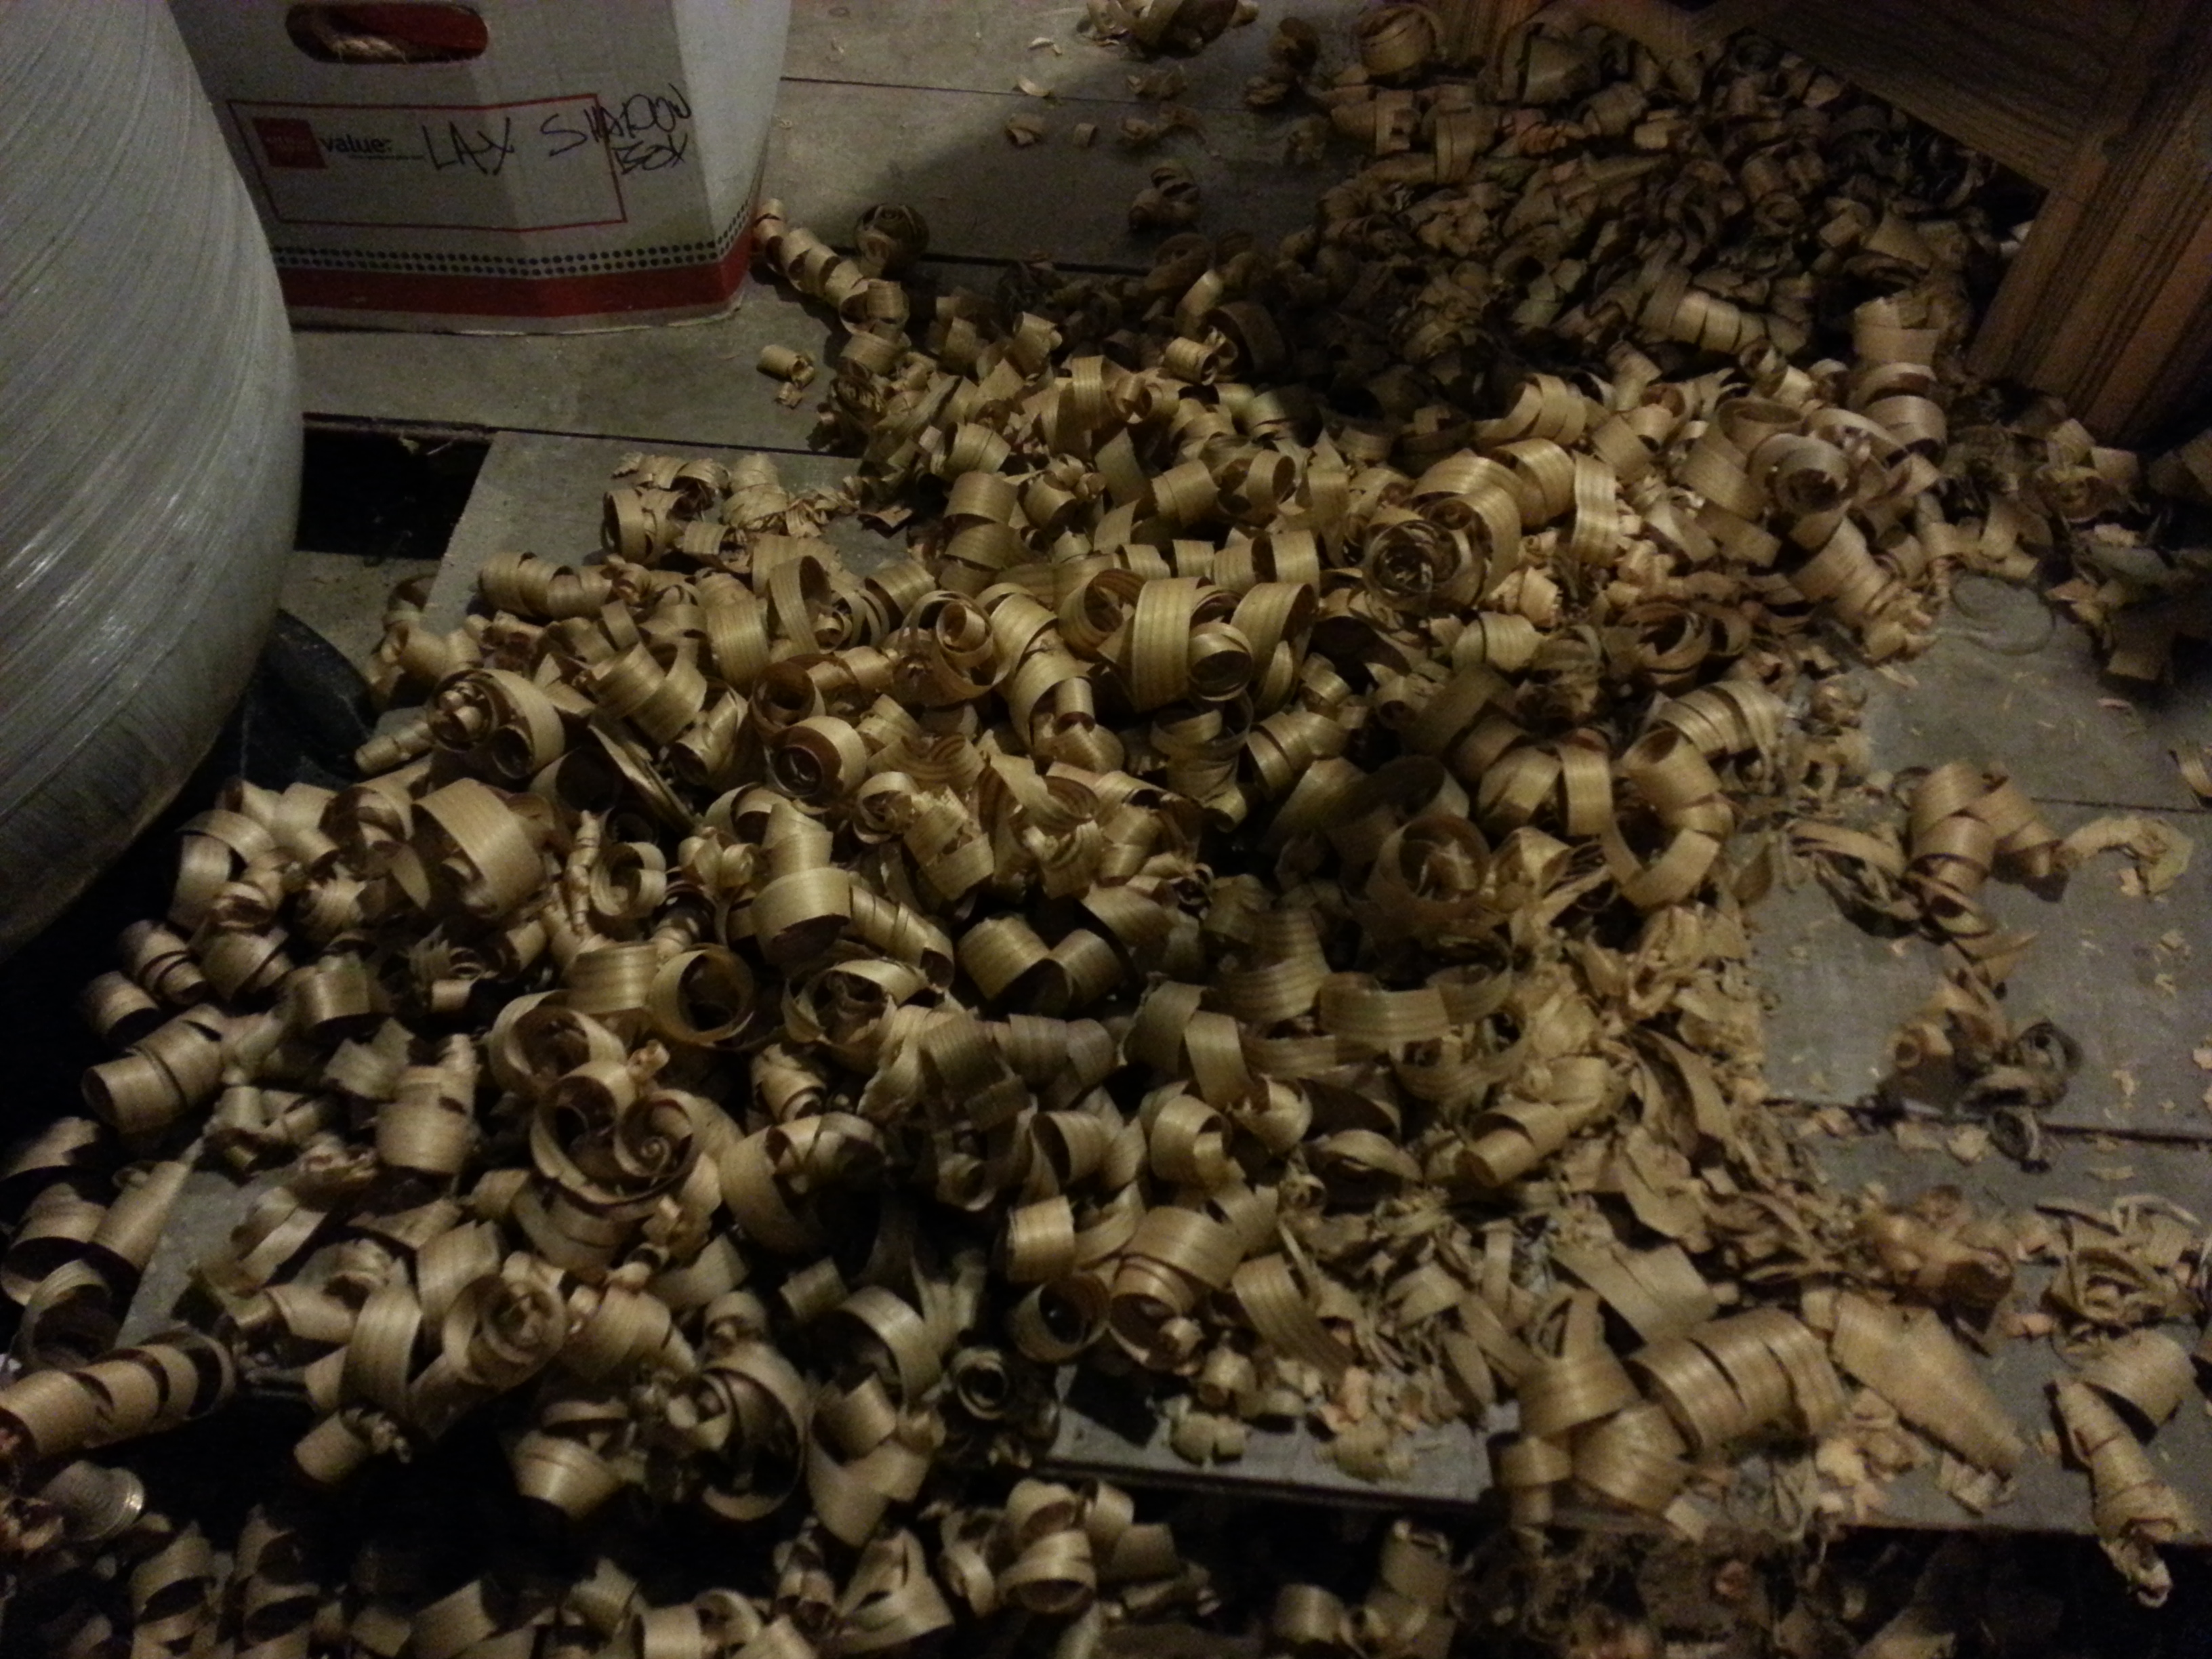
It really enabled me to start putting my hand plane to use!
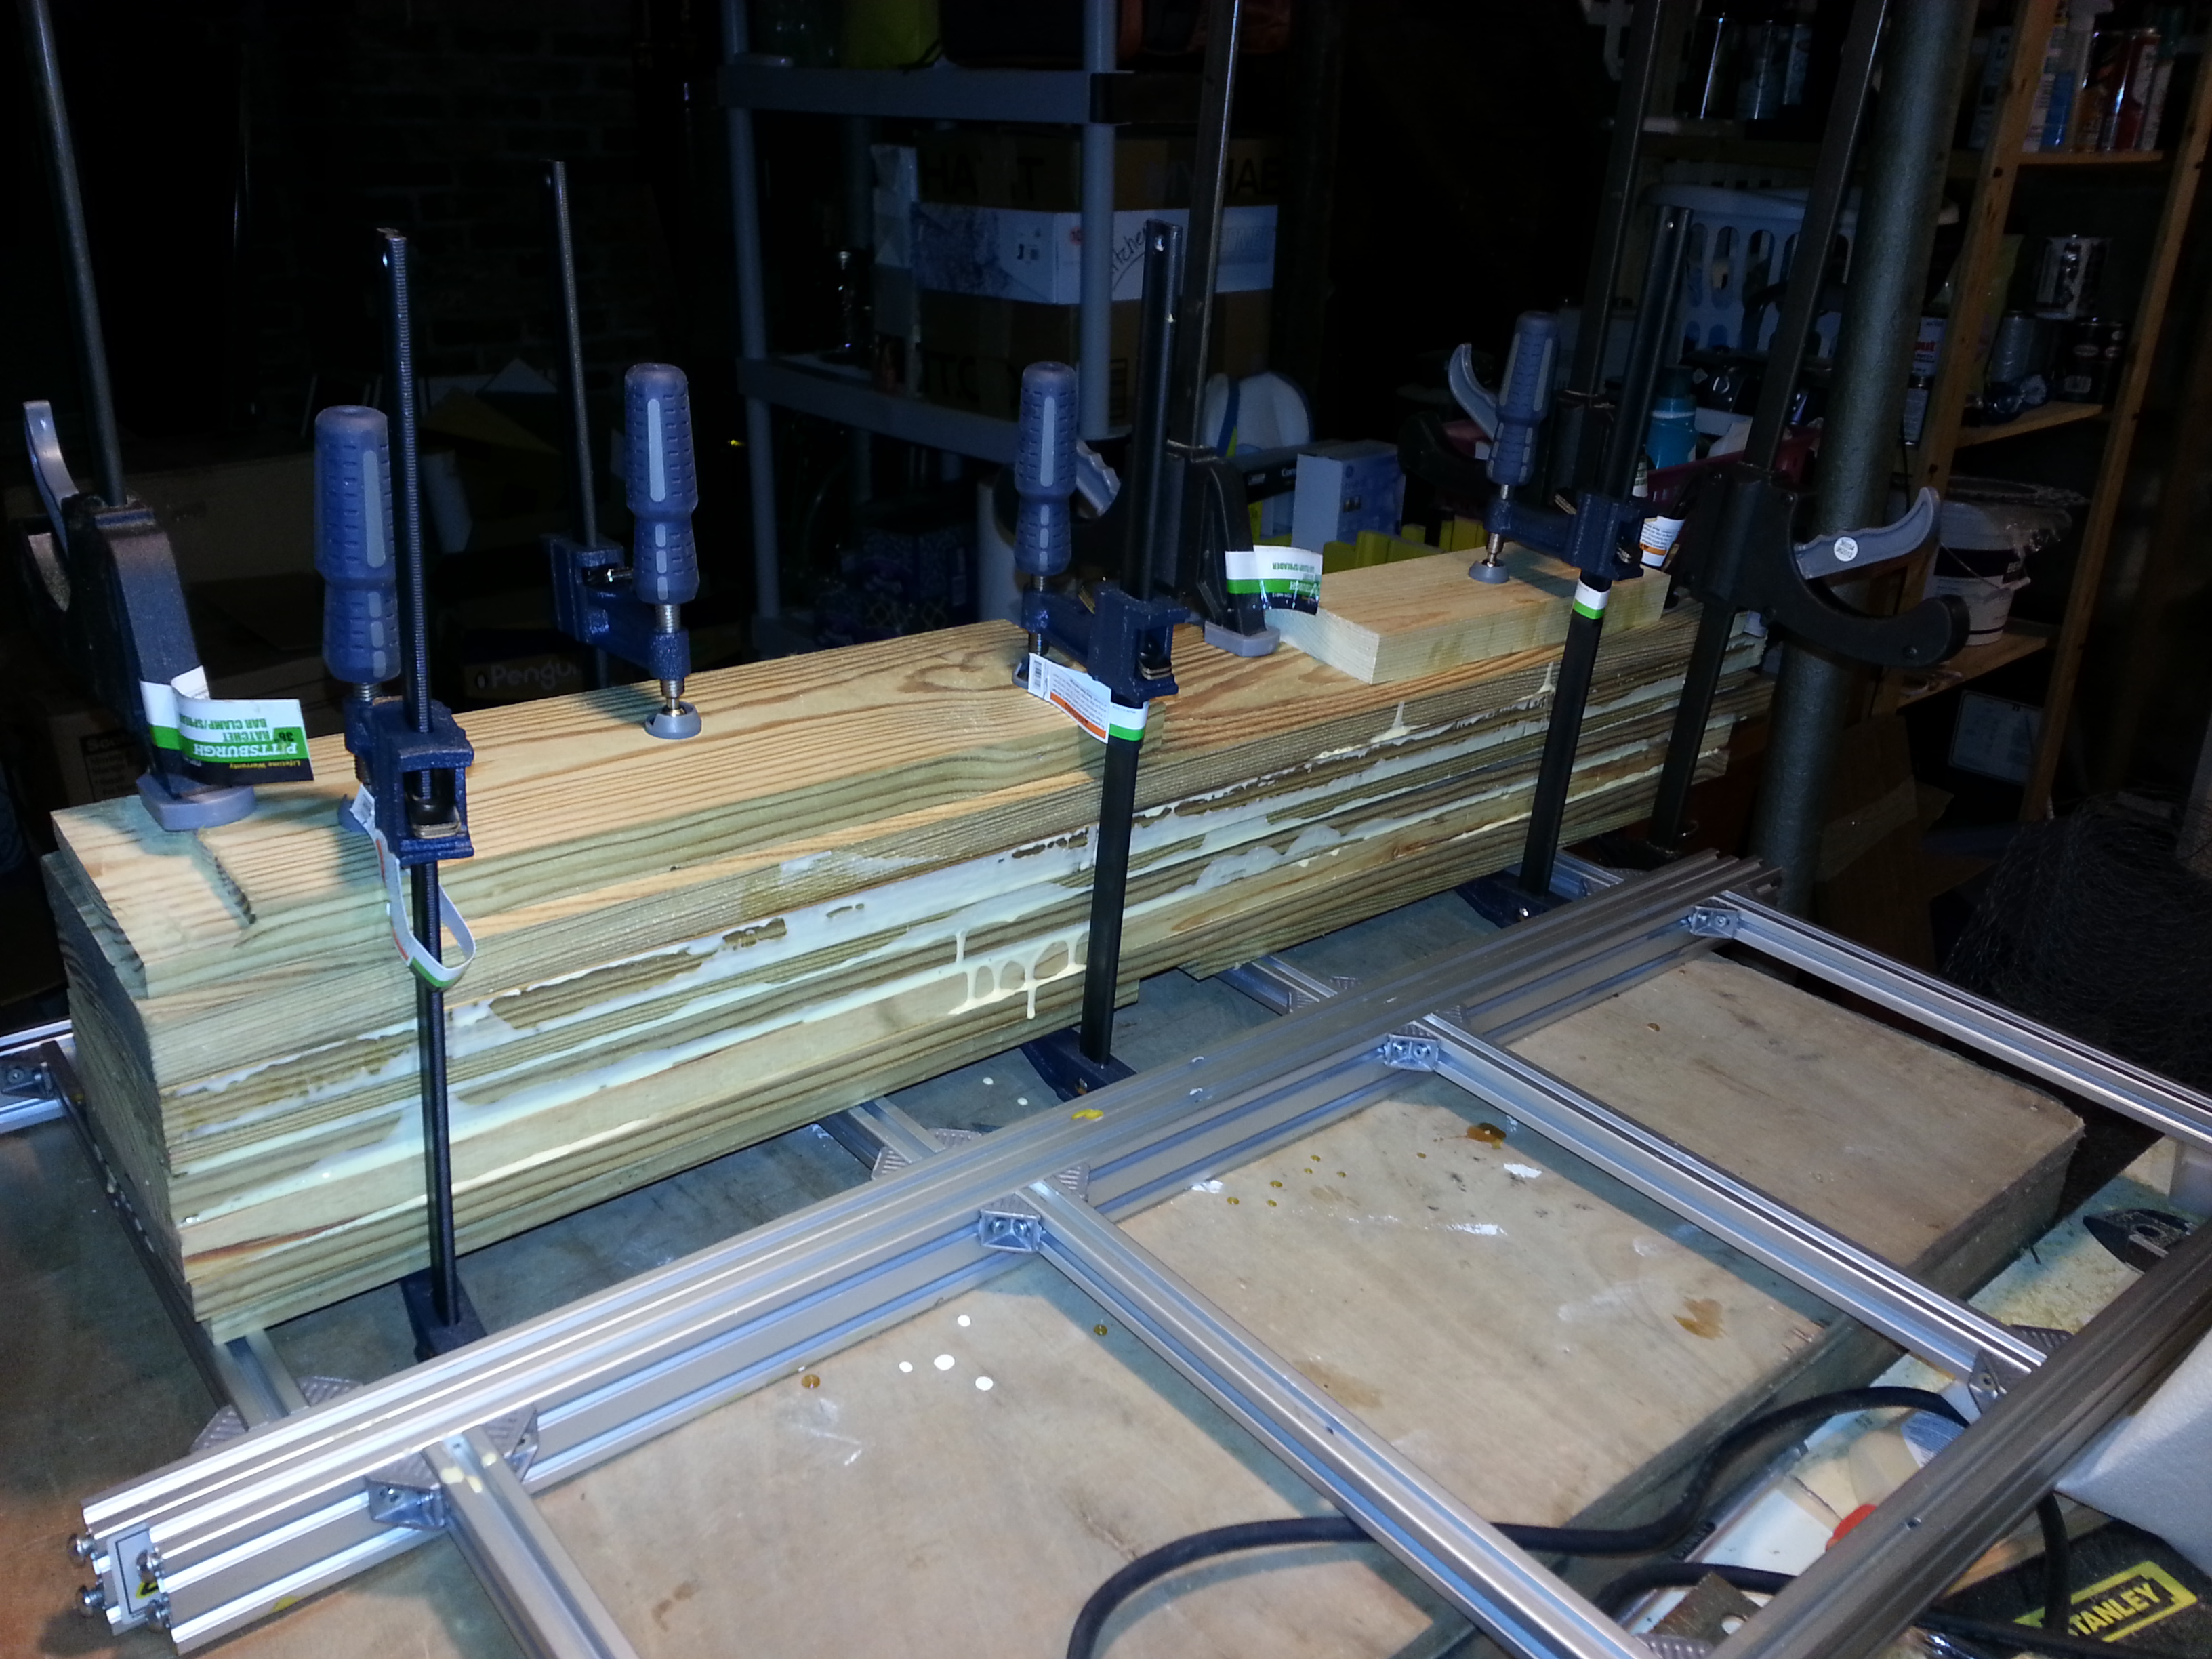
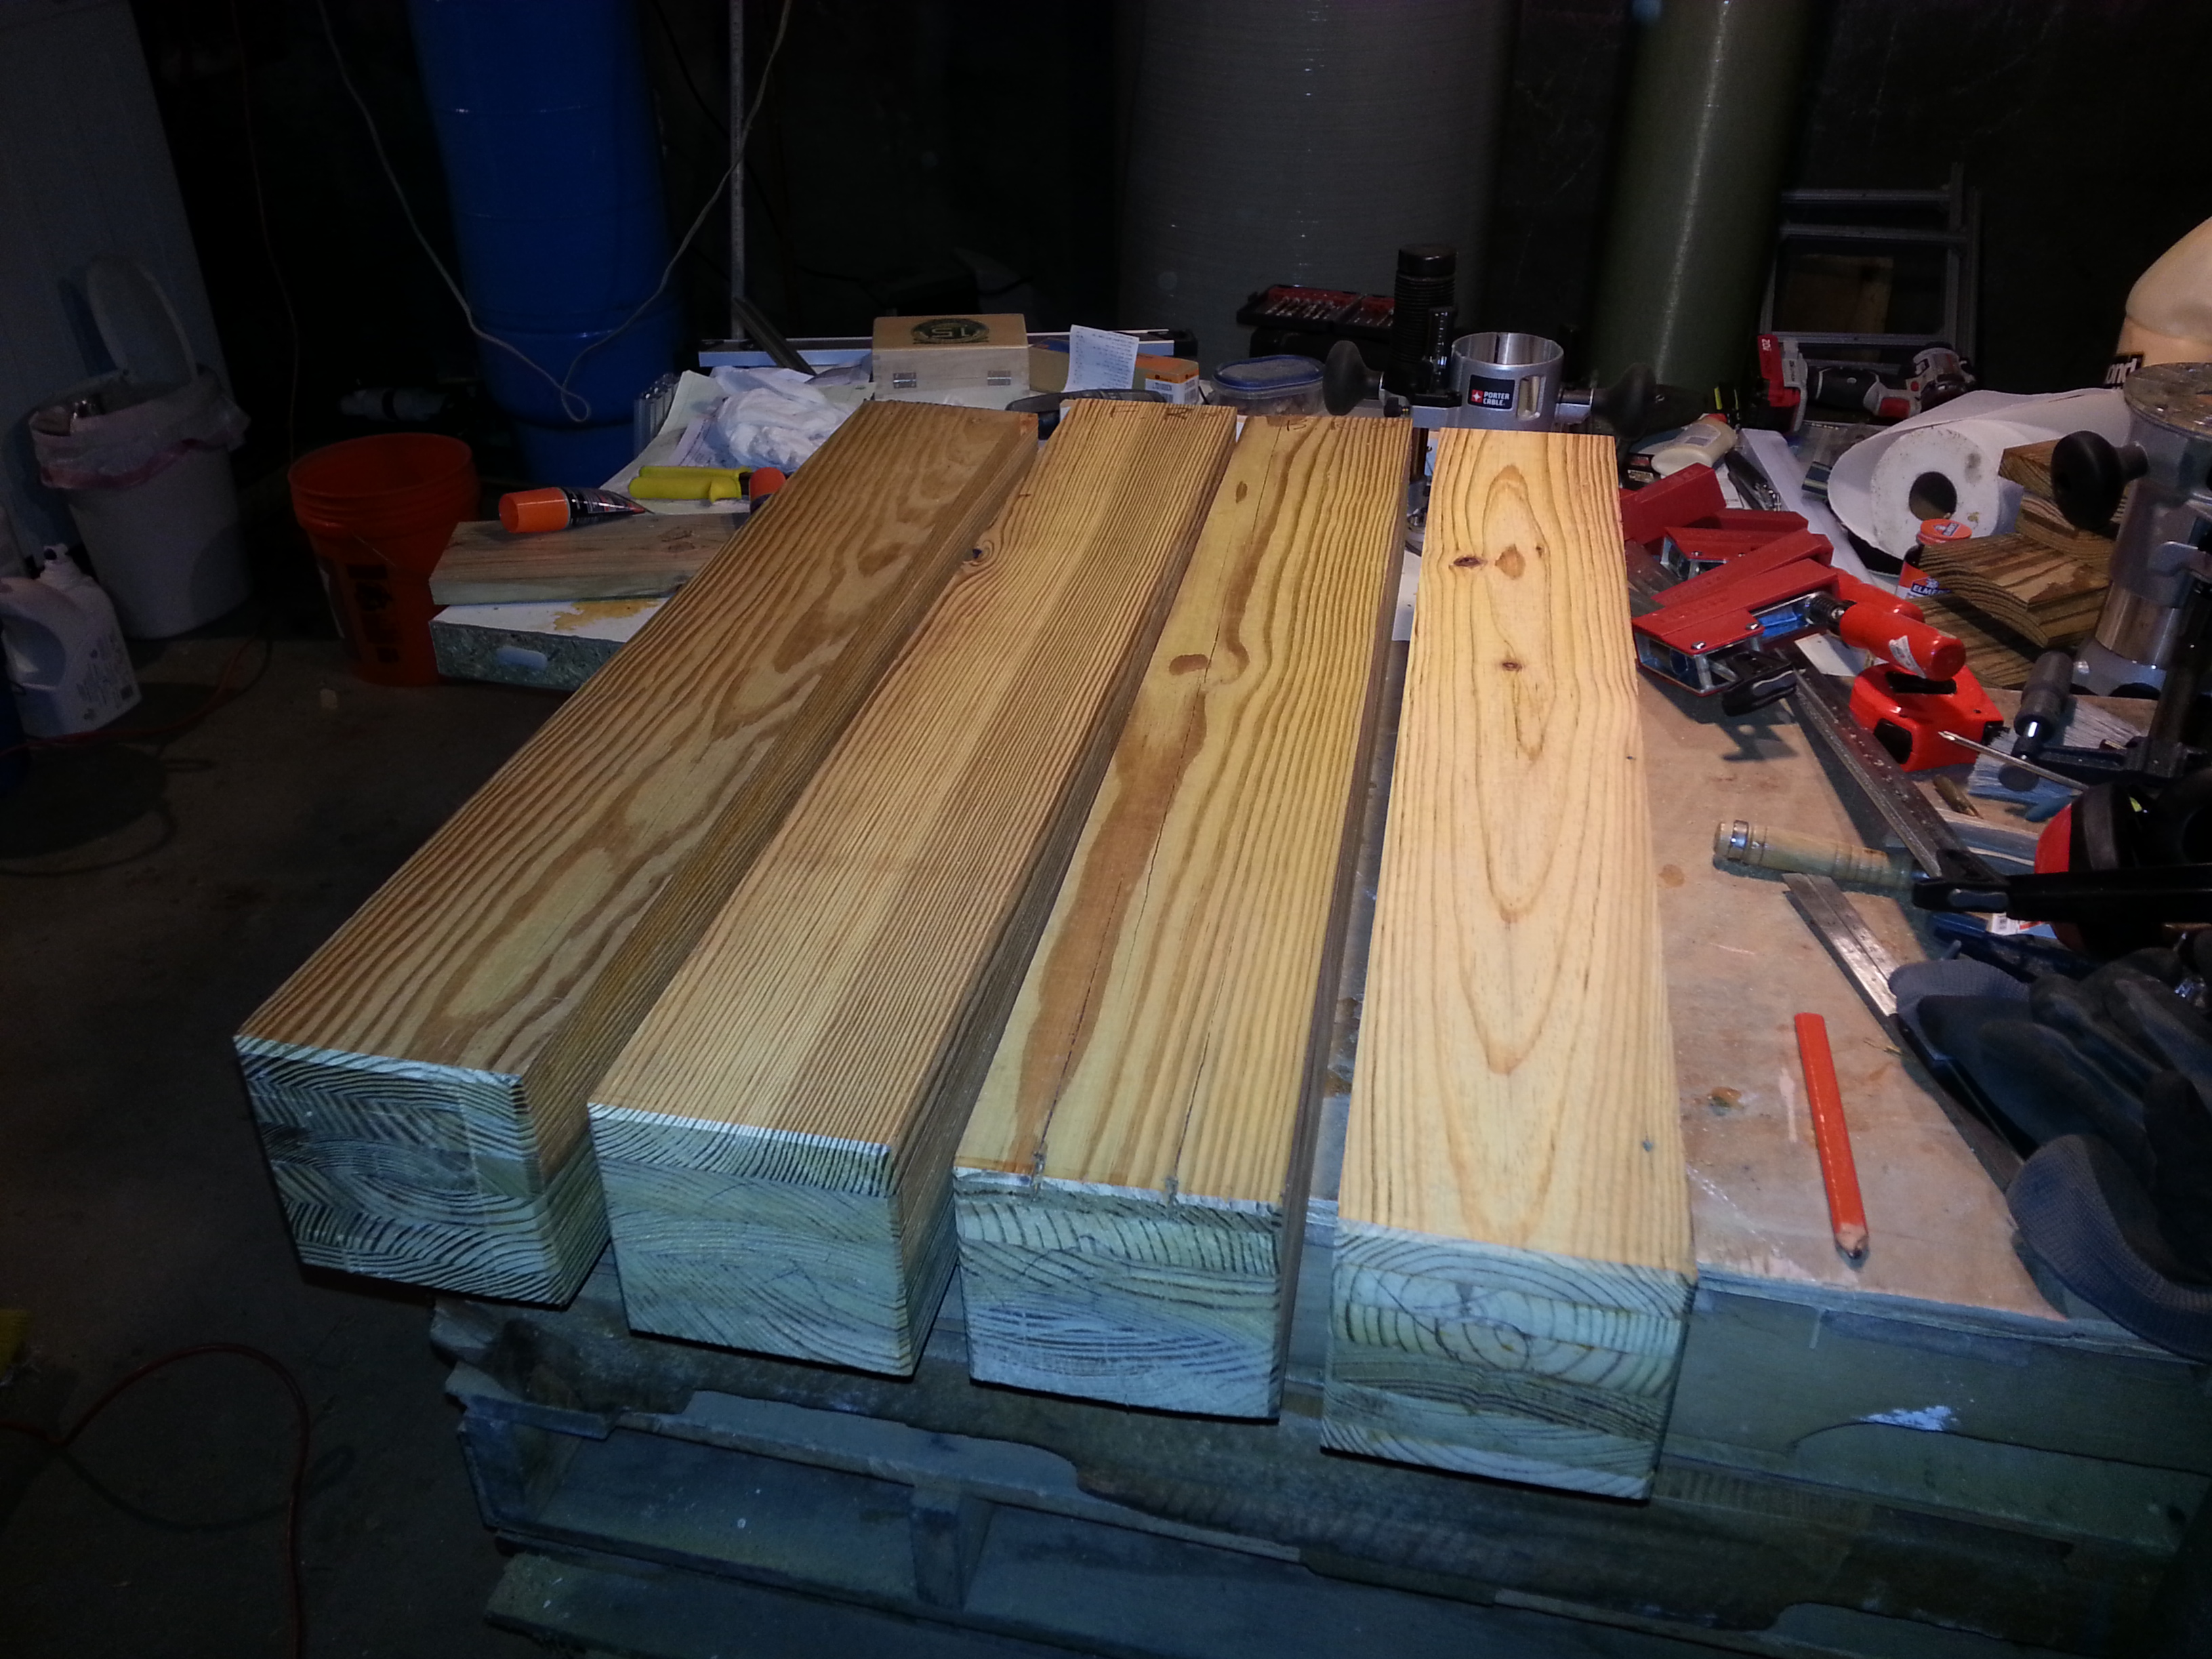
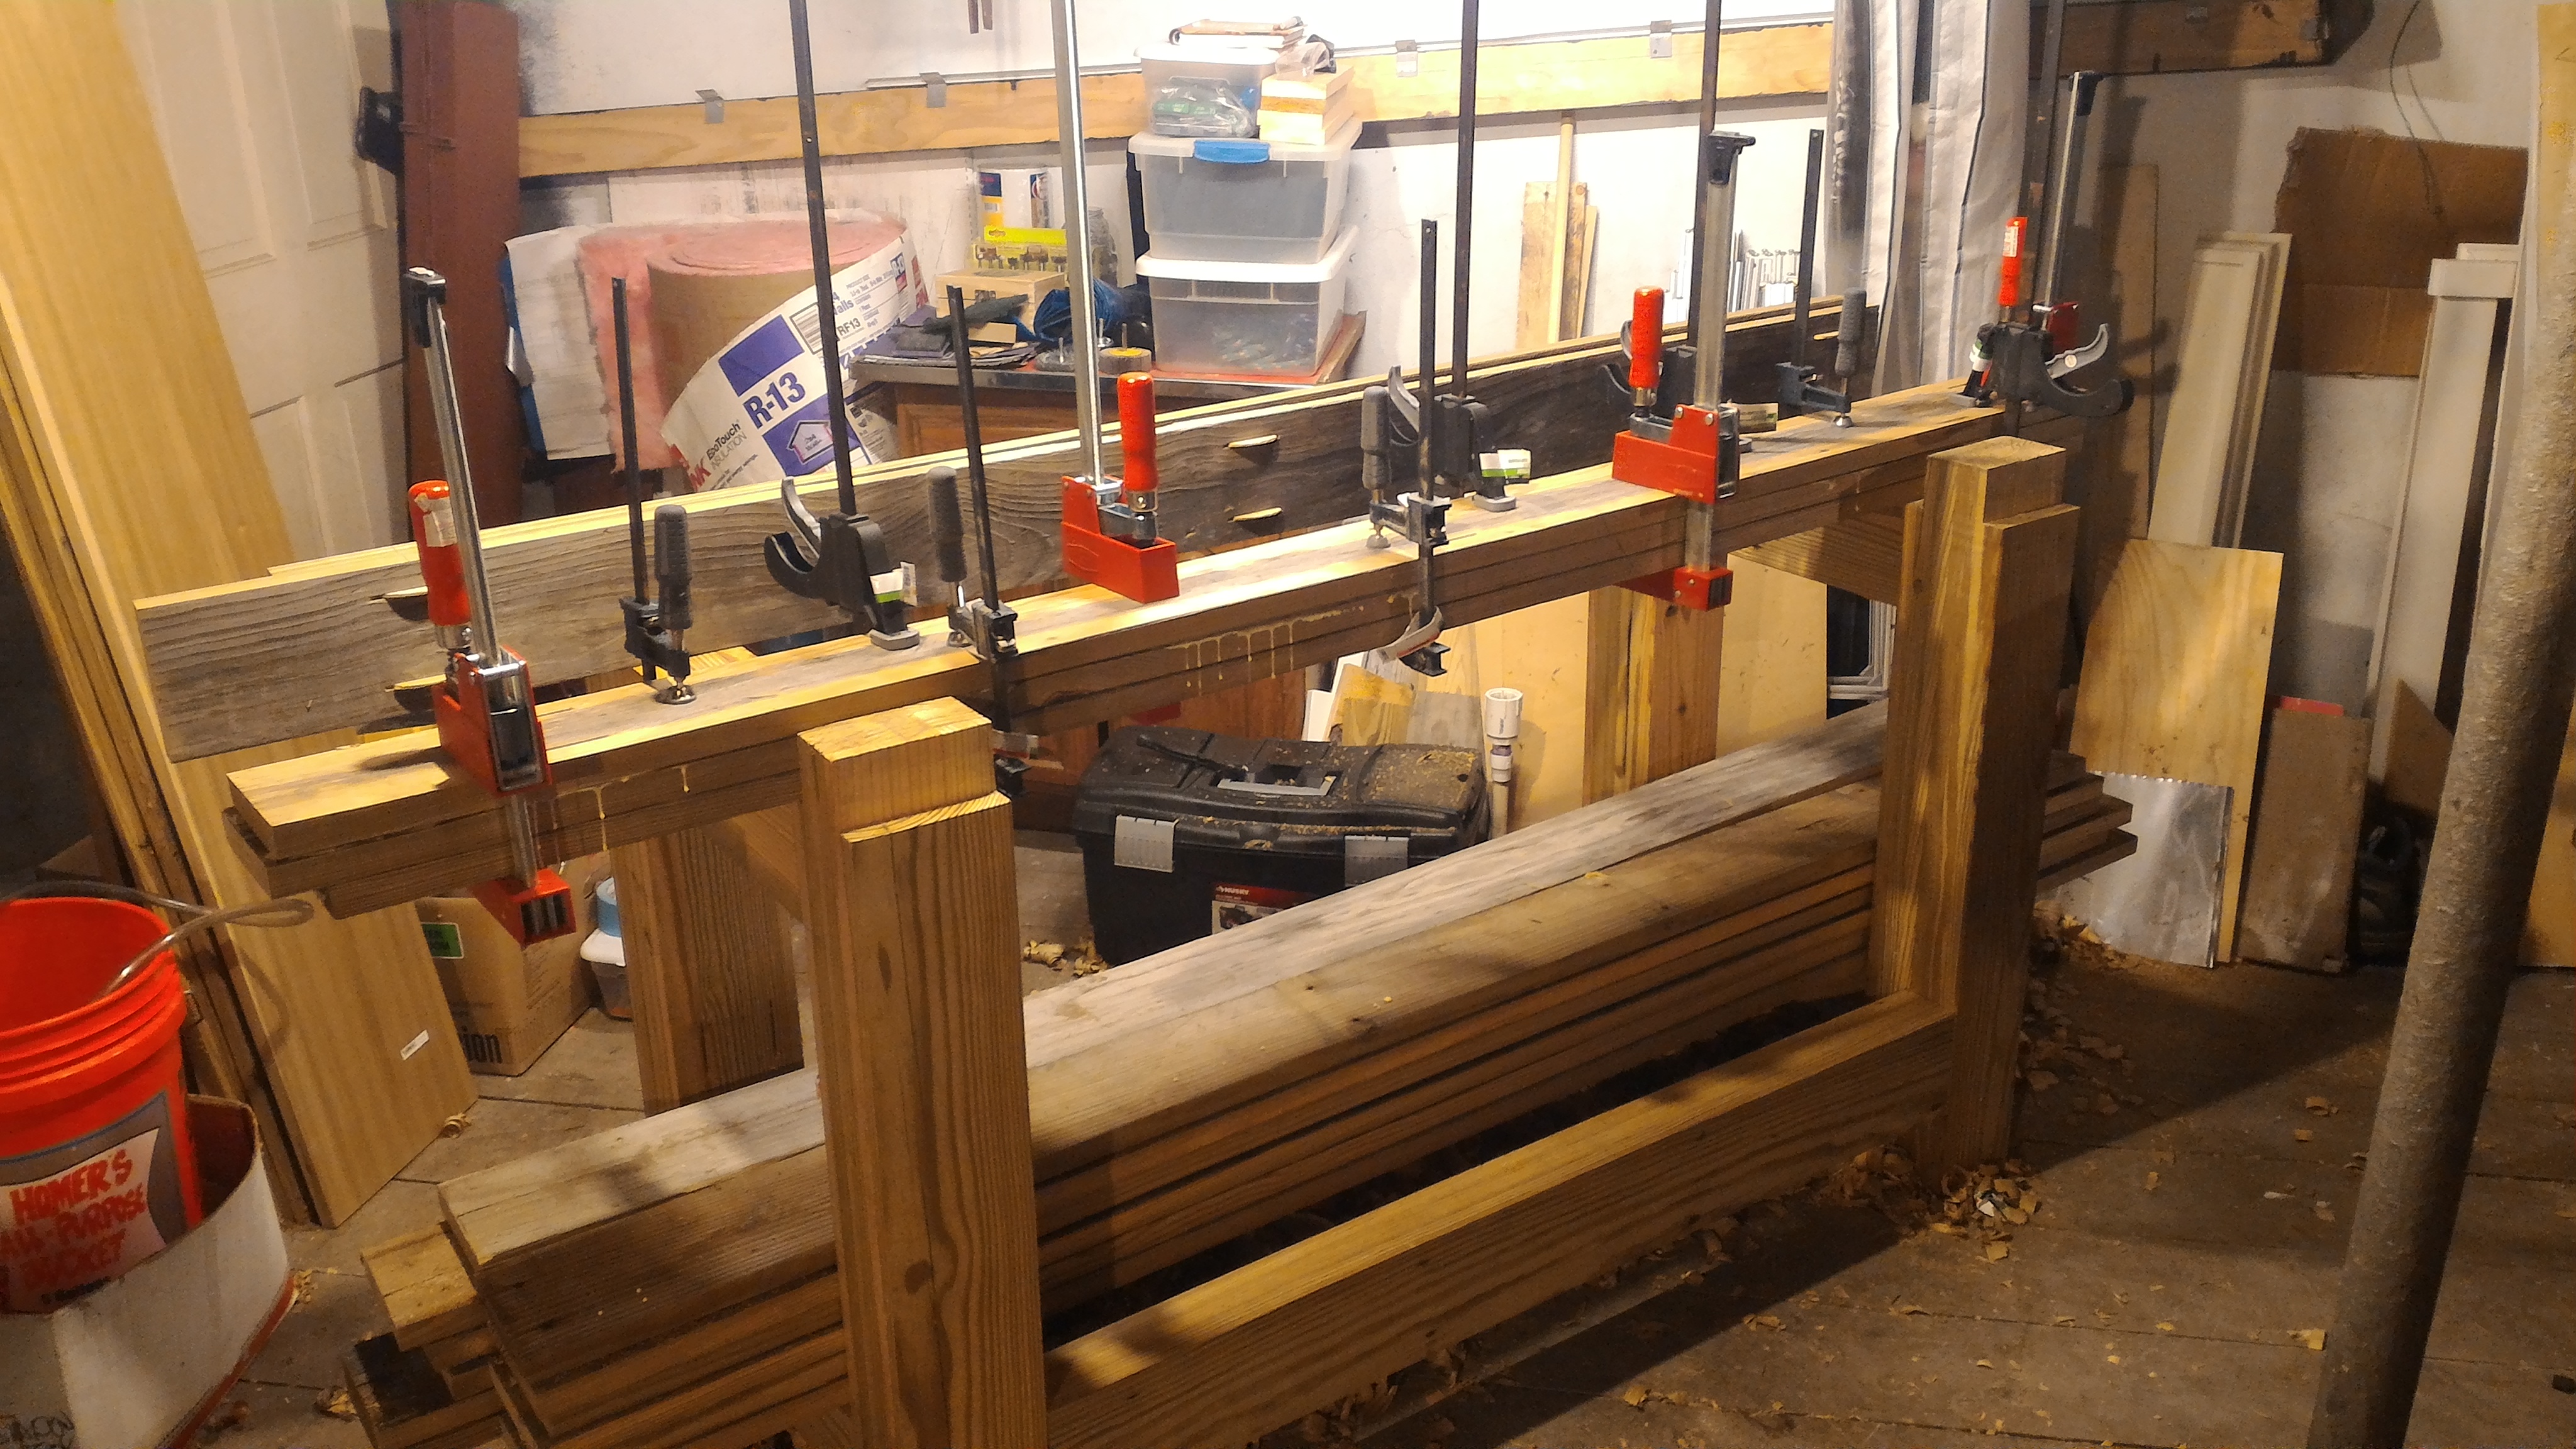
I took some time to arrange the top boards I had into sets that fit well together, putting nicer boards on the outside and ones that had splits towards the inside, hoping that their neighbors would help stabilize them after glueup. You can see the pile of top boards, weighing down the bench as I worked on each board individually.
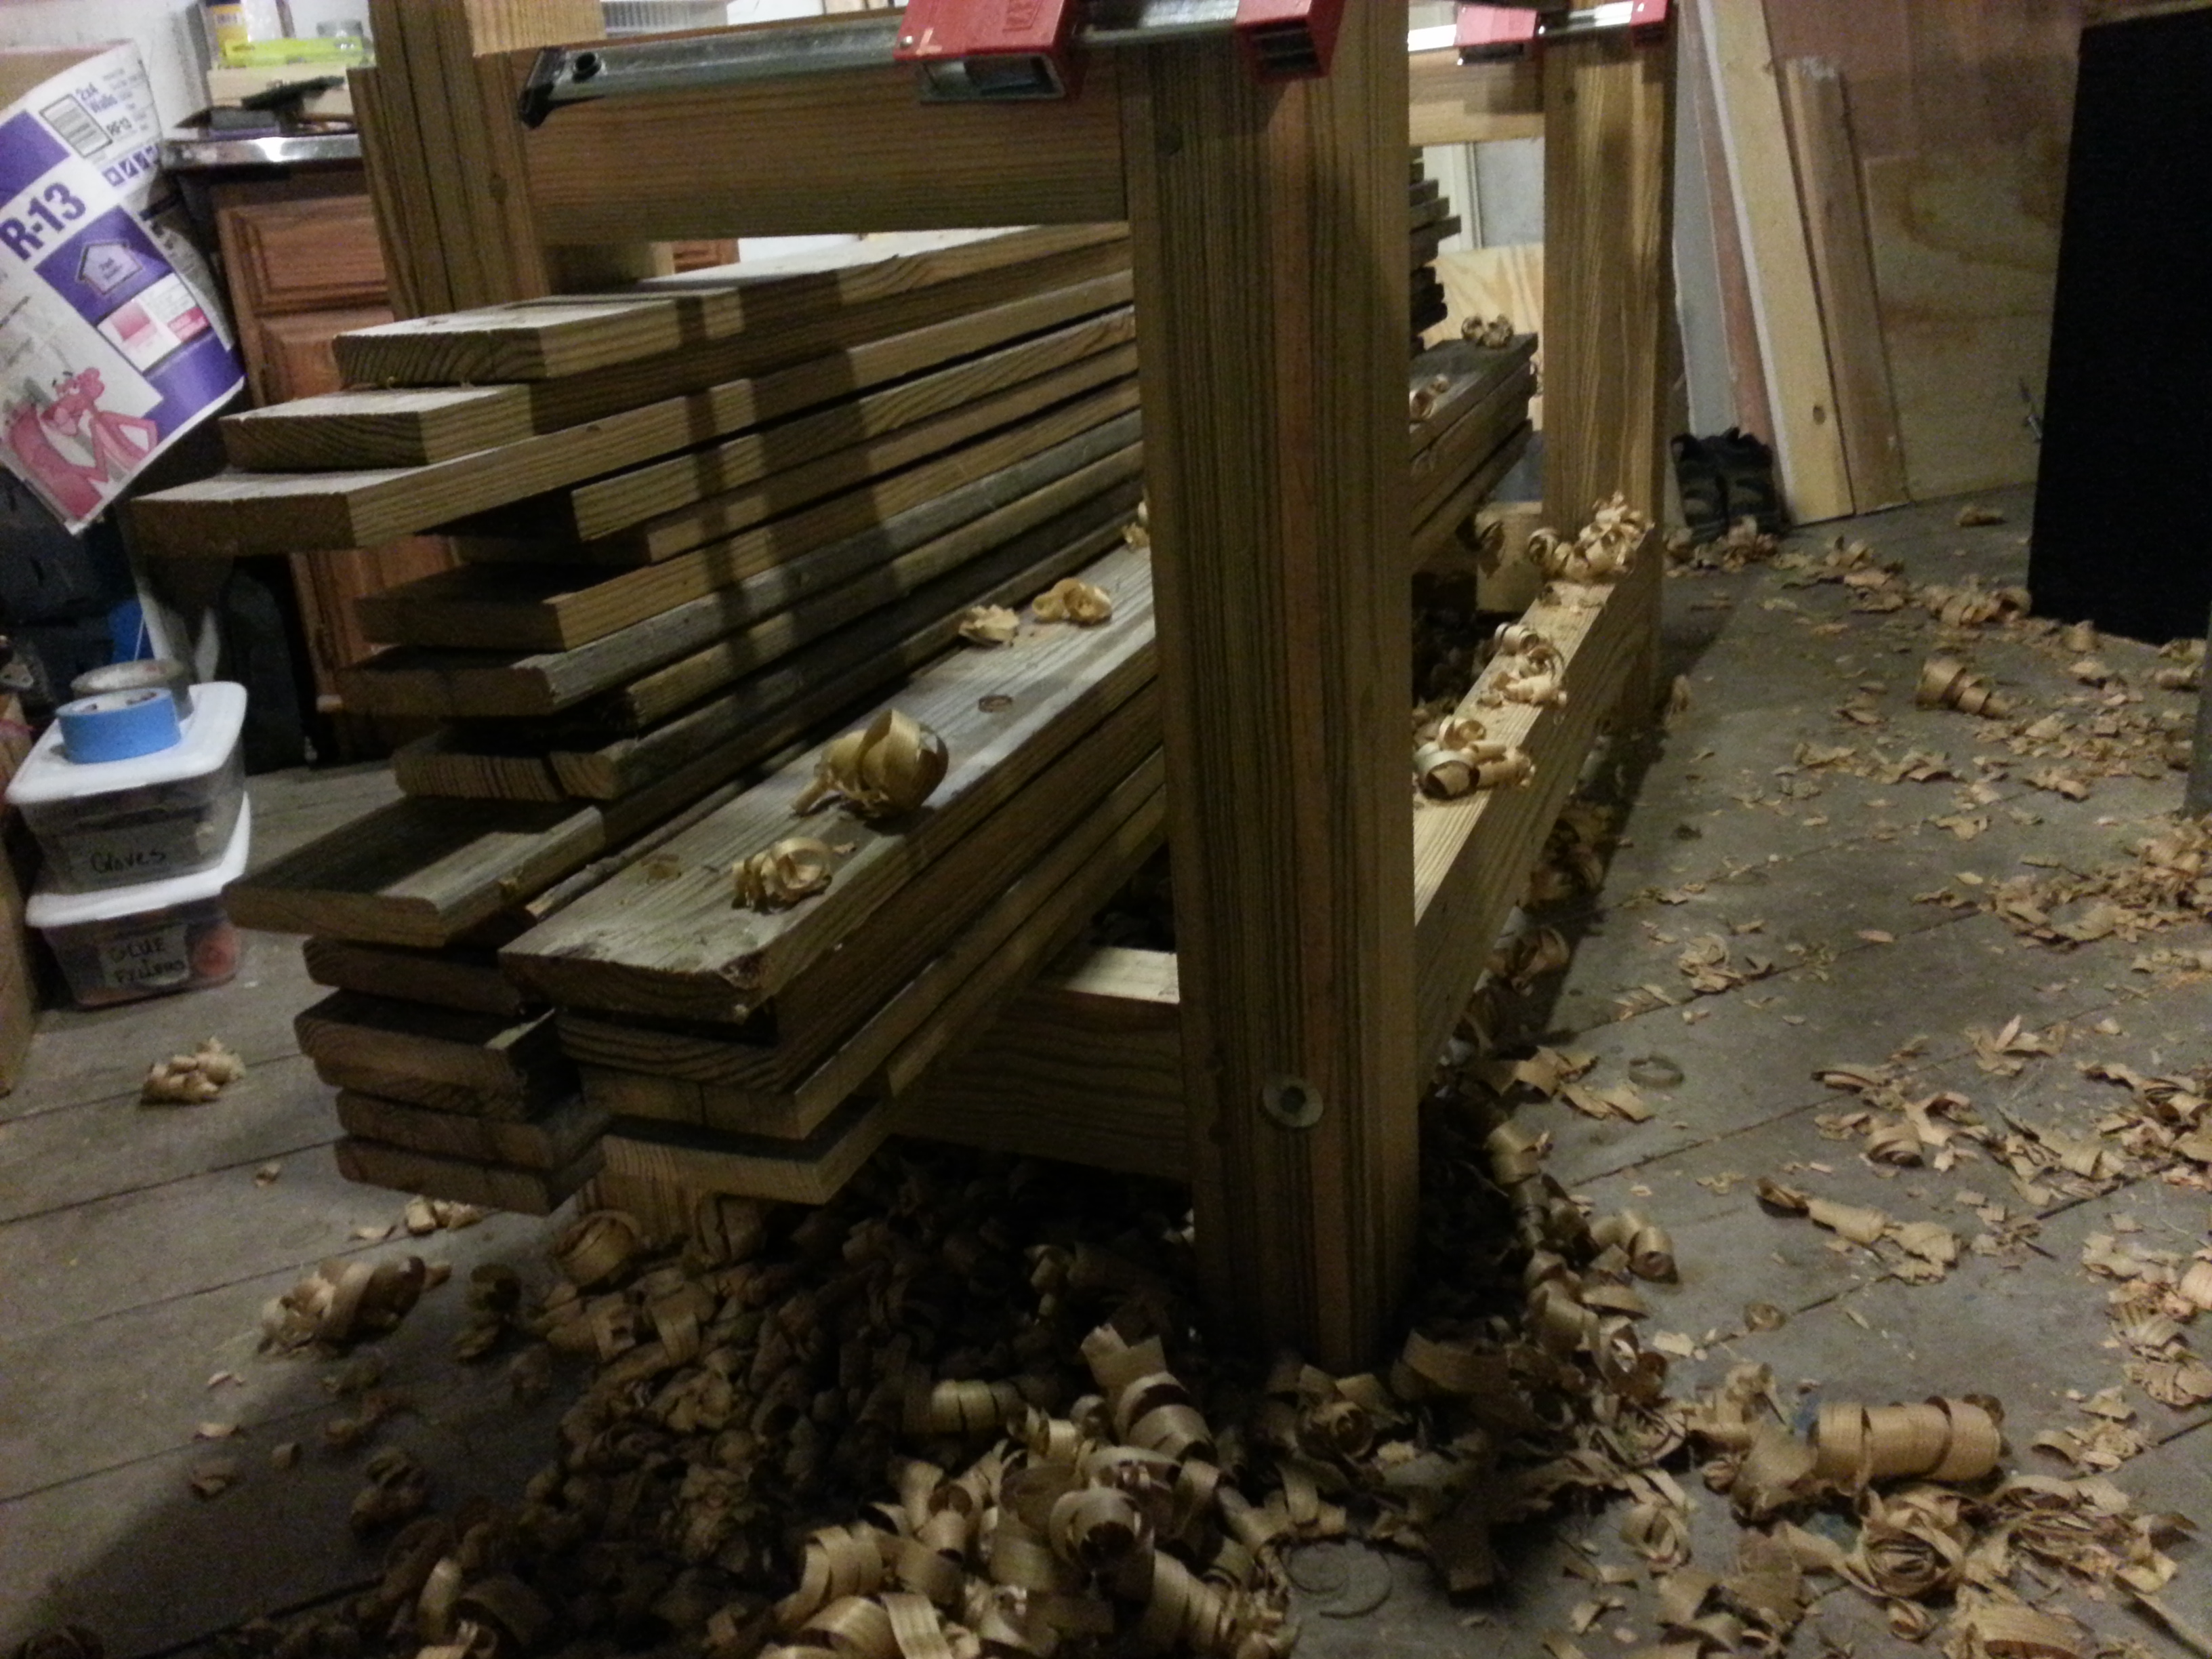
Originally I was planing the edges of each board individually, but as I realized earlier, I needed consistent widths to enable the biscuit jointer to make accurate biscuit cuts on faces that were to be glued up.
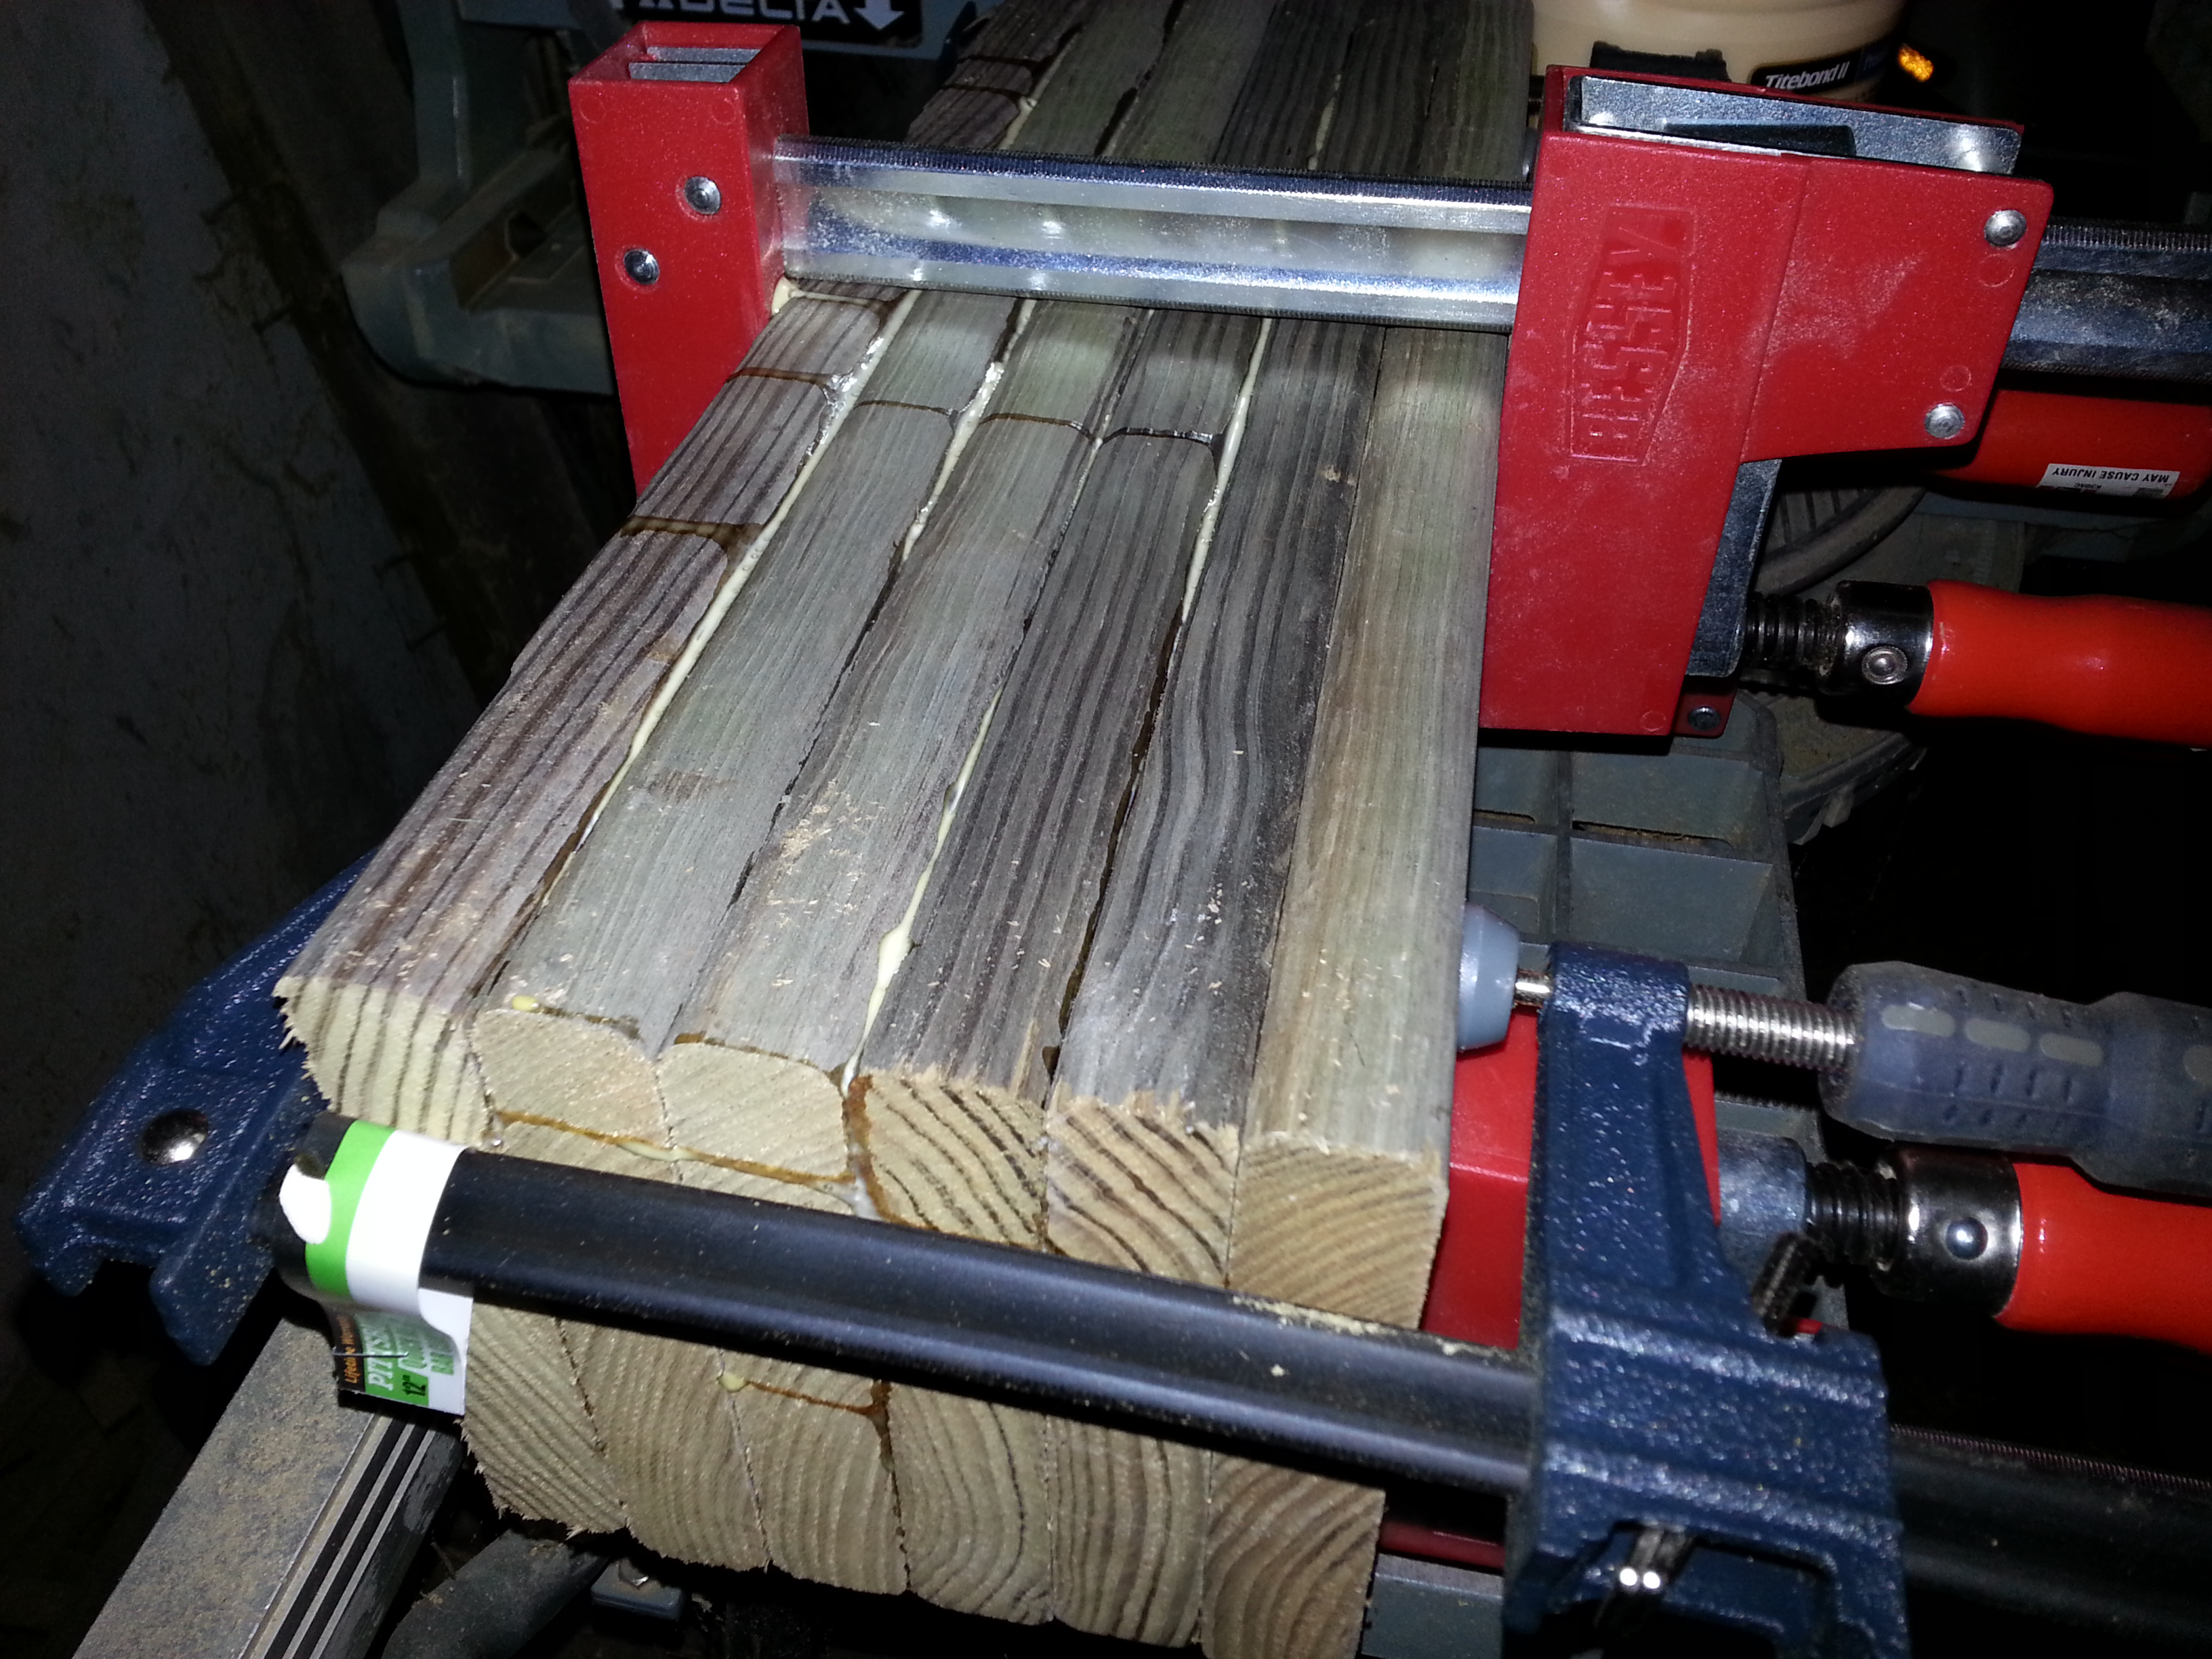
I started to plane about 5 or 6 boards at a time to get them to a consistent height before attempting a glue up.
This pic is after planing 5 boards to the same width and adding biscuits at each end and in the middle (see pic for placement). They are 1” in from the edge.
Eventually, I’d have about 11 boards (making up one side of the split top) and would plane the glueing faces of those flat so that I could glue them up without biscuits.
Rinse and repeat.
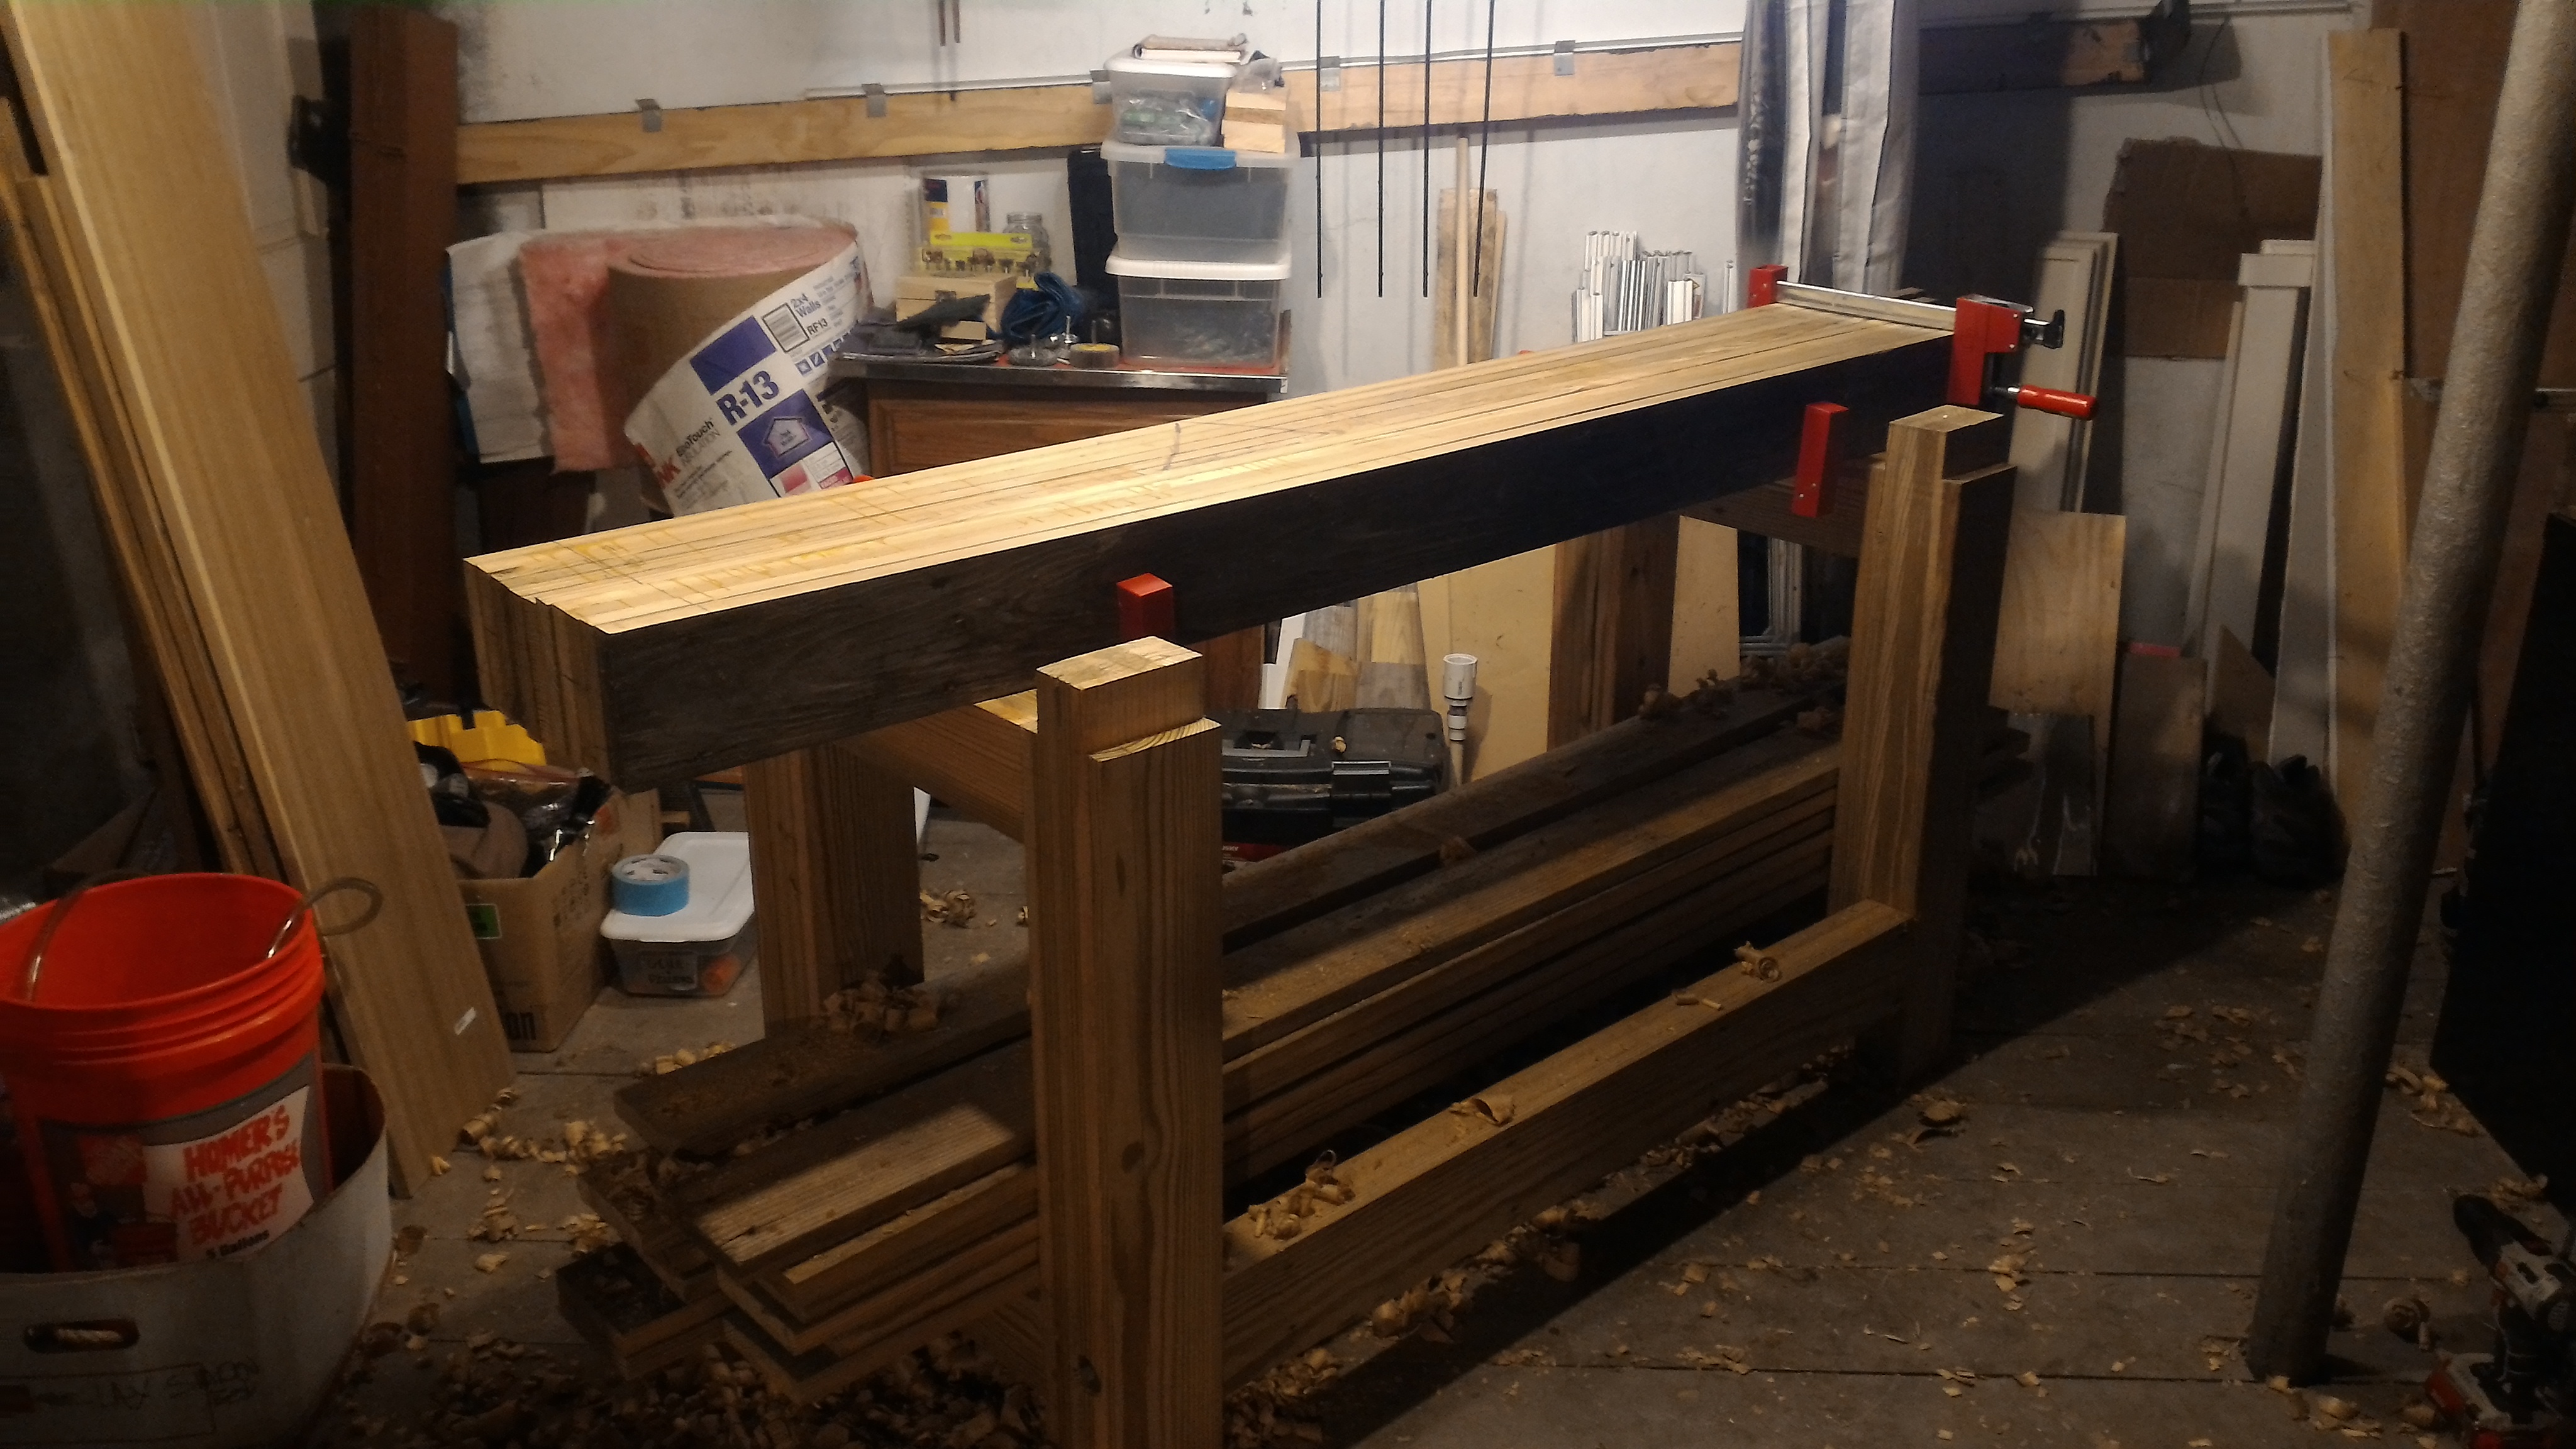
I took this half top and laid it down on my floor, and started the process over again with the top boards for the second half. Finally I had them both done and just needed to cut the mortises for the top of the base to slide into. This pic shows both pieces resting on top of the base tenons, waiting to be marked with a pencil for cutting.

Cutting the Top Mortises and Final Fitting
At this point, I think I was so interested in finishing the bench, that I forgot to take pictures of the process of cutting the top mortises!
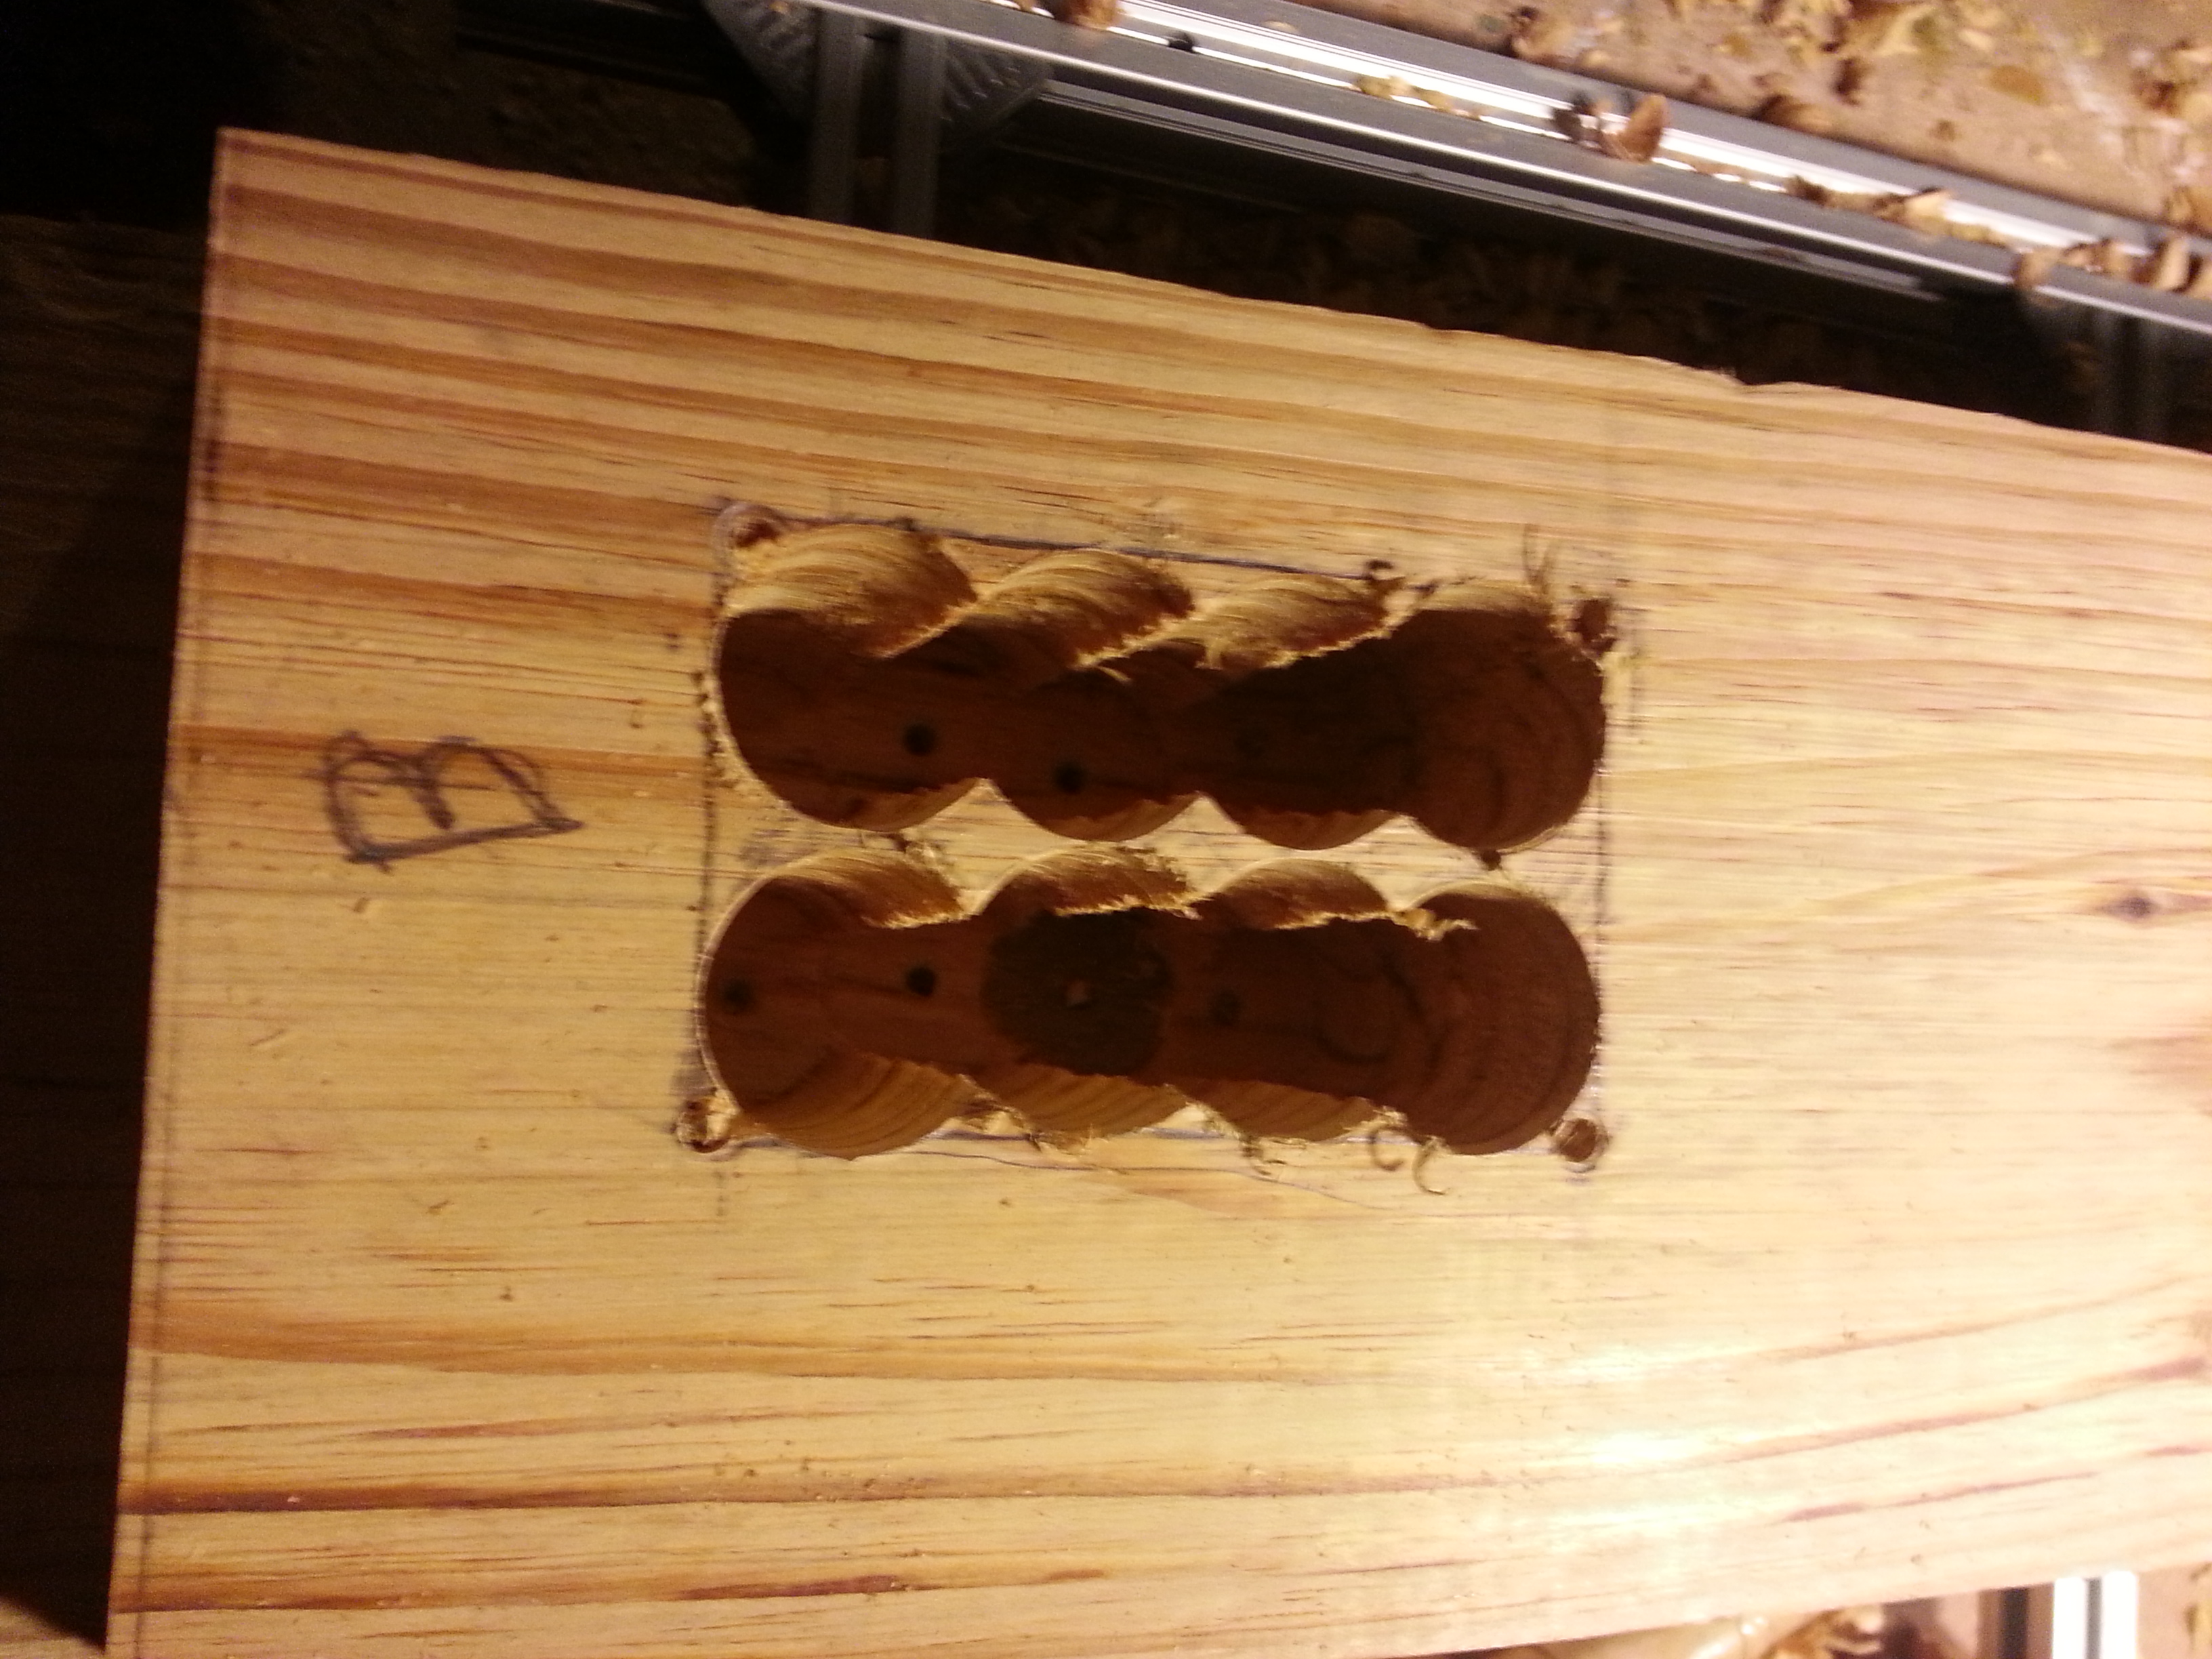
I did it exactly the same as the side mortises, wasting out the majority of the mortise with an auger bit on my hand drill (not very comfortable, may I remind you) and chopping out the remainder with a chisel.
It took a few tries to get the fit right, and lifting a hundred pound half top to slide into onto tenons was not very easy. After a couple on-and-offs of the top and shaving off more inside the mortises, it finally fit down onto the base.
This is where the bench sits today, since I am finding more use for it now that it is a real bench. As I see the need, I will add such features as a center insert for the slot, leg vise, tail vise, and dog holes, but until then this is where it stands. There will most definitely be more posts coming in the near future detailing the construction of these features, but progress is more important than perfection, and I want to make progress with other projects right now.


Wow!! It is impressive how you meticulously detail the project from beginning to where you are now. It is amazing the impression parents leave with their children.All start with your Dad’s workbench and your dream or desire to have one when you grew up. It is just fascinated to me how you got these woods from Craigslist and your determination to get them to your atelier(workshop). The post is amazing to me especially as it goes step by step.
Good job my friend. I will follow your work and definitely learn a lot from it.
Keep up the good work. I am waiting for the next post in two weeks.
Thanks AK! it’s certainly been a long time coming, I appreciate the comment. You’ll hear from me soon about the next post.
Good work Brad. It’s good to see someone else using crap materials and making it work. I had a go at a lamination last year and it went terribly wrong. Permit me to add my experience if it may help others.
Last year I tried ‘jointing’ some 6′ x 3″ x 2″ lumber with a brand new portable planer/thicknesser before gluing up. I ended up with two very twisted slabs, which were only 5′ long after cutting off the snipe. This was down to 3 things. The thicknesser wasn’t set up properly. I didn’t have a flat reference to glue up on. My clamps were skewing the boards during glue up.
I could have lived with the 5′ length but after hand planing out the twist they ended up being too thin for a top. So I chopped them up to make the stretchers (no waste in my workshop!). Good to go a second time.
This year I got a load 6′ x 4” x 2″ contruction lumber for £2 a plank (I’m in the UK). I knew most of it was bowed, cupped and twisted but it was worth a go at that price. I took my thicknesser to pieces, re-built and reset it so it cut parallel faces. Joy! Only 0.02mm out over the length and, contrary to what most people say, the thicknesser had removed a lot of the twist.
I still had bowing along the length on some boards but the faces mated really well after light ‘sanding’ with drywall screen! What to do about the bowing? Like you I was thinking biscuit jointing. But I still also had a bit of twist.
However, I discovered with a dry run that with judicious placement, the twists all lined up coplanar coz the boards all came out of the same stickered pile. They pulled together nicely with light clamping.
So I decided after much deliberation that fighting both bow and twist was too much. I think you could get fairly flat during glue upwith biscuits if, like you, you plane out the bowing first. But in the end I decided against that because it means losing thickness twice; once before gluing up and inevitably again during flattening.
Trying to pull in twist AND bow during glue up is possible but would introduce too many different spring forces in the wood, especially with softwood which isn’t dimensionally stable. The finished article is likely to bow and/or twist fairly quickly or even spring apart.
In the end I sort of followed Paul Sellars’ technique and just banged it all together accepting that I would have some quite high ridges on both faces which would lose me some thickness during the one flattening process. This time I made some Shopdogs and set them up parallel with levles. It worked! Some of my boards lifted a bit again due to the scewing action of the clamps and I didn’t notice until the glue had started to go off so I left them alone. That way there was virtually no spring forces in my glue up.
All the faces stuck though stuck together really well without gaps. There were some seemingly enormous ridges on both sides and a tiny bit of twist but after flattening with the router sled method I ended up with 3 & 1/4” thickness – decent enough. I lost about 1/2” from the original size. I found this acceptable as I’d set myself a target of a minimum useful thickness of 3”.
If I did this again I still wouldn’t use biscuits tho, or worry about the bowing till the flattening stage but I would glue up differently. I’d glue a central ‘core’ first, say 3 or 4 boards and let them cure overnight. Then I’d add two boards at a time, one on each side. That way I could control the skewing better. I might have only lost 1/4″ if I’d done this.
Wow, Brad! That’s a beautiful bench! Good work.
Thanks! It’s definitely going to remain a work in progress for some time and will probably never quite be done.
DUDE! This is awesome. You should definitely post on reddit.com/r/diy
Thanks! That’s a good idea…I’ll check that out. In not a regular redditor, so I’m bit nervous of any etiquette I might miss. Suggestions?
Great article on bench building seems like a cool project.
Thanks Brian, it has been fun and there’s still more to come.
Wow! This is awesome Brad. I will look forward to seeing your other projects and the evolution of your bench over time.
Thanks for the positive feedback, more will certainly be coming! Should have the next post out within a few days.
It looks like a lot of work, but you ended up with a very nice product you’ll use for years. Nice work
Impressive work! So nice to see you turned that pile of wood into such a good looking work bench. I learned something today!