I’ve been hinting for some time that I am restoring a wooden play stove for my daughter, but I haven’t had the time to sit down and actually work on it, let alone write about it!
I believe that I’ve shared some background before, but not knowing where you are coming into this, I’ll share a bit here as a refresher.
When my wife was younger, her dad had a ShopSmith, which is something of a Swiss Army Knife for woodworking. It can become a table saw, a lathe, a drill press, and a number of other things.
It’s quite the versatile tool, so long as you know how to set it up.
Well, one of the more memorable creations that was born of this snazzy contraption was a wooden play stove that he made for my wife when she was a kid.
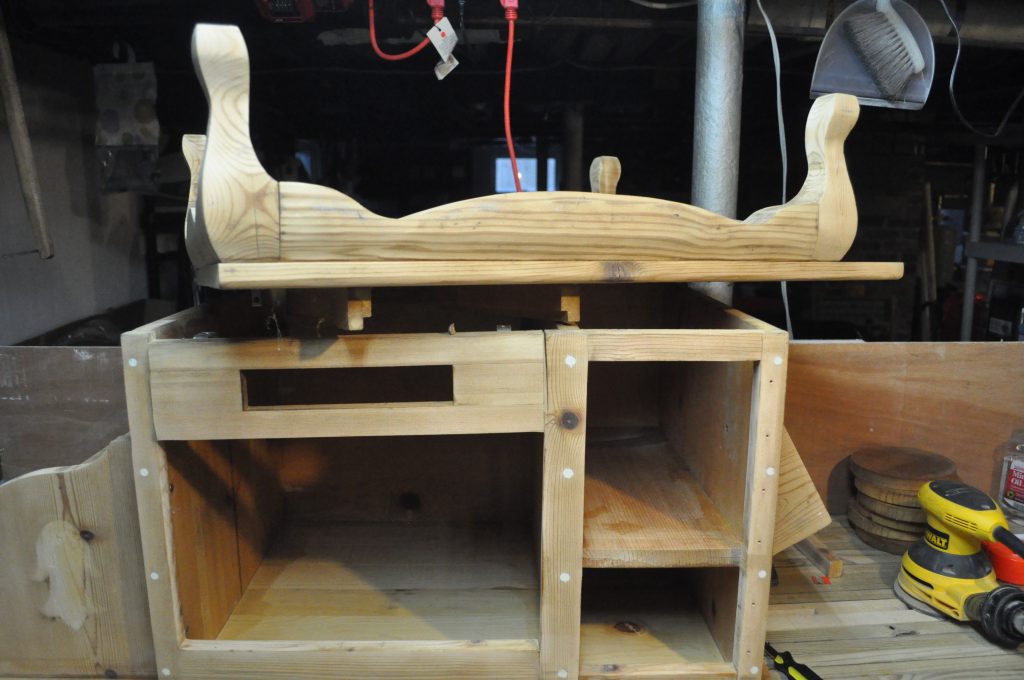
Long story short, we still have the stove and it’s been on my project list to clean it up and give it to our daughter. It’s not done yet, but here’s what I’ve done so far…
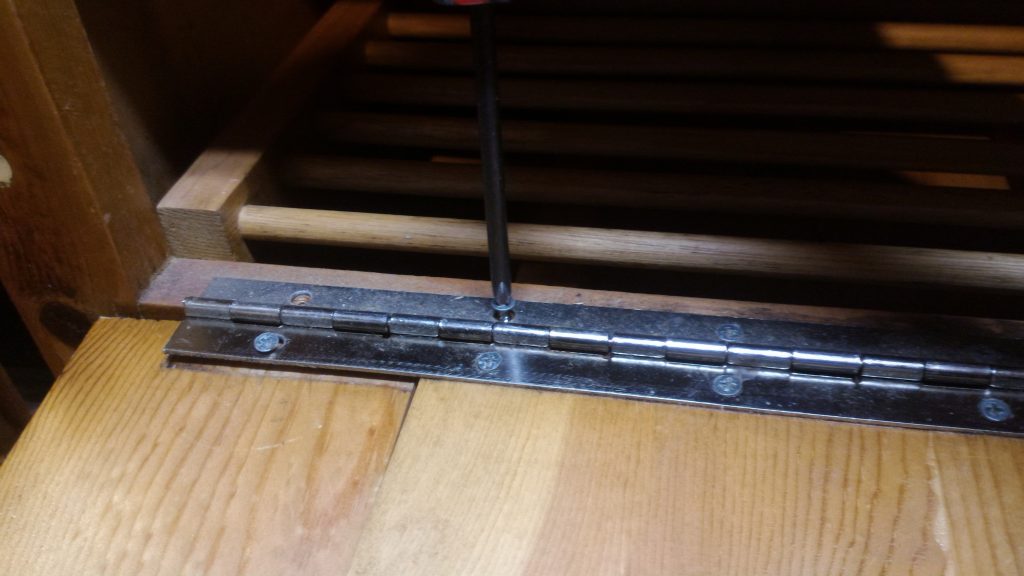
The first thing I did was take as much of the stove apart as I could, removing doors and handles so that I could get the most with my sander.
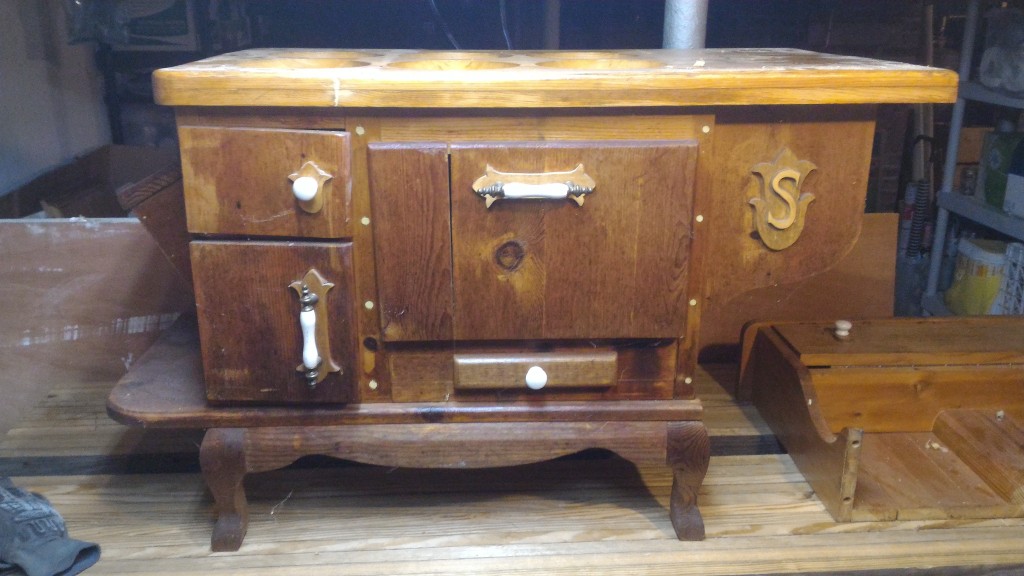
I took all the hinges and handles off as well. This gave me a much more suitable surface for sanding on the front frame of the stove.
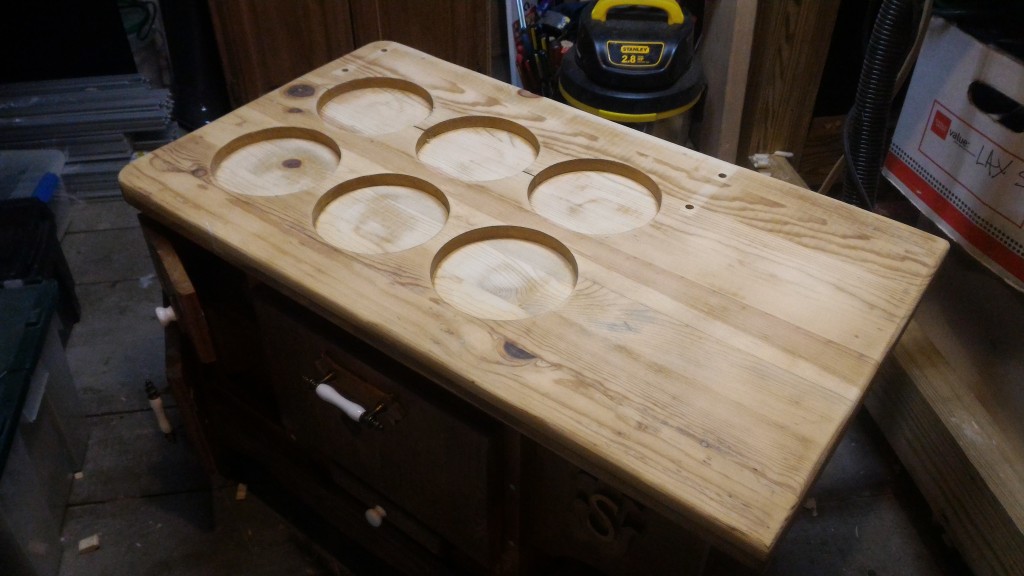
As I was sanding the front, I also decided to remove the ‘S’ from the front of the stove. Since this was glued on, I had to be careful.
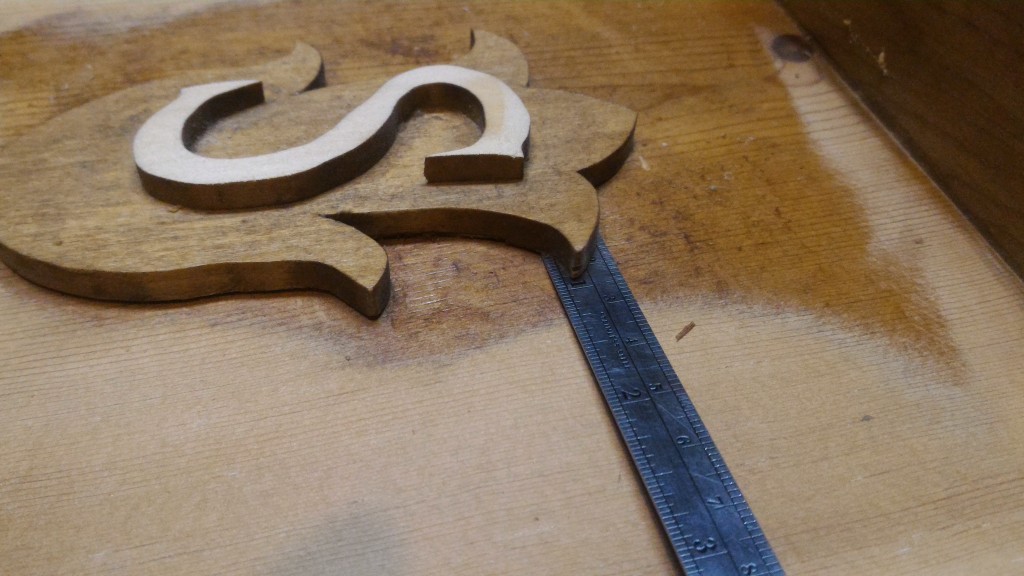
I sharpened a small metal ruler that I had and used my mallet to get it underneath the ‘S’ and its backing. Once it was sufficiently loosened from the stove, I used a chisel to pop it off the rest of the way. Frankly, I was surprised that the entire thing stayed in one piece.

I began the restoration effort by purchasing some abranet sanding mesh sheets after reading a recommendation on Christopher Schwarz’s blog.
Starting with 80 grit, I hooked my sander up to my shop vac for dust collection, applied the sacrificial velcro pad (so that the hooks on my sander are not worn down by the sandpaper), then installed the sanding disc and got to work.
I began with the top of the stove to see how well the sandpaper removed the finish and was pleasantly surprised by its effectiveness. The natural wood was beginning to show through even after just a light sanding. The time it took was really to make it as even as possible to help prevent blotchiness when I stain it with the new color.
I focused mostly on the large flat surfaces first, getting as much as possible with the random orbital sander to speed up my work and minimize dust.
There were some areas that the sander couldn’t fit into so I got to those areas with a sanding block fitted with 60 grit paper. This was reasonably effective but certainly was an arm workout.
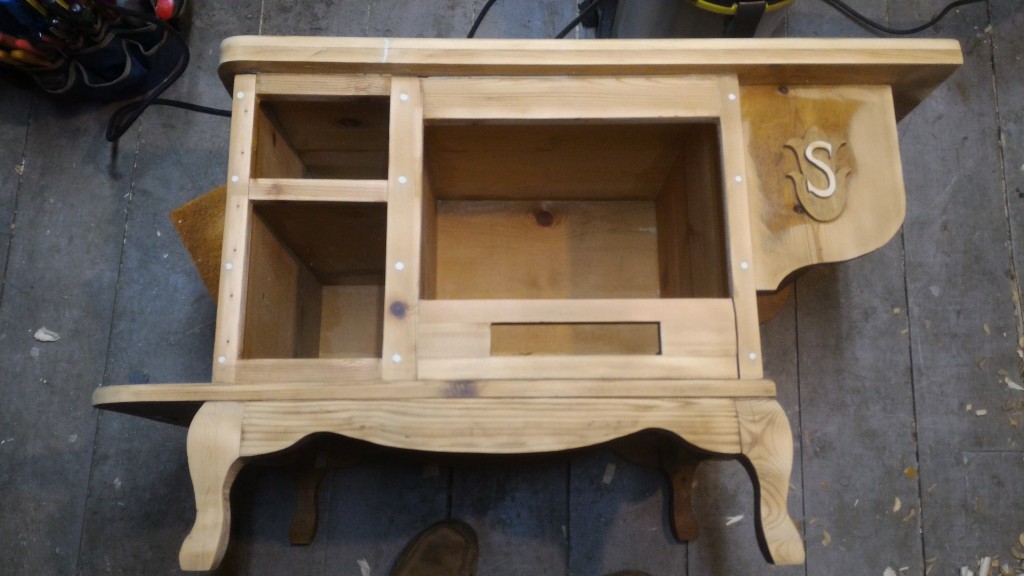
After sanding most of the outside of the stove, I flipped it over on my workbench to sand the bottom and for the first time, the large split along the bottom of the stove really struck me…how was I going to fix this?
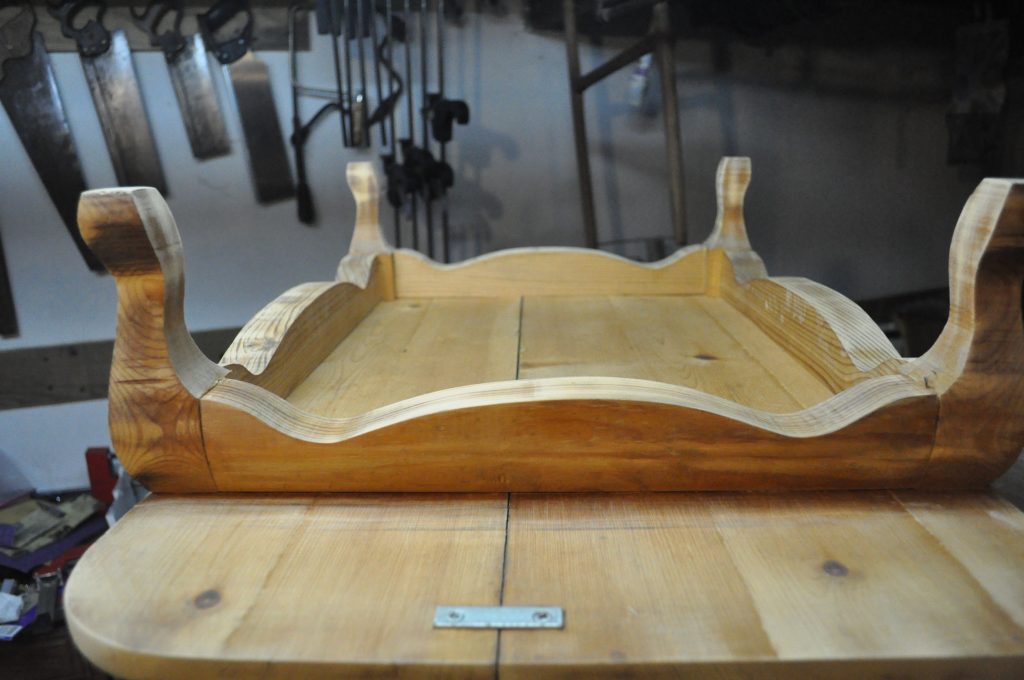
I could tell that the apron and legs were also coming apart at the joints.
After some inspection, it looked like there were a couple things at play here…
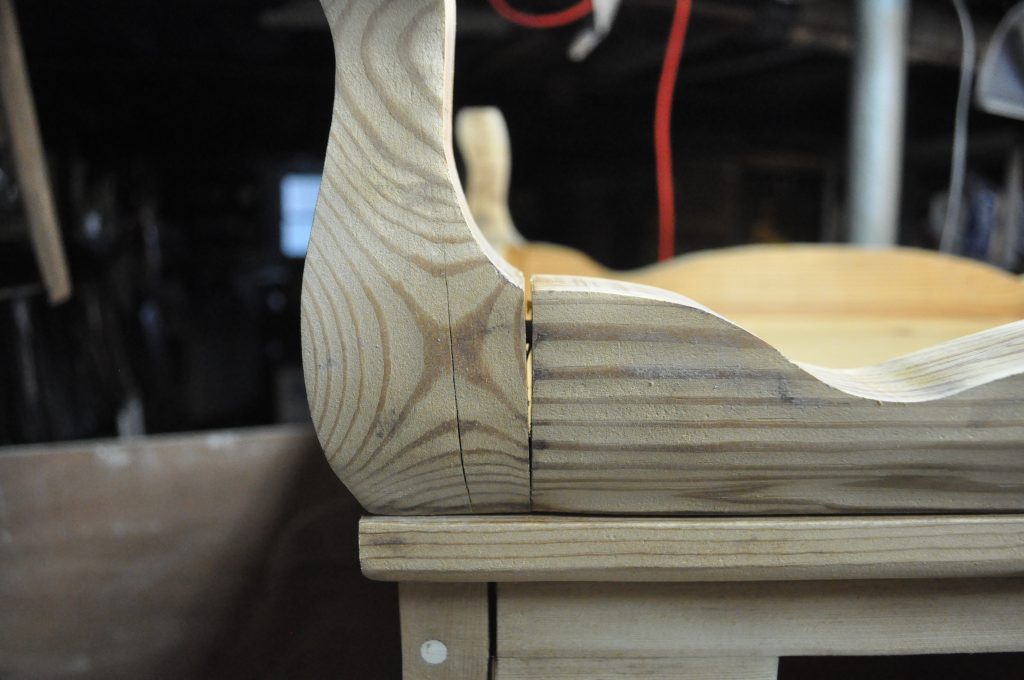
First, the legs and apron were attached to the bottom with screws into each leg from the topside of the bottom piece. At least with the front and back screws, this appeared to not allow the bottom piece to shrink as the seasons changed, since the apron pieces along the side held the legs a fixed distance apart.
Combine this with the shrinking wood running perpendicular to the apron piece, and you have two opposing forces. It was only a matter of time before the bottom split open.
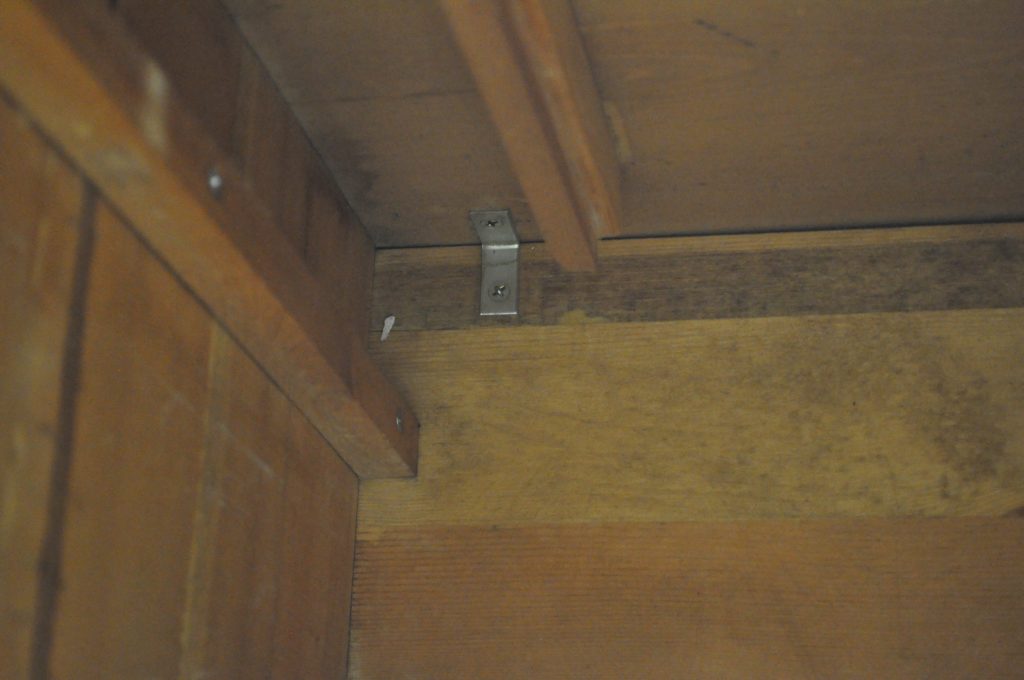
The second force that contributed to this was the frame of the stove. While an effort had been made to manage the wood’s movement, it was still insufficient to prevent splitting. The bottom was screwed to the frame with 4 right angle brackets, only at the front and back of the stove. The only problem was that these brackets did not have slotted screw holes to allow the wood to move. Again, this created two opposing forces and seemed to contribute to the splits along the bottom piece.
I knew that if I wanted this to stay in one piece in the future, I would need to correct the mounting methods from the apron to the bottom and the bottom to the frame.
I proceeded to take the bottom off of the frame by unscrewing the 4 brackets that held it in place, which the revealed the 4 screws attaching the bottom to each of the legs.
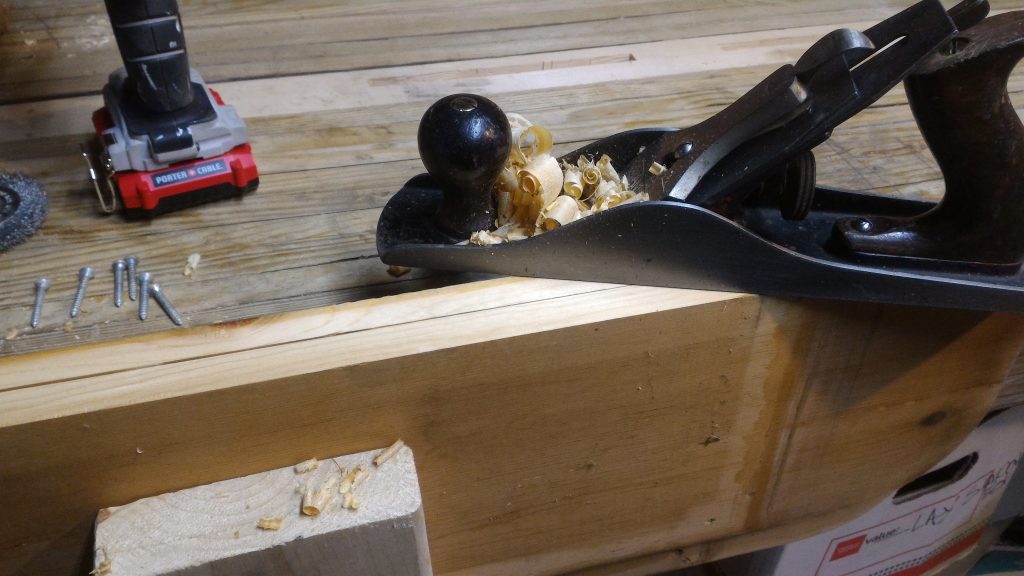
A bonus to this little tangent is that now I am able to properly joint and glue the split in the bottom instead of merely filling it with wood putty.
After removing the two drawer supports from the top of the bottom piece, I took the two separate bottom pieces and folding them like an upside down book, placed them in my vice so each side of the joint was facing up, allowing me to hand plane both sides at the same time.
This method of edge jointing does a couple things. First, it flattens, cleans, and smooths the edges at the same time, but second, and more importantly, it ensures that they have EXACTLY the same matching angle. Had I planed both pieces separately, I could have minor variations in my plane angle that would lead to the sides not lining up exactly square and poor joint quality.
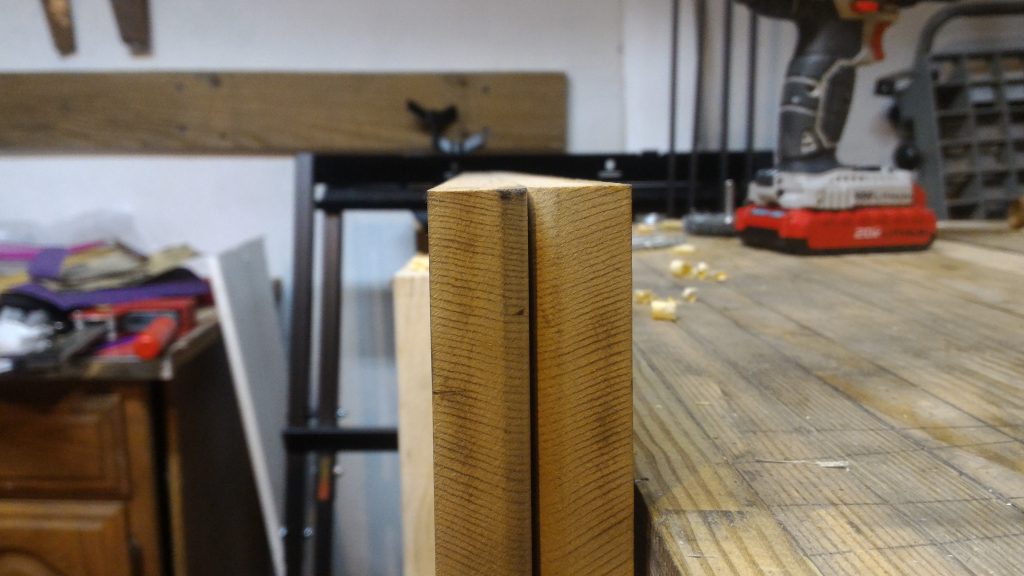
You can see in this photo, if you look closely, that I am in fact, not quite square, but because both sides of the joint are EQUALLY out of square, they will cancel out and I will end up with a nearly perfectly square joint in the end.
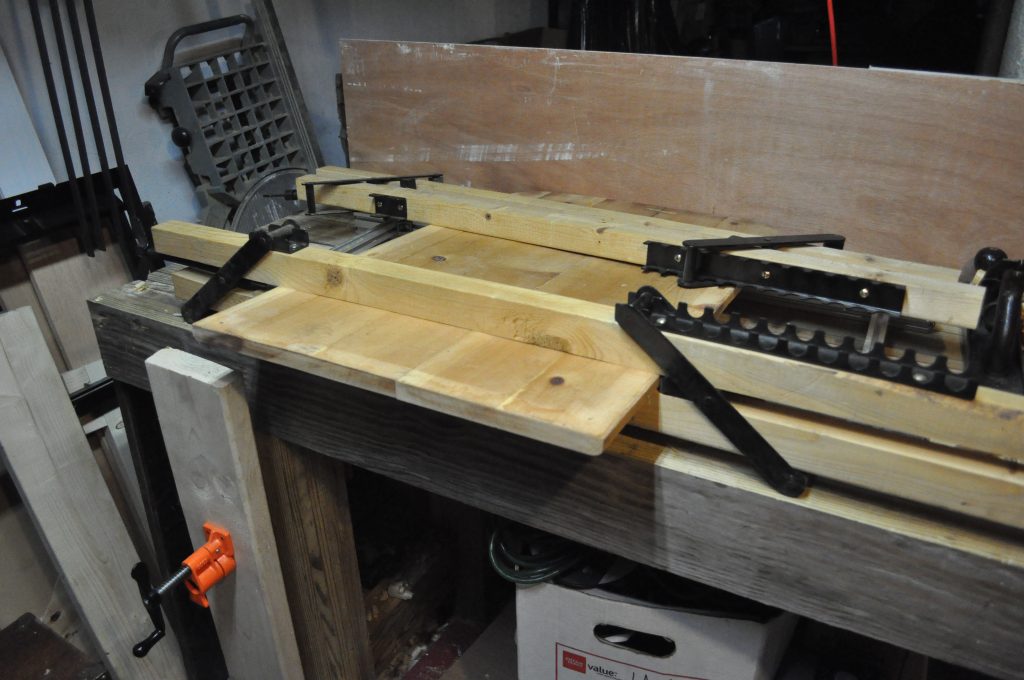
Glueing these two boards was also an opportunity to use some clamping cauls that I had found at an estate sale on Craigslist. These allow you to provide clamping force from the edges, to hold the pieces together for glueing, but their utility comes into play by holding the faces of the pieces flat and inline with each other, a necessity when glueing up edge joints, like for a table top.
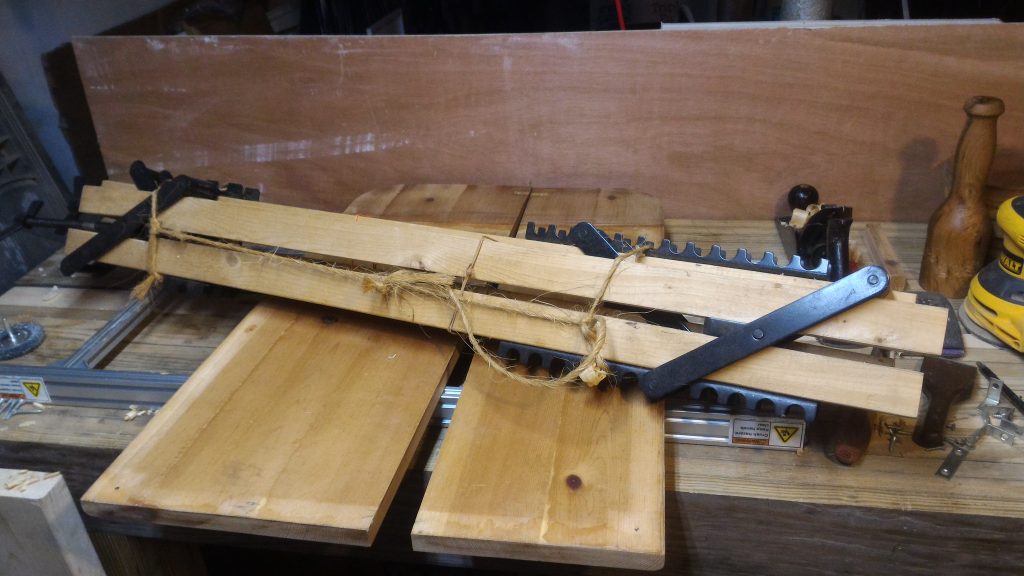
I had the bottom caul laid out, with my boards sitting on top of them, ready to be glued up. I applied a bead of glue down on edge, lay the board down and then slide in the top cauls. Setting the horizontal clamps was somewhat tedious and cumbersome, but I had done a dry run of this immediately prior and found that sliding the top cauls in from one end through the metal clamps made it much easier to maneuver the entire setup into place.
I also found that even though the two clamping cauls provided a good amount of force, I wanted to ensure that I had even pressure along the entire glue joint. I then used some of my long quick clamps to add a bit more clamping force along the entire edge of the joint. As I was tightening this all down, I kept checking how in line my two boards were by running my fingers along the joint on the top and bottom.
I have more detail to go into here with what I did next, but it’s getting late, and my post is getting a little long in the tooth (what the heck does that even mean??), so I’ll leave the remainder of this restoration project for a Part 2 post.
Talk to you again soon!
Looking good 🙂
Thanks Zech!
Looks great Brad, keep up the good work.
Thanks Doug! It’s surprising how challenging it is to find time though. I suppose that’s an excuse, but there always seem to be something else more important.